Setting Up AWS Cloud WAN with Cisco SD-WAN Cloud onRamp v20.15
This guide will walk you through the process of configuring AWS Cloud WAN integration with Cisco SD-WAN using the Cloud onRamp for Multicloud feature in vManage.
Prerequisites
Note: These are provided in dCloud, but will be needed if configuring in your own account
- Access to vManage interface
- C8Kv device list already uploaded to vManage
- AWS account with appropriate permissions
- Access and Secret keys for AWS account
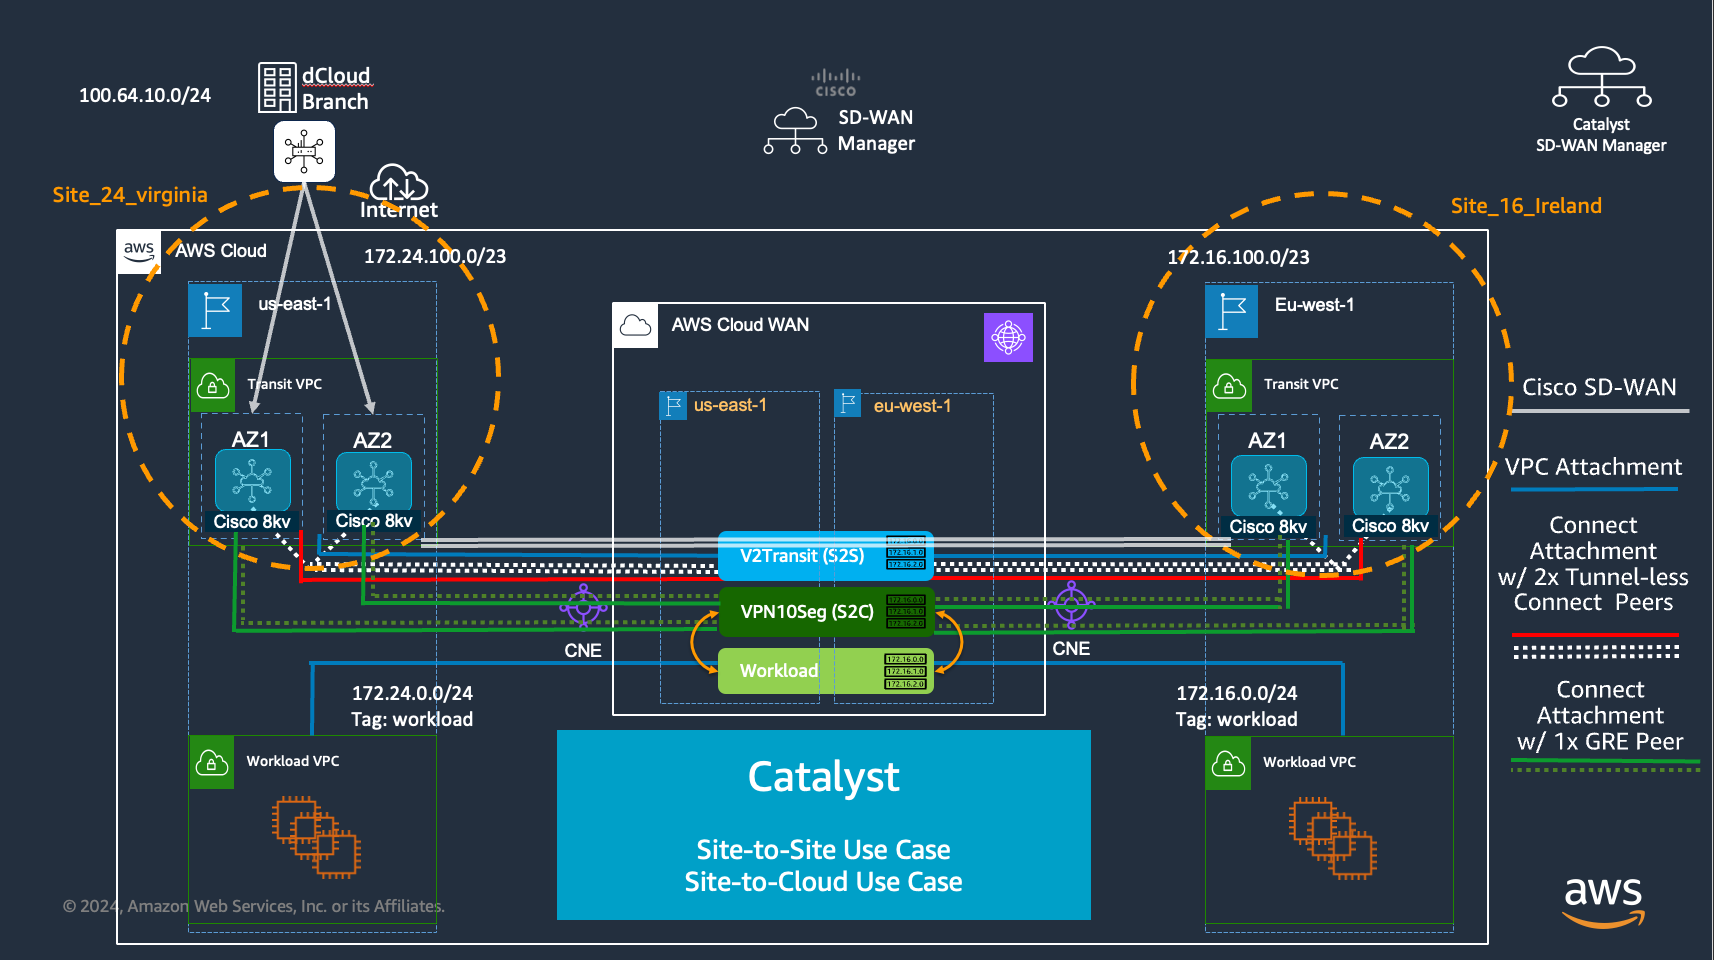
Lab Diagram
Lab Environment Setup
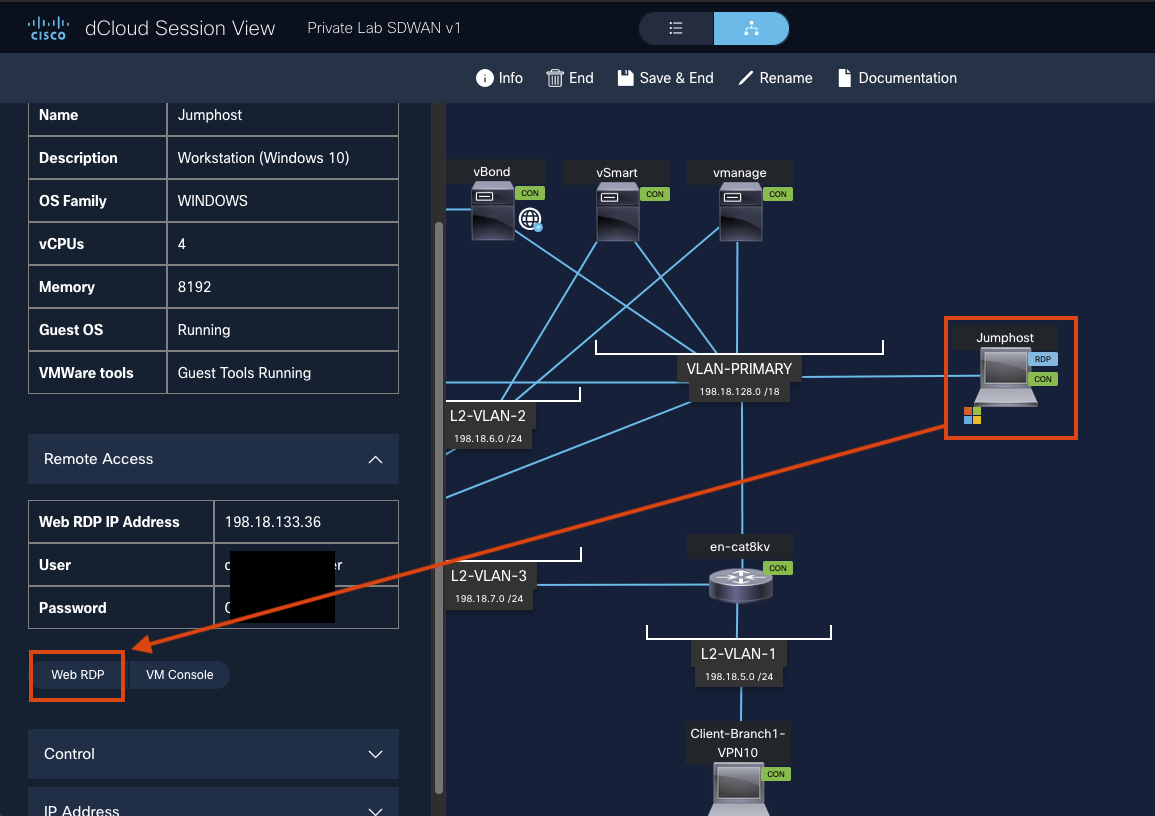
Step 1: Access the Lab Environment
- Navigate to your dCloud session and select Jumphost.
-
On the left panel, click Web RDP to launch the Windows instance in your browser.
-
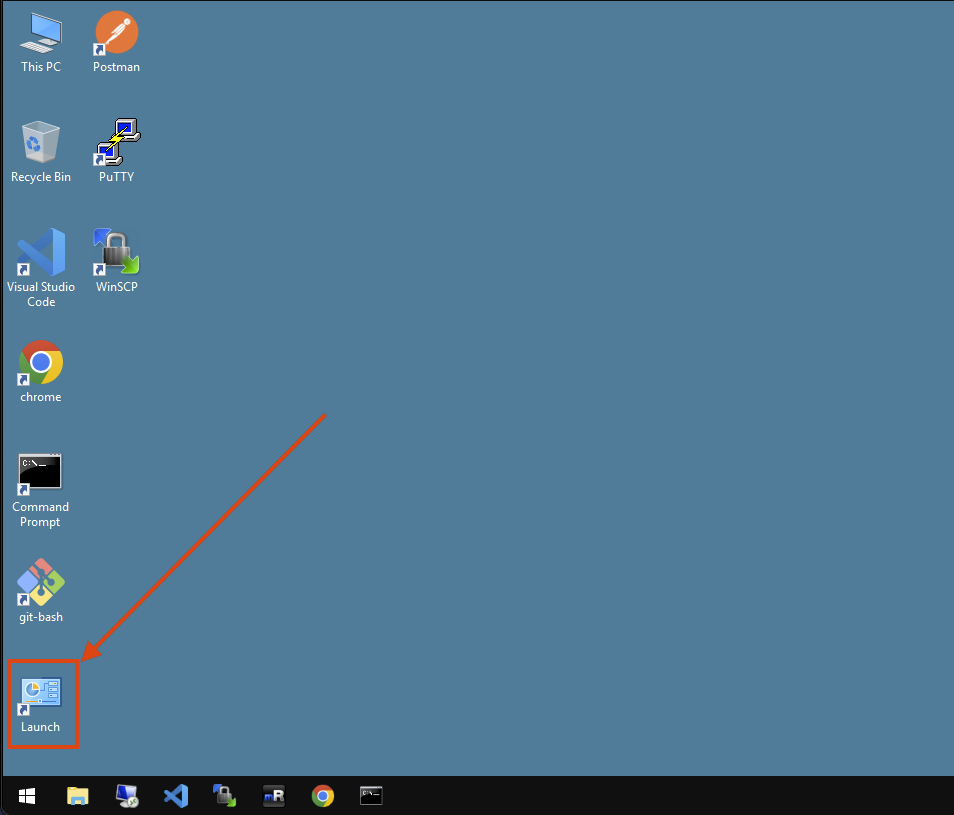
If the browser is not already open, click the browser launch icon to access the AWS portal.
-
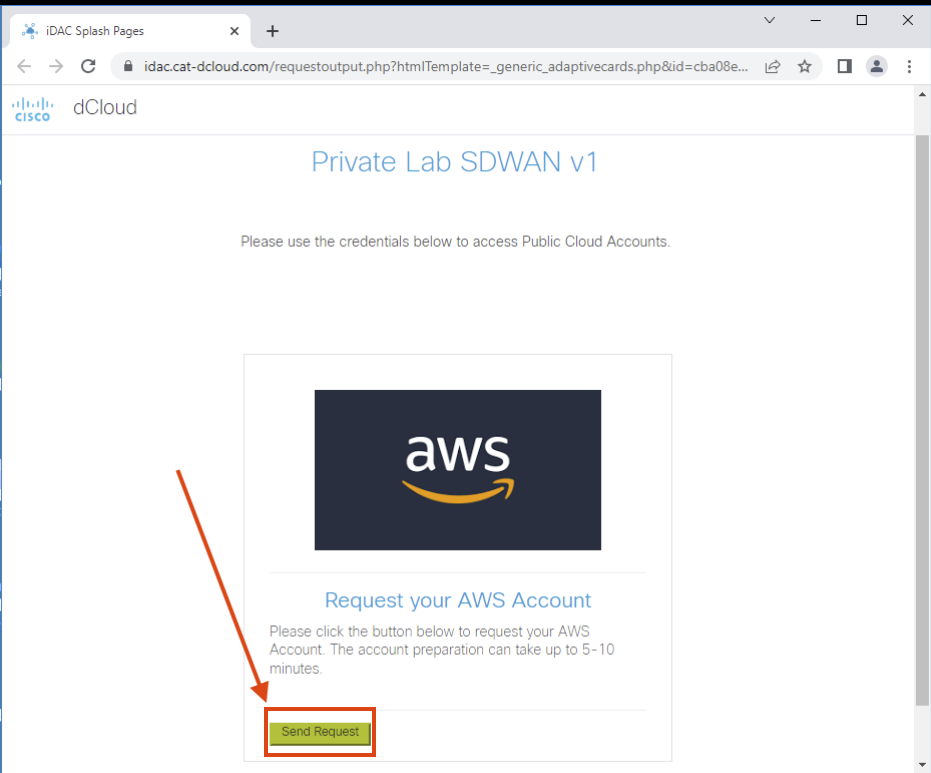
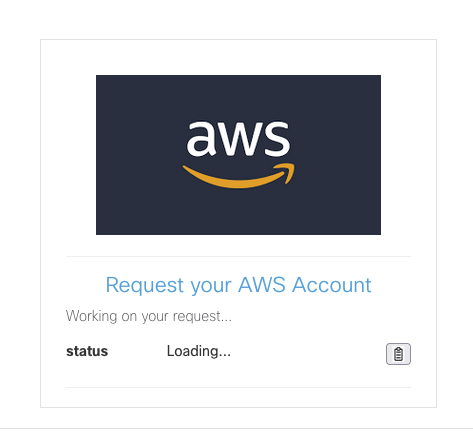
Click Send Request in the AWS account request box. The system will show a "Loading..." status while processing.
-
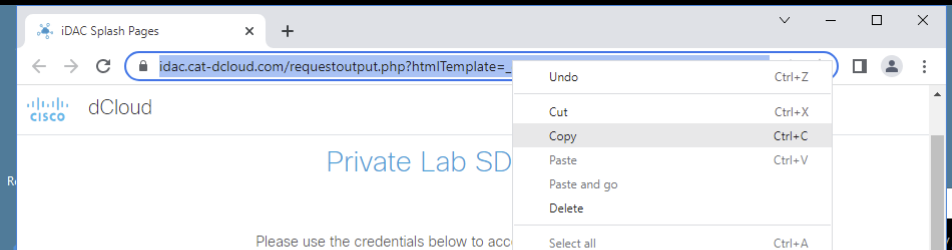
For optimal experience, access the AWS console through your local browser:
- Right-click the URL and select "Copy"
- Open your local browser (outside the RDP session) and paste the URL
- Wait approximately 5 minutes for account provisioning
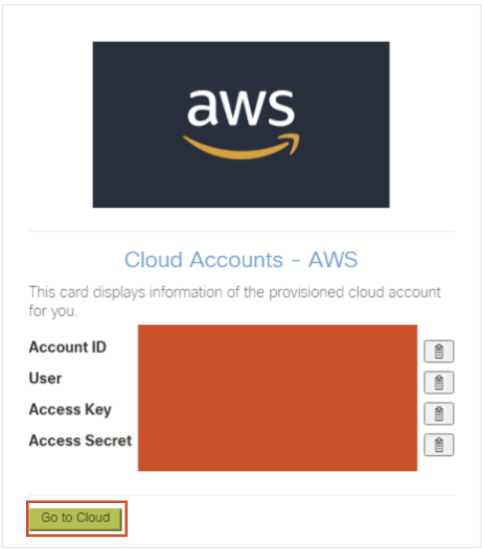
- Click Go to Cloud when the button becomes available
Note: Safely proceed to the next step while you wait for account provisioning
Step 2: Access vManage in Your Local Browser
-
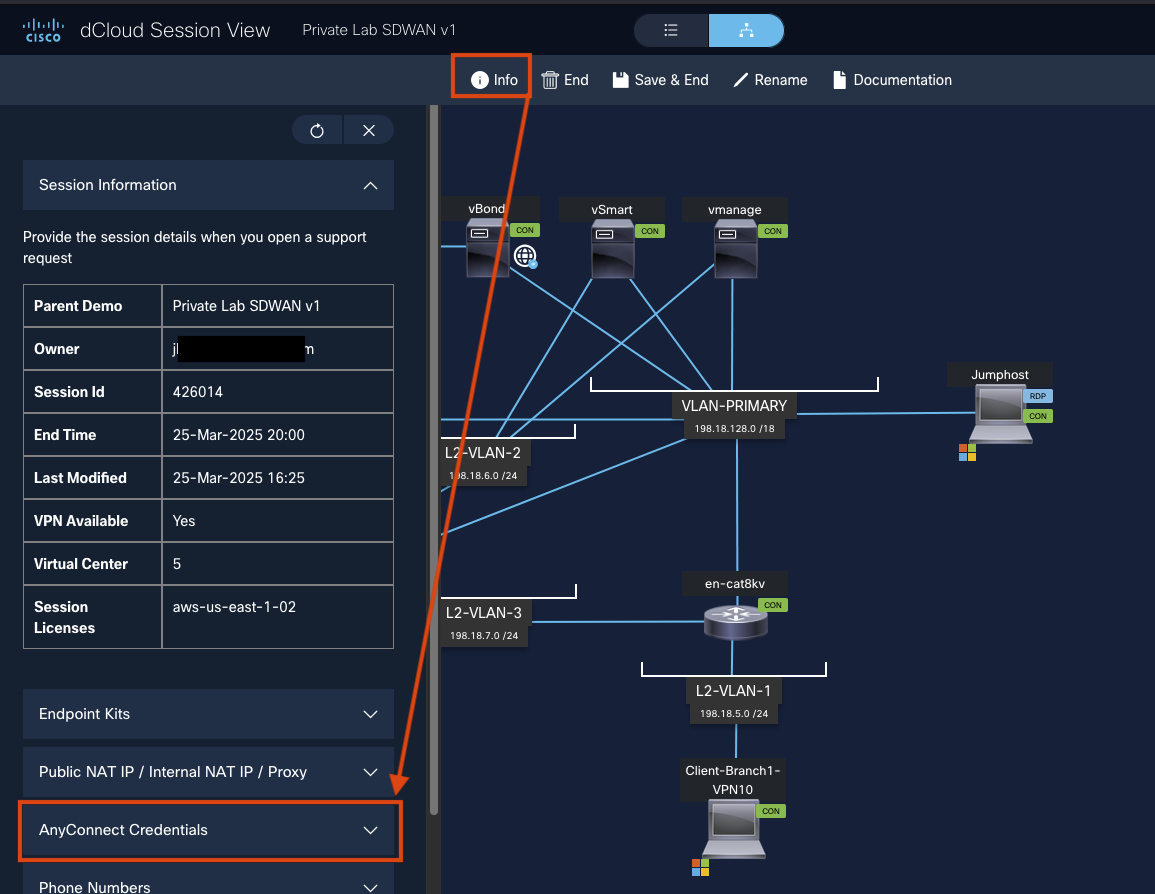
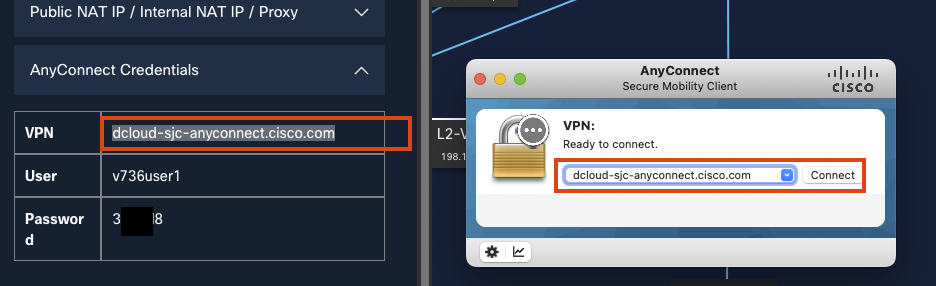
Return to your dCloud session in your local browser and click Info at the top, then select AnyConnect Credentials.
-
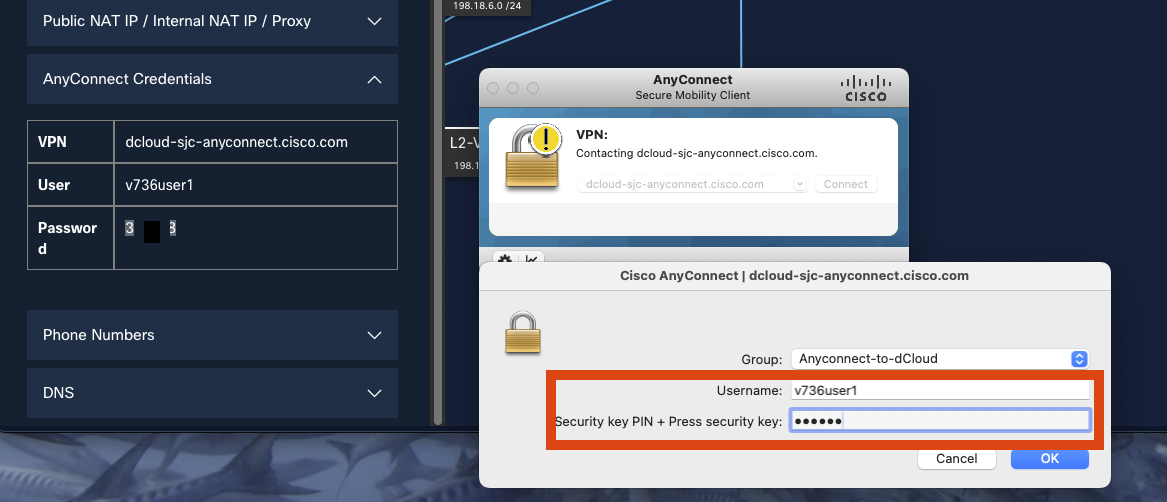
Open AnyConnect VPN client and enter the provided VPN domain.
-
Enter the DemoUsername and DemoPassword provided in the dCloud portal.
-
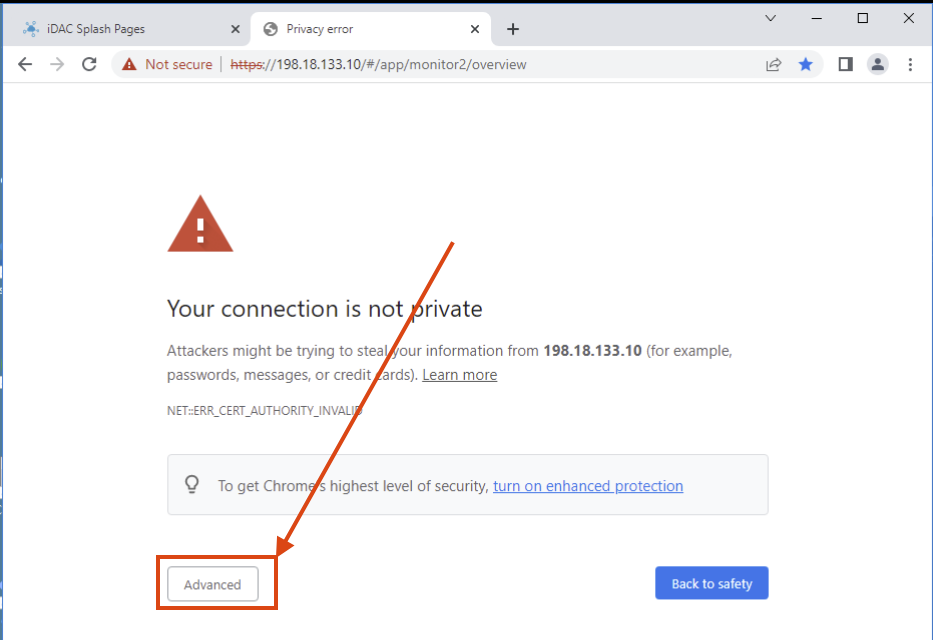
After connecting to the VPN, open a new browser tab and navigate to: 198.18.133.10
-
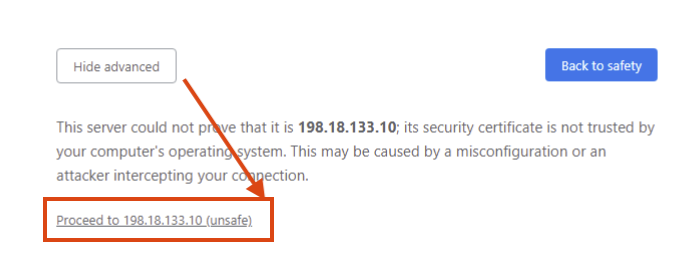
Click Advanced, then Proceed...(unsafe) to bypass the certificate warning.
-
Log in to the vManage environment using:
- DemoUsername: admin
-
DemoPassword: C1sco12345
 You now have access to both an AWS account and the vManage environment needed to complete this lab.
Catalyst Manager Configuration Steps
Step 1: Create Site Hierarchy
First, you need to organize your site hierarchies. We will just create a single site for this lab which will represent a hub location of 1 or more C8000vs in an AWS Transit VPC.
-
Log in to the vManage console
-
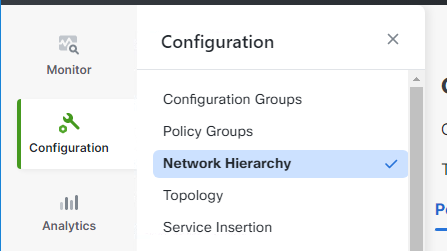
Navigate to Configuration > Network Hierarchy
-
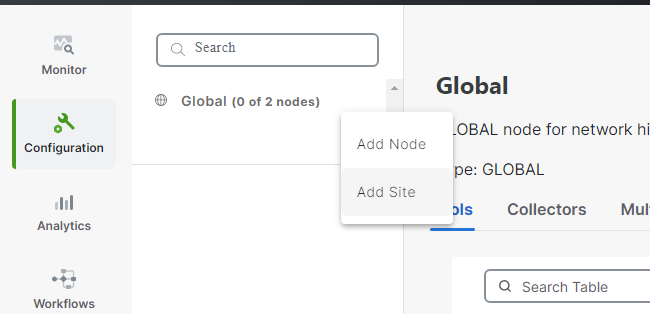
Click on the ... besides Global Nodes and add site
-
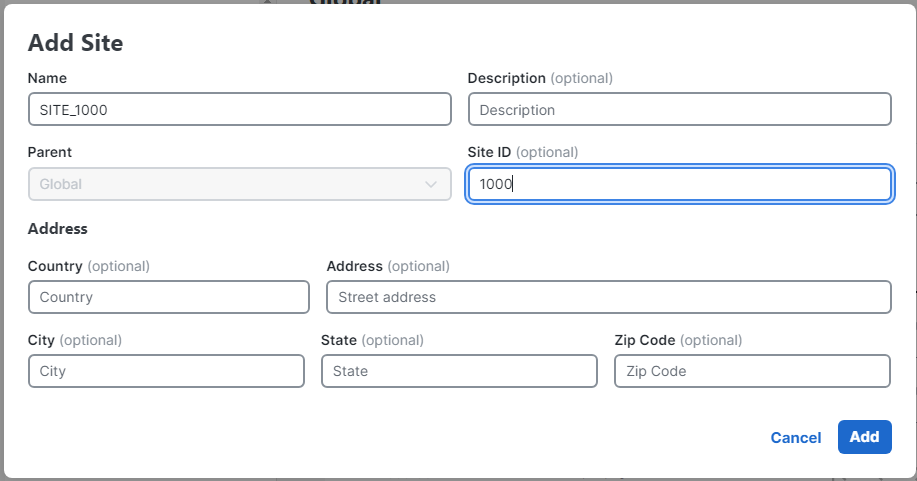
Create 2 sites with the following details:
Site_24_Virginiawith ID of24Site_16_Irelandwith ID of16
Step 2: Configure Cloud OnRamp for Multicloud
-
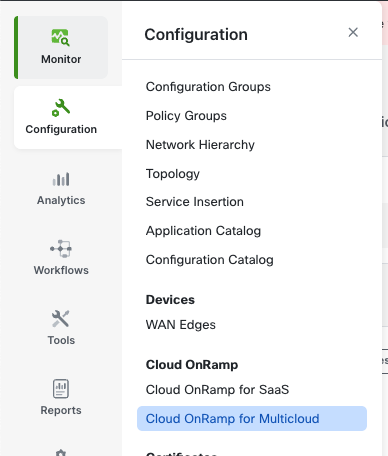
From the Cisco SD-WAN Manager menu, navigate to Configuration > Cloud OnRamp for Multicloud
-
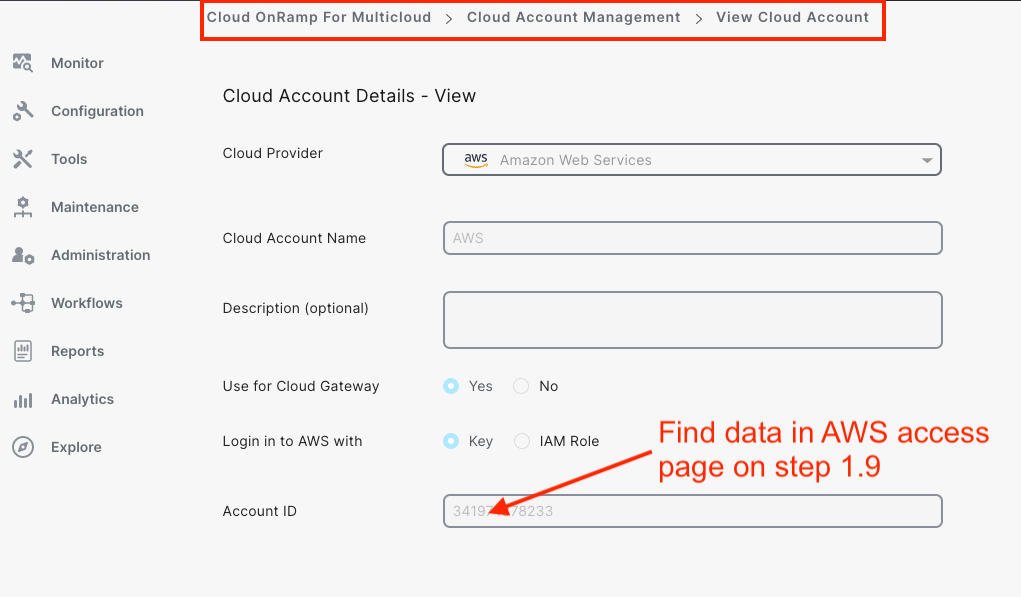
Connect your AWS account by providing AWS Access and Secret keys
-
Under Cloud Global Settings, click Add

-
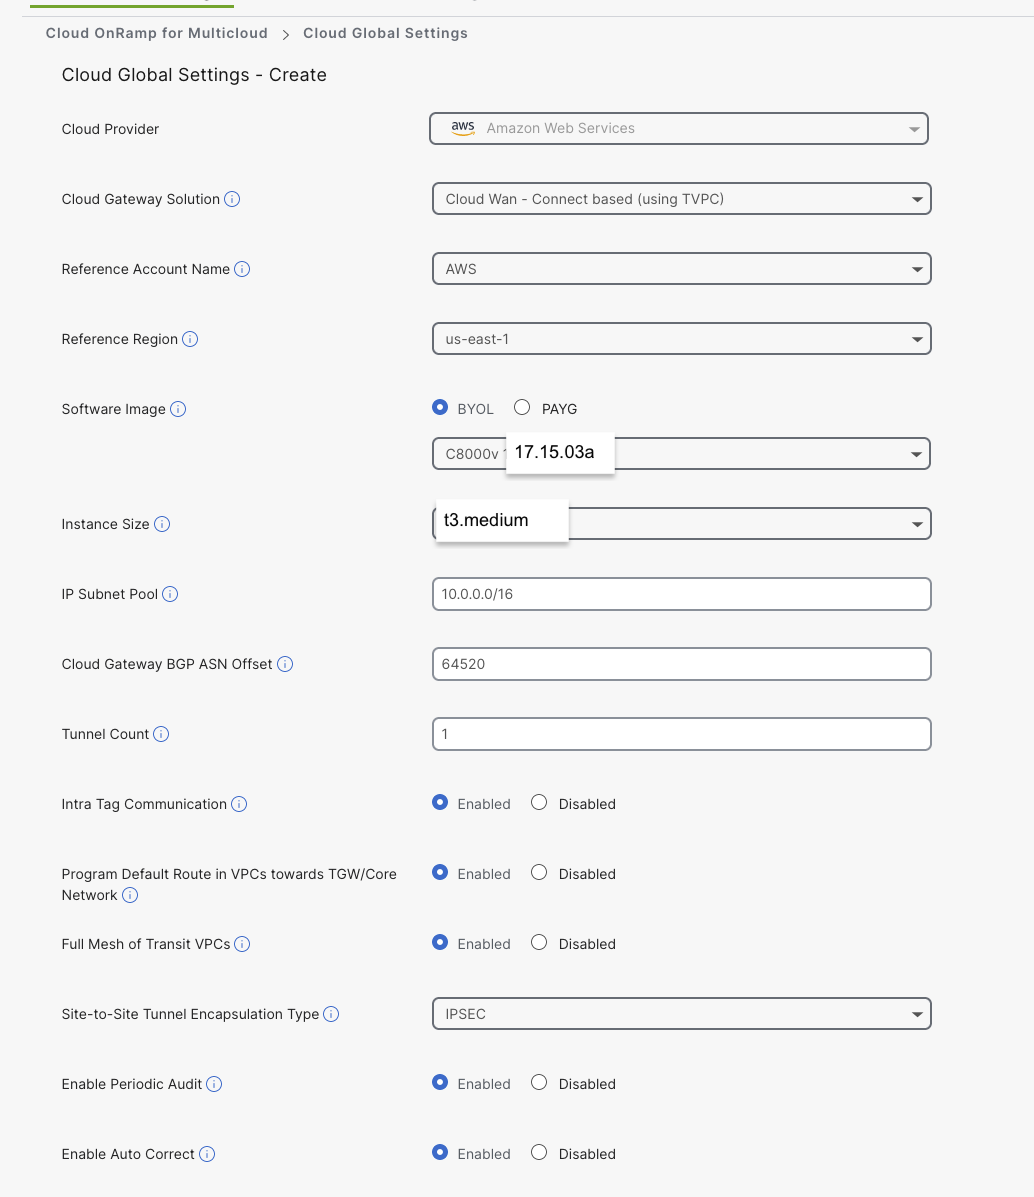
Complete the Cloud Gateway Global Settings
Note: For the IP subnet pool, you can use the smart default suggested or leave it blank and configure during the gateway creation process.
Important
17.15.03a must be used as it is a whitelisted/approved AMI inside this dCloud AWS IAM environment
Step 3: Create Cloud Gateway
-
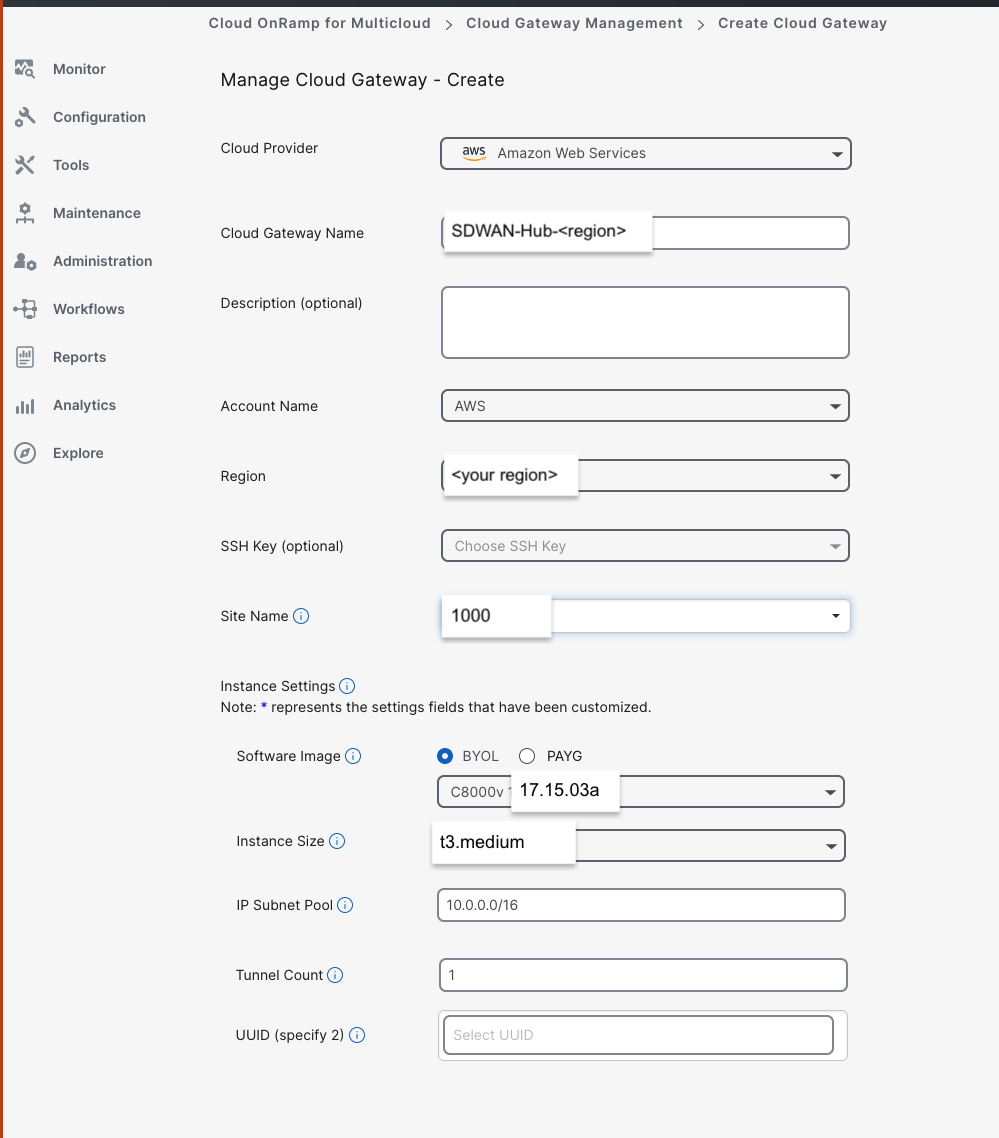
On the Cloud OnRamp dashboard, click Create Cloud Gateway
-
Fill in the required details:
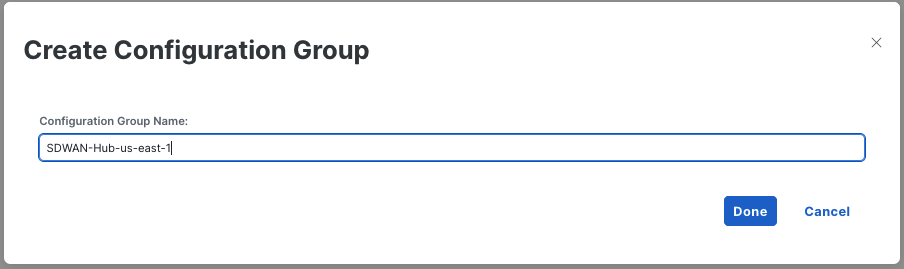
Important
Be sure to click Create Config Group
- Give the Cloud Gateway a name, e.g., SDWAN-Hub-us-east-1
- Use software version 17.15.03a
- Set the IP subnet pool CIDR for your Transit VPC
- Virginia: us-east-1:
172.24.100.0/23 - Ireland: eu-west-1:
172.16.100.0/23
- Virginia: us-east-1:
- Set Tunnel count (typically 1 for 8kv to AWS connections)
- No SSH key is required
- UUIDs will be added automatically when the site is selected
Important
17.15.03a must be used as it is a whitelisted/approved AMI inside this dCloud AWS IAM environment
- Create New Config Group:
SDWAN-Hub-us-east-1
- Chassis should be auto populated with 2 available C8Kvs
- Click Create
-
Fill in both Chassis Configurations
- System IPs:
172.24.100.1and172.24.100.2 - Host Names:
router1-Virginiaandrouter2-Virginia - Color:
default - User / Pass:
adminandC1sco12345for both
- System IPs:
-
Procees to next step of creating workload VPC and Instance while COR configures Cloud WAN
- This process takes approximately 30 minutes as it configures all required components in AWS using SDK calls
Configure Site-to-Cloud Connectivity
Step 1: Create workload VPC in AWS
-
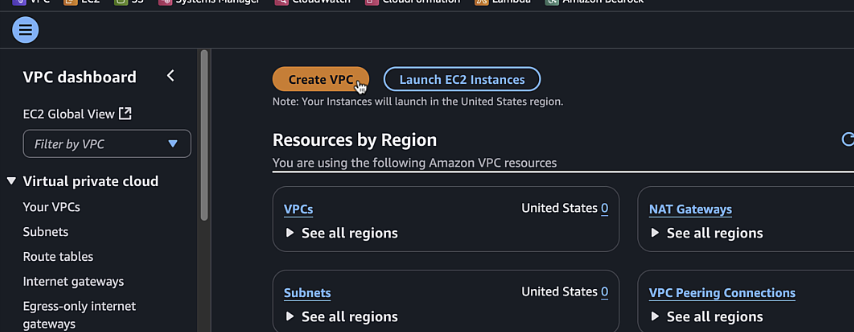
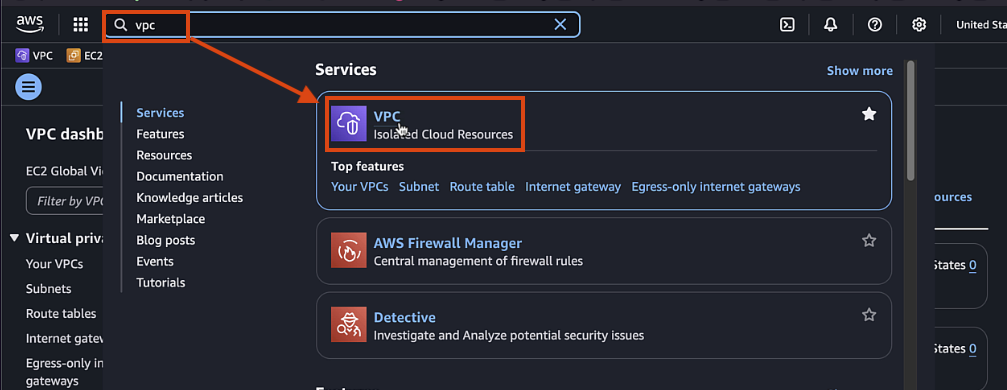
Log in to the AWS console and navigate to the VPC dashboard

-
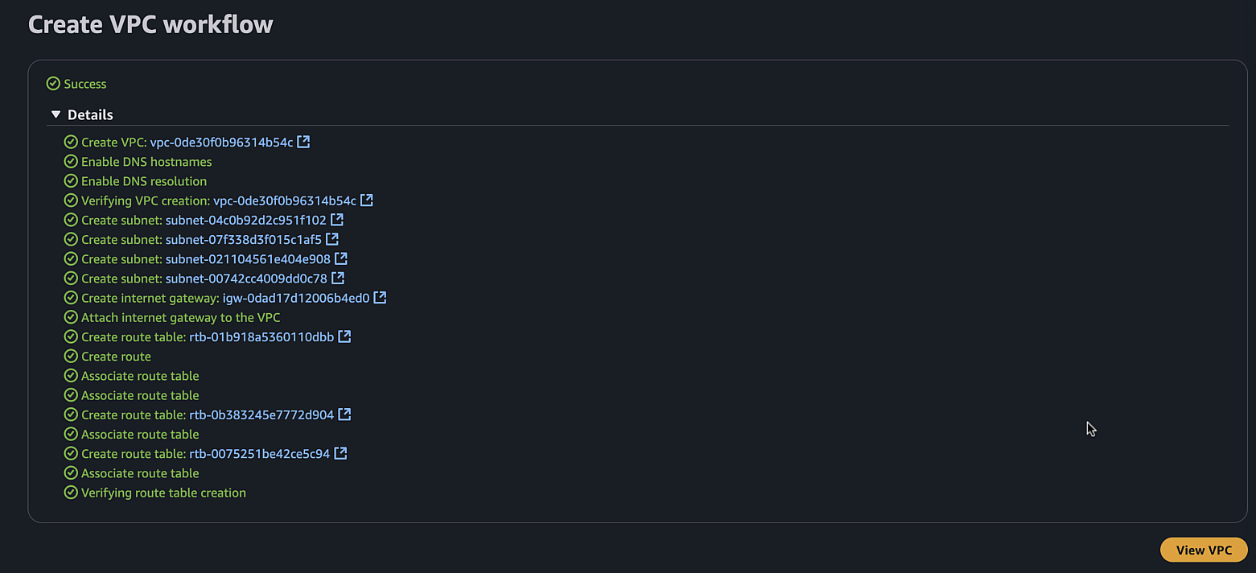
Click "Create VPC" and select "VPC and more"
Important
Make sure you change the region in upper right before creating the workload VPC. dCloud defaults to Ireland
-
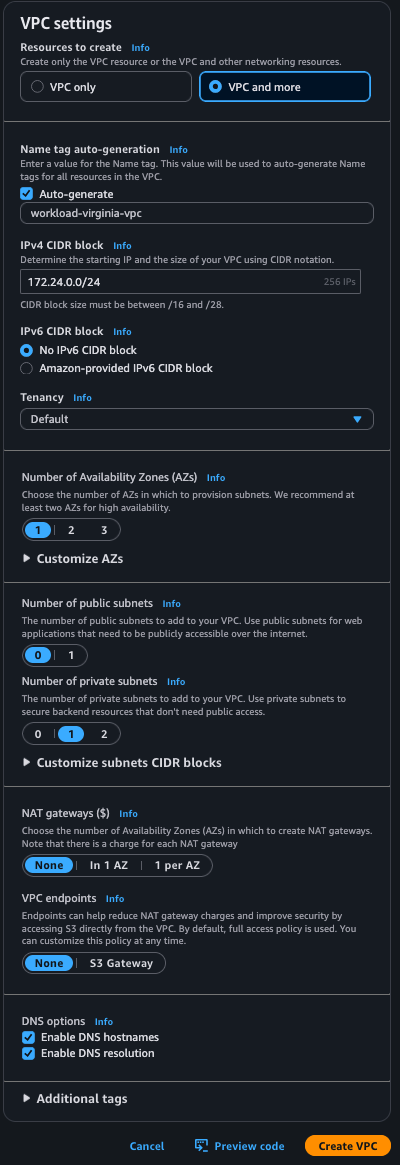
Configure the following settings:
- Name tag:
workload-for-sdwan-VPC - IPv4 CIDR block:
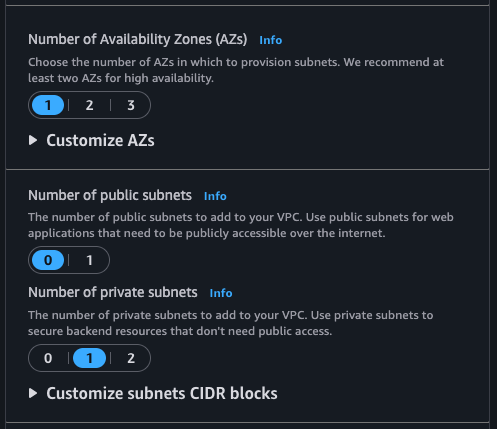
172.24.0.0/24 - Number of Availability Zones:
1 - Number of public subnets:
0 - Number of private subnets:
1 - NAT gateways:
None - VPC endpoints:
None

- Name tag:
-
Click "Create VPC"
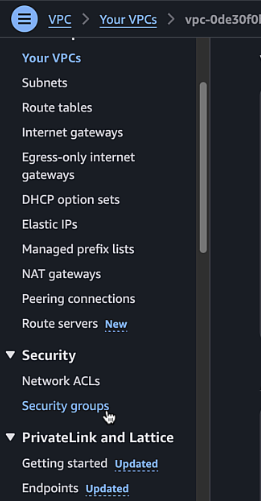
-
In the VPC dashboard, navigate to "Security Groups"
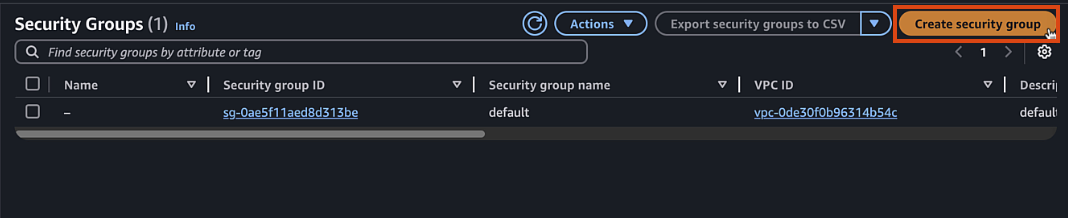
-
Create a workload security group:
- Name:
workload-sdwan-SG - Description:
workload-sdwan-SG - VPC: Select the VPC you created
- Add inbound rules for ICMP for
172.16.0.0/12and100.64.10.0/24
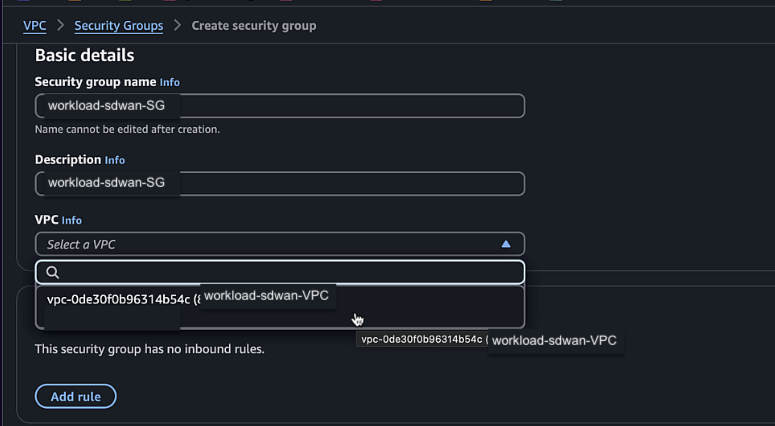
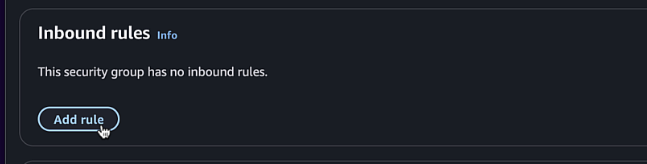
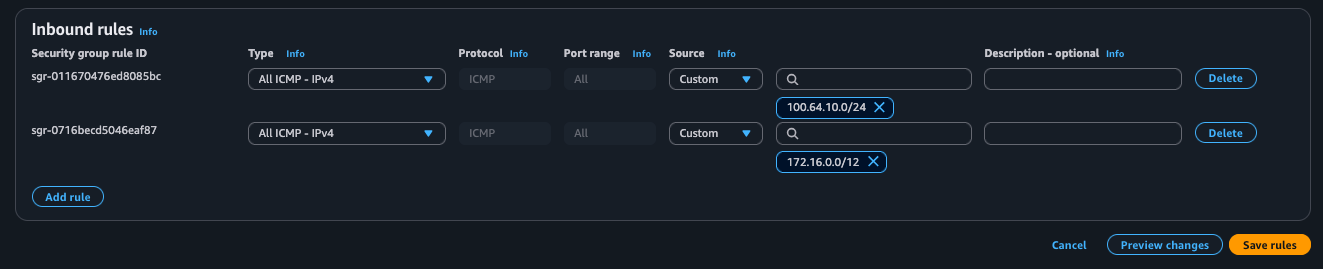
- Name:
-
Launch EC2 workload instance in workload VPC using AWS CLI
Important
You need to use AWS CLI for these next steps. To install, follow the directions here AWS CLI Install Instructions
- Open up your local computers terminal application and a note taking app
- This process will create an EC2 instance in your workload VPC with the necessary user data that provides a username and password so that we can login without creating a keypair
-
Search for the below AMI in the region you are currently using
- dCloud white lists AMIs and all others will be blocked
Region Amazon Linux AMI us-east-1 ami-08a6efd148b1f7504us-west-1 ami-032db79bb5052ca0feu-west-1 ami-0253a7ea84bc17a73ap-southeast-1 ami-015927f8ee1bc0293ap-east-1 ami-033e2043070352bd5us-west-2 ami-054b7fc3c333ac6d2 -
Copy the below OSX shell commands if on MAC (or Powershell if Windows) into a note taking app to update with the values from your own lab
# OSX and Linux instructions # Find these details in the Lab Env Setup Section export AWS_ACCESS_KEY_ID="AKI__REPLACE__JAY" export AWS_SECRET_ACCESS_KEY="ptUF09Dzb02Ch__REPLACE__jGlMf1P/fB" # Run this to create a a new file called user-data.sh cat > user-data.sh << 'EOF' #!/bin/bash # Lab Script that sets password for ec2-user echo "ec2-user:C1sco12345" | chpasswd sed -i 's/PasswordAuthentication no/PasswordAuthentication yes/g' /etc/ssh/sshd_config # Enables password auth systemctl restart sshd # Restarts SSH to apply changes EOF # Find these details from your Workload VPC, be sure to use the whitelisted AMI for your region aws ec2 run-instances \ --image-id ami-025__REPLACE__a73 \ --instance-type t3.micro \ --security-group-ids sg-07__REPLACE__6a \ --subnet-id subnet-064a__REPLACE__24 \ --user-data file://user-data.sh \ --region us-east-1 \ --tag-specifications '[{"ResourceType":"instance","Tags":[{"Key":"Name","Value":"WorkloadInstance"}]}]' -
Run Above if OSX or below if Windows. Do not run both
# Power Shell Instructions # Find these details in the Lab Env Setup Section $env:AWS_ACCESS_KEY_ID="AKI__REPLACE__JAY" $env:AWS_SECRET_ACCESS_KEY="ptUF09Dzb02Ch__REPLACE__jGlMf1P/fB" # Run this to create a a new file called user-data.sh @' #!/bin/bash # Lab Script that sets password for ec2-user echo "ec2-user:C1sco12345" | chpasswd sed -i 's/PasswordAuthentication no/PasswordAuthentication yes/g' /etc/ssh/sshd_config # Enables password auth systemctl restart sshd # Restarts SSH to apply changes '@ | Out-File -FilePath "user-data.sh" -Encoding UTF8 # Create tag-specs.json @' [ { "ResourceType": "instance", "Tags": [ { "Key": "Name", "Value": "WorkloadInstance" } ] } ] '@ | Out-File -FilePath "tag-specs.json" -Encoding UTF8 aws ec2 run-instances ` --image-id ami-025__REPLACE__a73 ` --instance-type t3.micro ` --security-group-ids sg-07__REPLACE__6a ` --subnet-id subnet-064a__REPLACE__24 ` --user-data file://user-data.sh ` --region us-east-1 ` --tag-specifications file://tag-specs.json -
After replacing the values, paste the commands in your terminal window, upon success, you will see the reutrn json values of the EC2 instance
- Open up your local computers terminal application and a note taking app
-
Verify that you can log into instance using Instance Connect
-
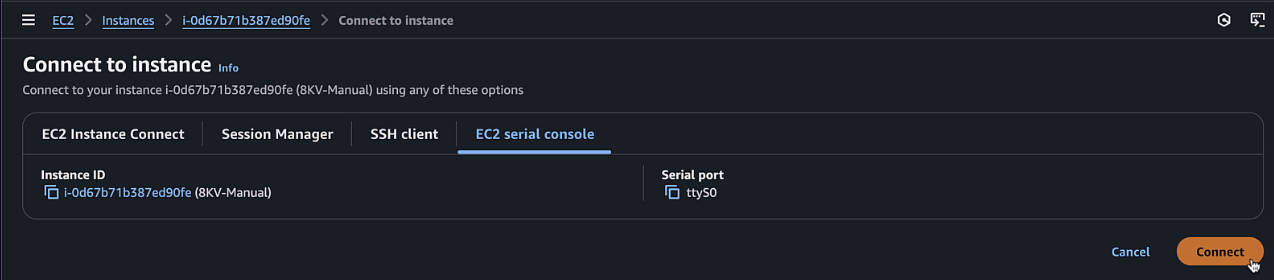
Once the instance is running, select it and click "Connect"

-
Choose "EC2 Serial Console" and click "Connect"

-
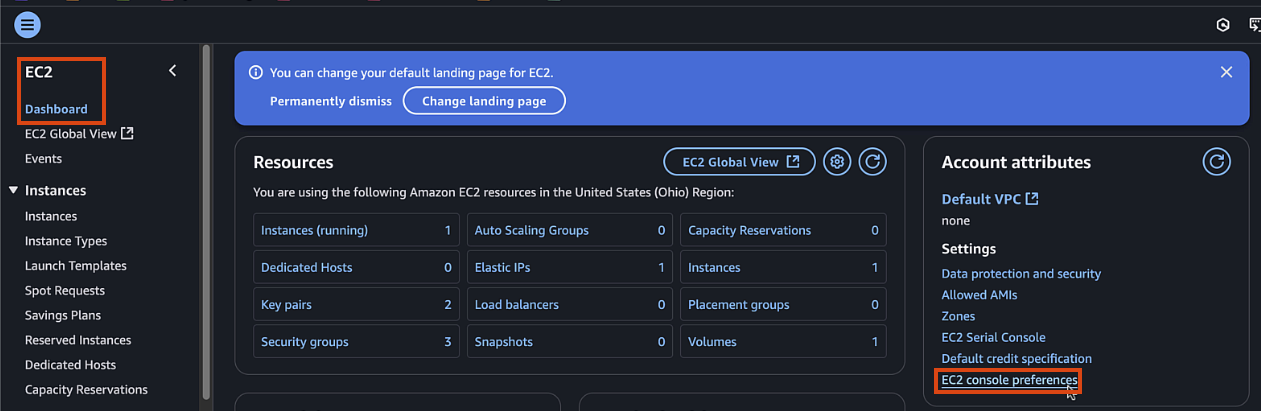
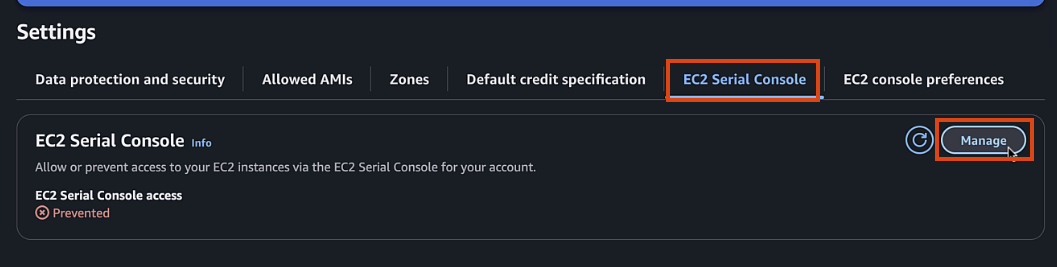
If EC2 serial is not accessible, you can enable it in your account by:
- Clicking Manage Access (or in EC2 page go to Account attributes > EC2 console preferences)
- EC2 Serial Console > Manage
- Allow > Update

-
Click Connect and access the new Instance
 * User:
 ec2-user* Pass:C1sco12345
-
Step 2: Configure COR Connectivity
Important
Make sure that COR has completed the CGW bringup process from previous step
-
In Catalyst Manager > Cloud OnRamp > Discover > 'Host Private Networks' , add tag of workload to newly created VPC
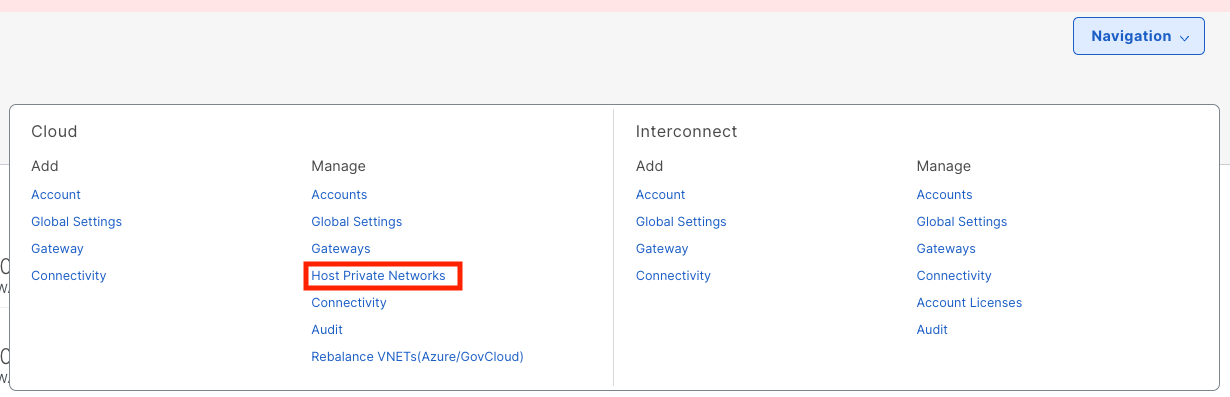
- Select Cloud Provier > AWS
- Add New Tag > workload , select the correct region, and select your workload VPC

- Once created, sort by tags, and verify your VPC has the workload tag applied
-
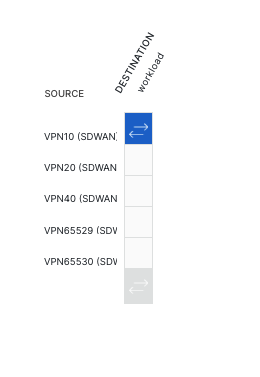
In Catalyst Manager > Cloud OnRamp > Intent Management > 'Cloud Connectivity' > Edit , connect VPN 10 with the Workload VPC
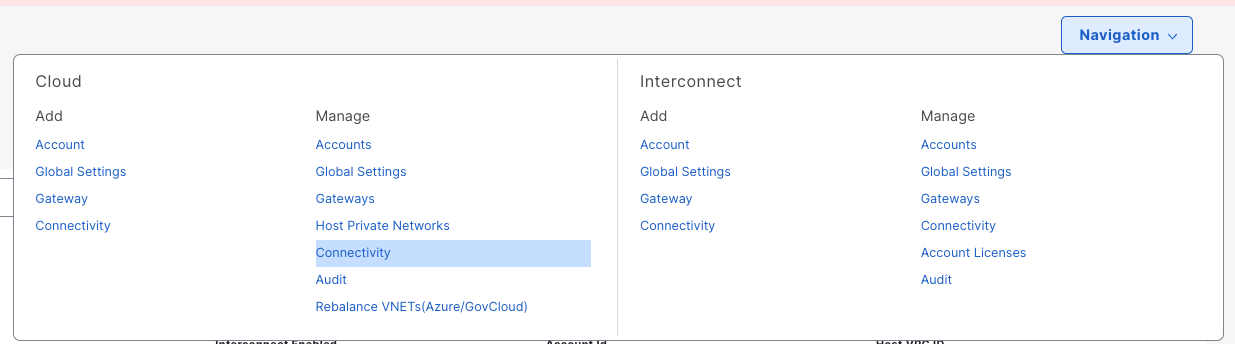
- Cloud Provider > AWS
- Click Edit
- Click VPN10 x workload matrix so that it lights green
- Click Save at bottom of page
-
Wait for COR to finish creating the connectivity in Cloud WAN
- To view progress, navigate to AWS Cloud WAN Console
- Click the Global Network that COR has created
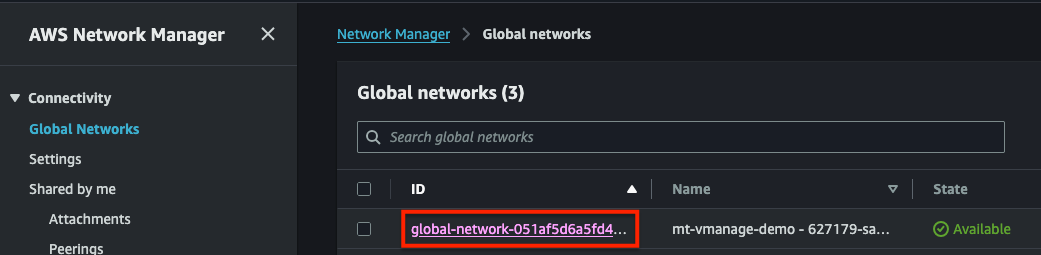
- Navigate to Attachments
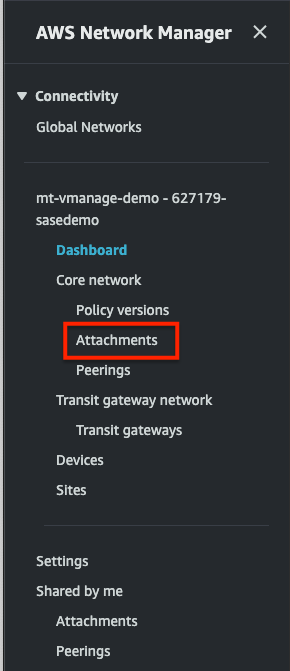
-
Verify that you have 5 Attachments
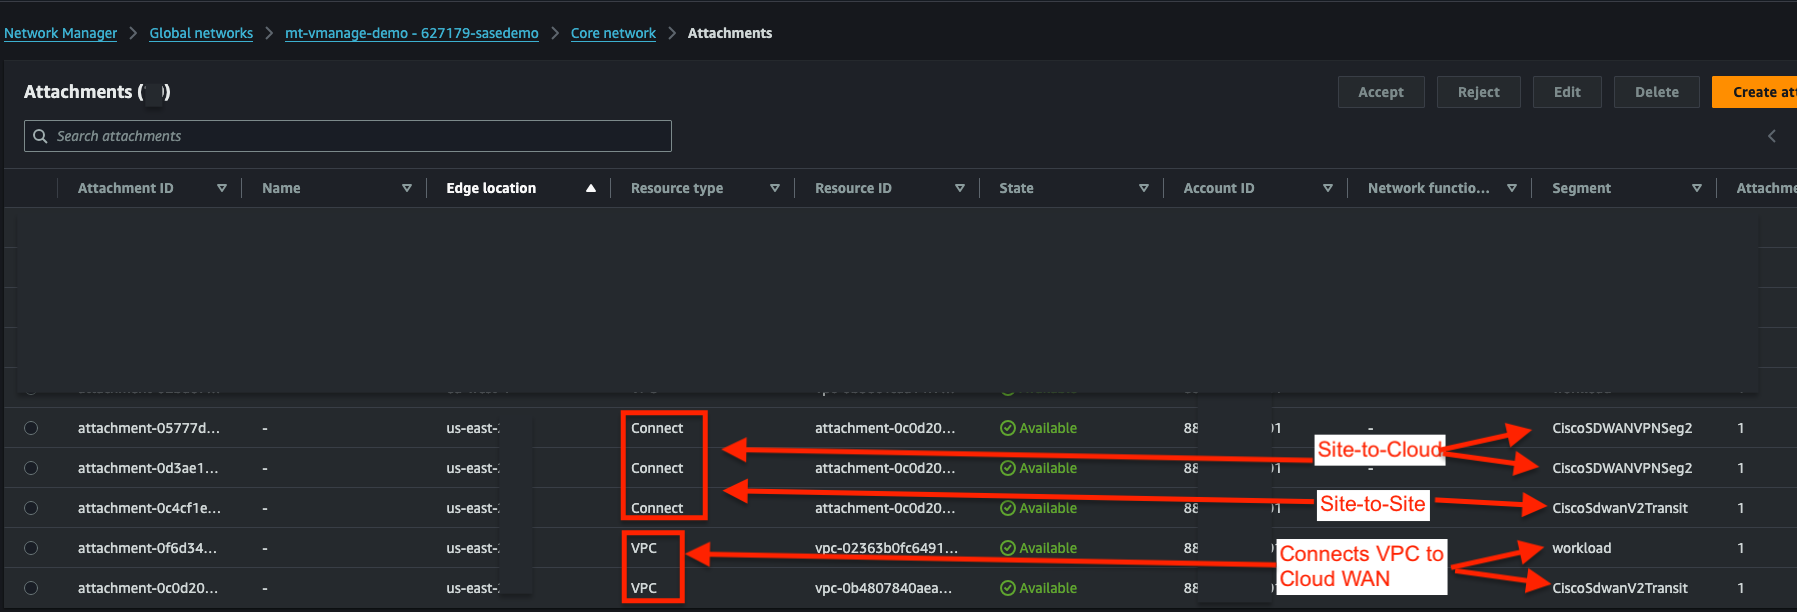
- 2x VPC attachments for your CGW VPC and your workload VPC
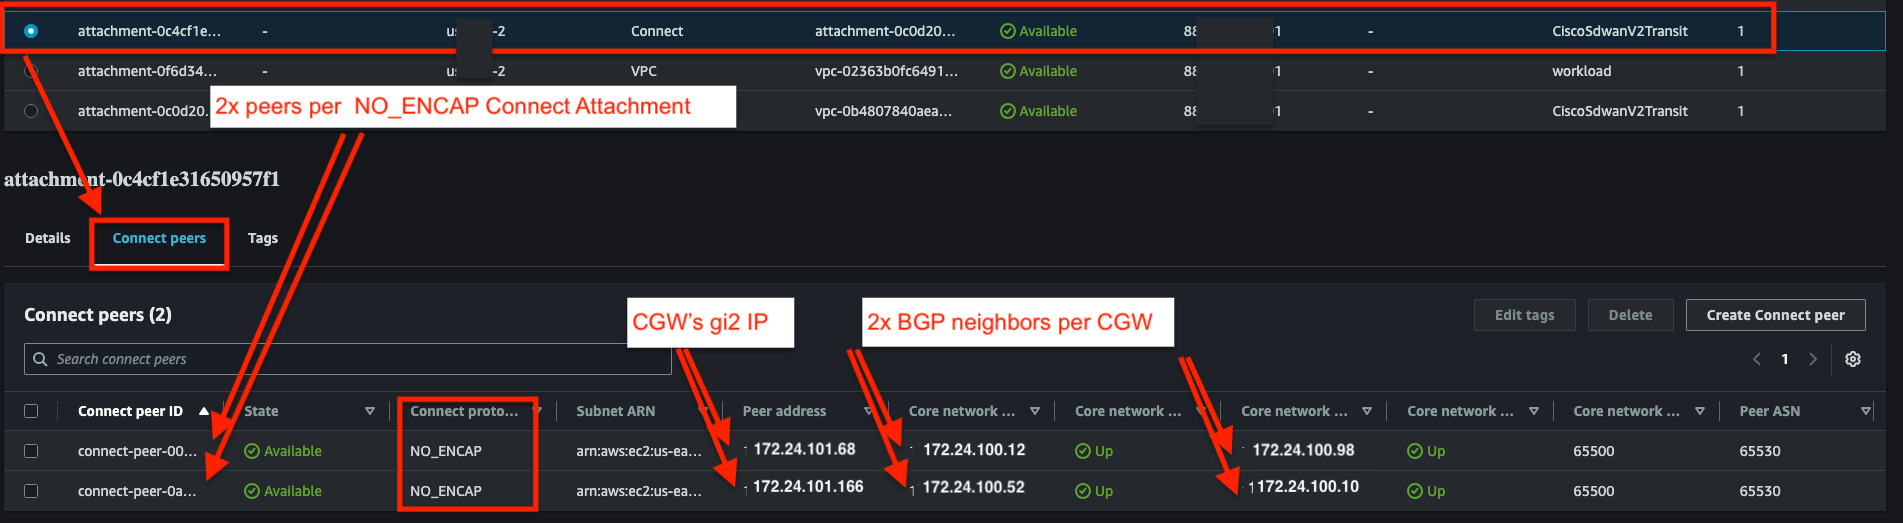
- 1x V2Transit Connect Attachment for your Site to Site (NO_ENCAP) connectivity
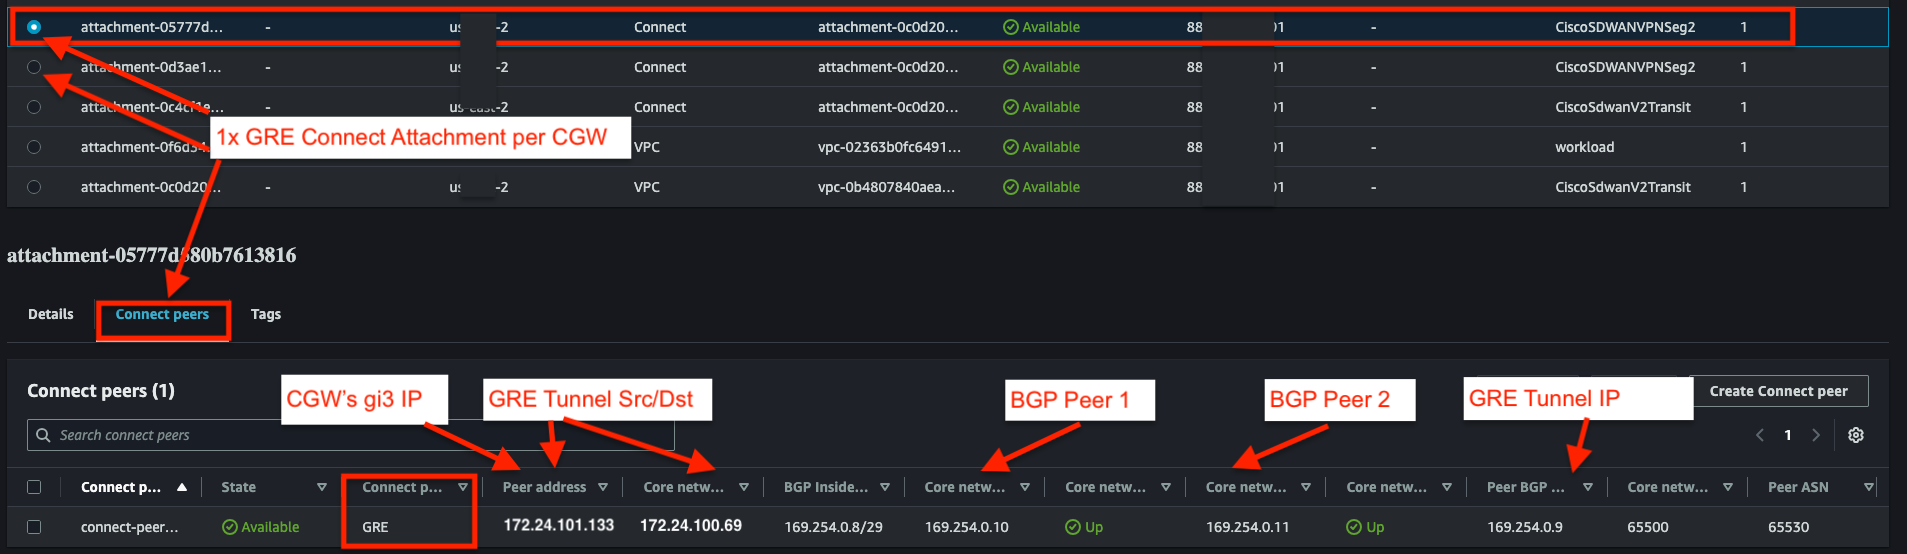
- 2x Connect attachments, 1 per C8Kv, for your Site to Cloud (GRE) connectivity
- In your V2Transit Connect Attachment, verify that you have 2x BGP peers, each with 2x BGP neighbors
- In each VPNSeg2 Connect Attachment, verify that each has a single GRE peer, each with 2x BGP neighbors
- In your V2Transit Connect Attachment, verify that you have 2x BGP peers, each with 2x BGP neighbors
-
Verify that Cloud WAN has received the routes from on-prem
- Navigate to Cloud WAN Core Network > Details
- Select your workload's region and the workload segment
- Verify that you see at least 2 routes:
172.24.0.0/24advertised from VPC attachment and100.64.10.0/24advertised from the CGW's Connect Attachment Peer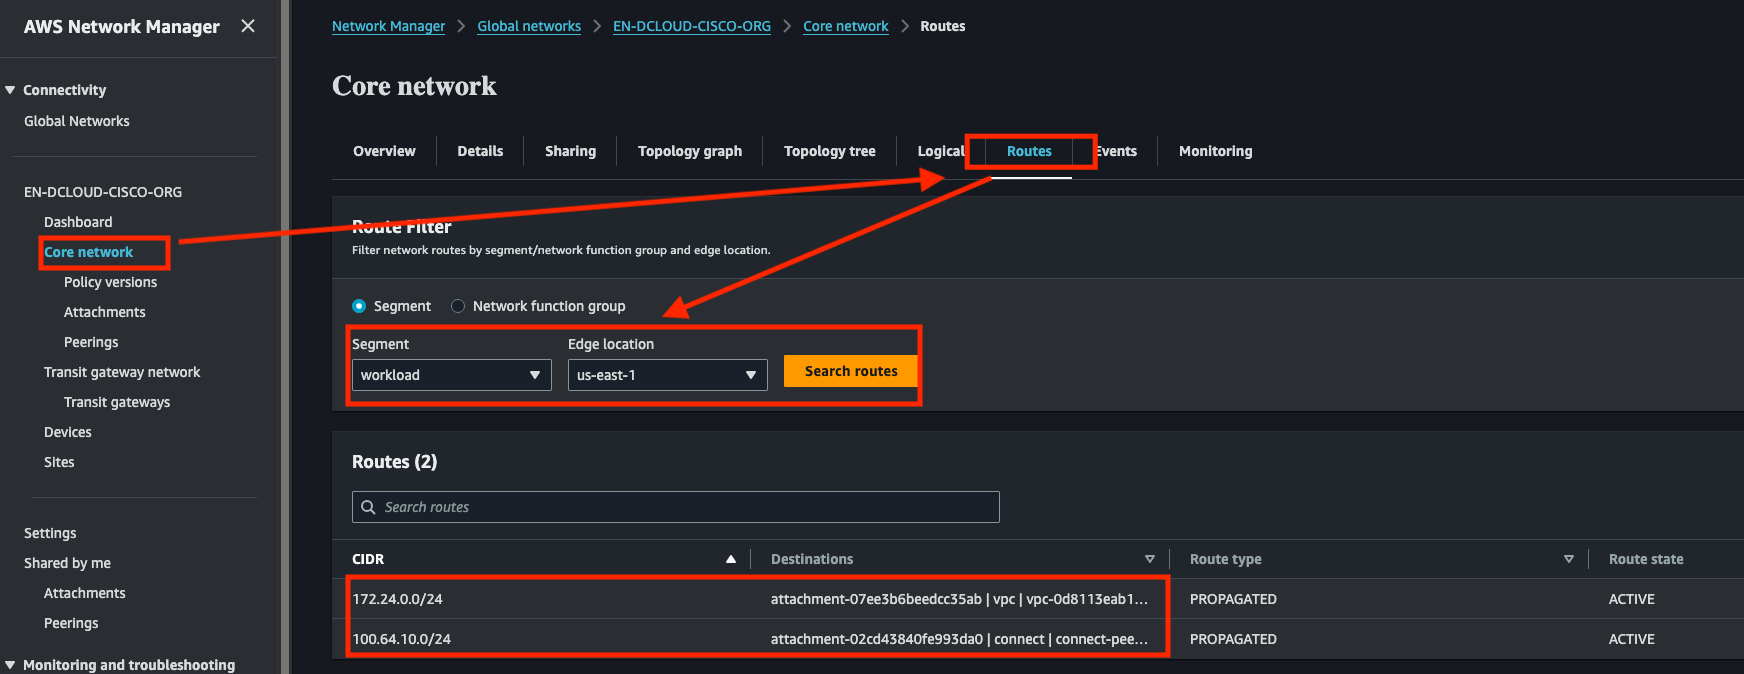
Step 3: Update workload VPC Route Table and Check Connectivity
-
Update VPC Route table and check connectivity
-
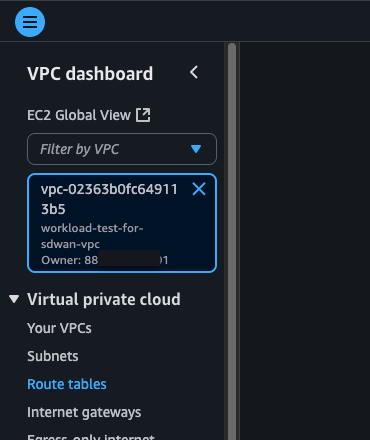
Navigate to the VPC dashboard
-
Filter View by Workload VPC
-
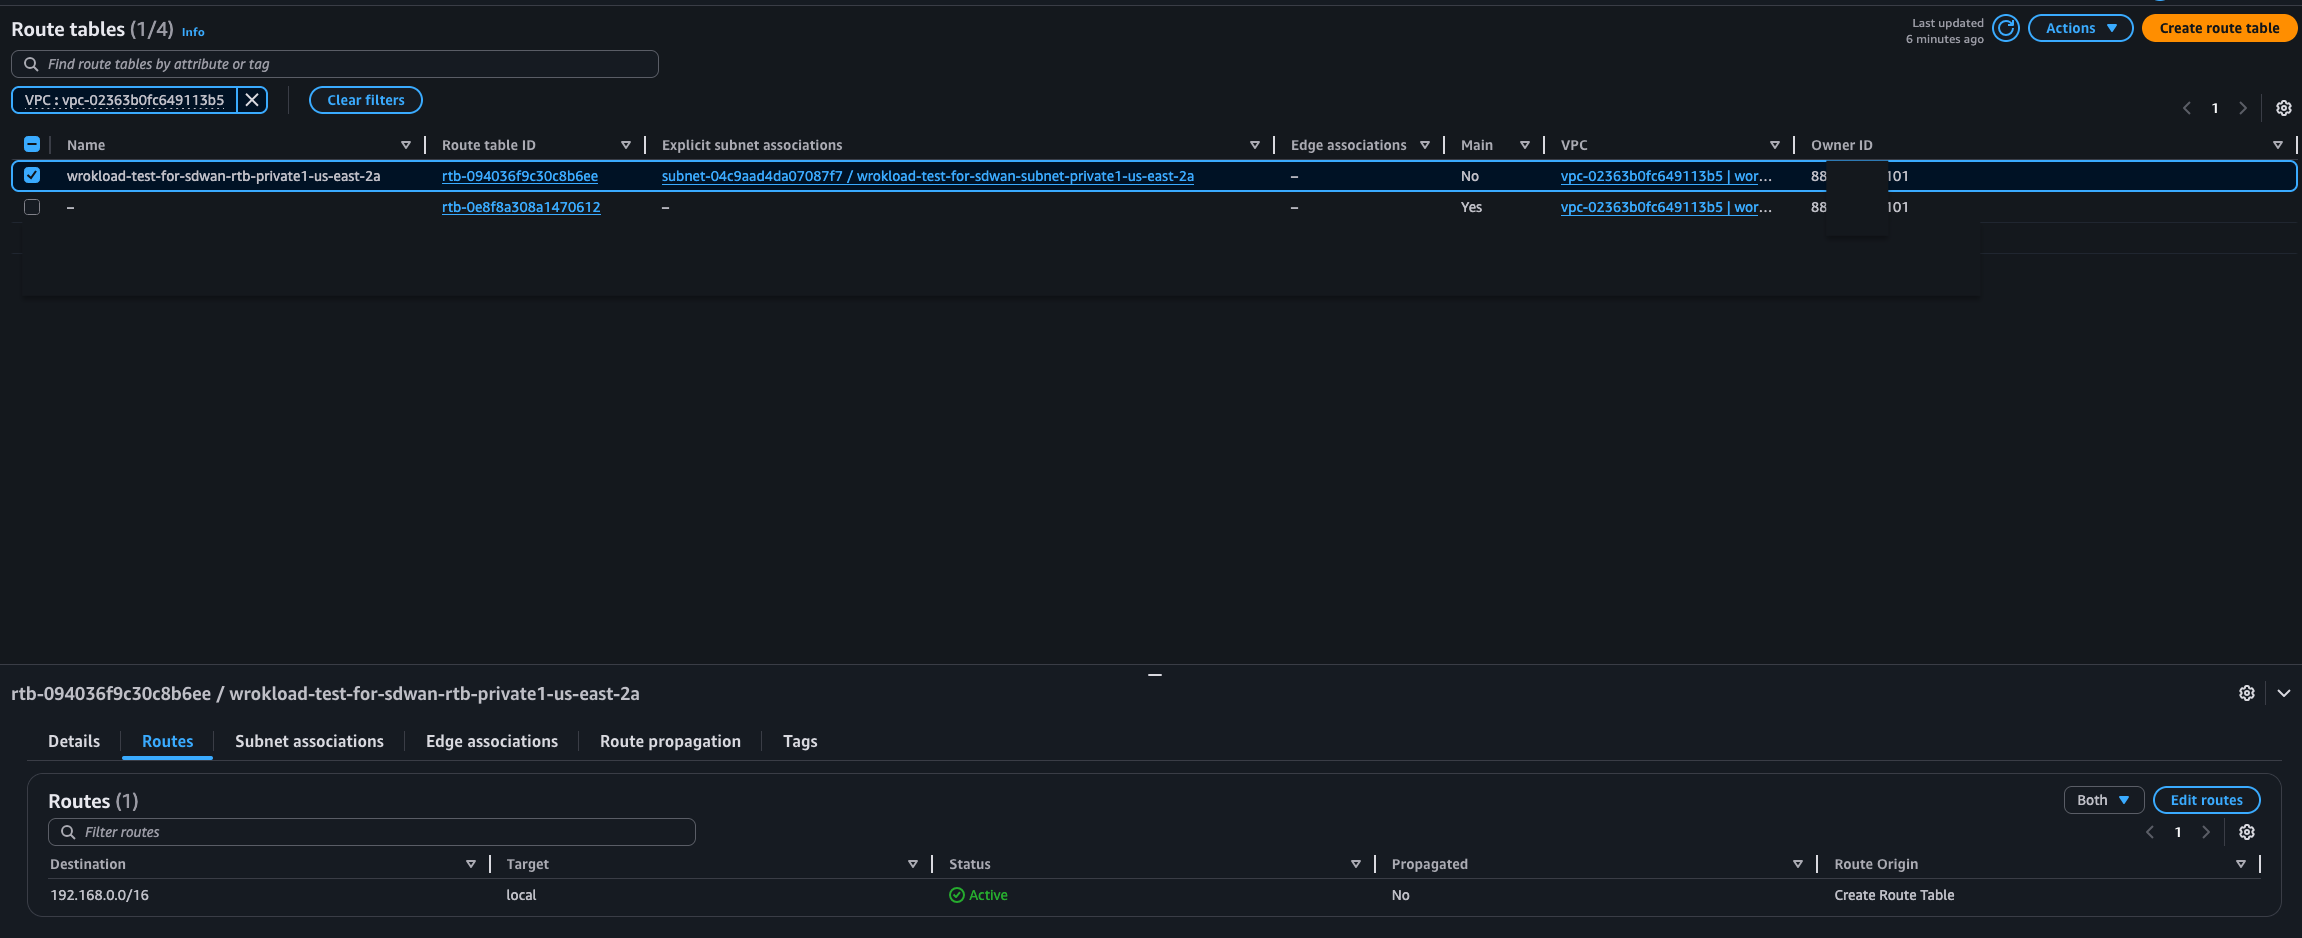
Click on Route Tables
-
Click the Private1 Route Table > Routes > Edit Routes
-
Add
0.0.0.0/0to your new core network attachment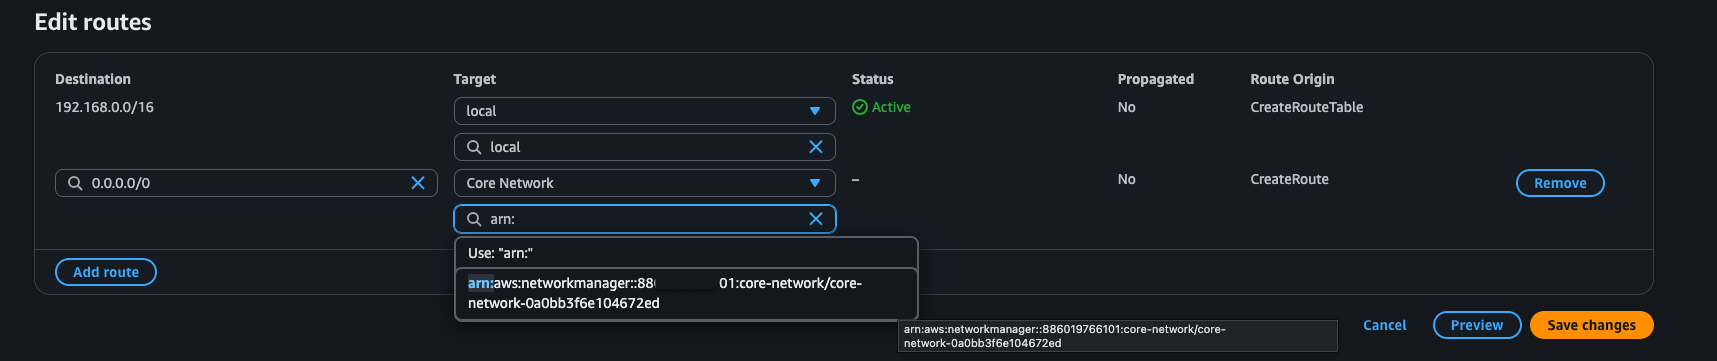
-
Go back to your EC2 Connect window and ping one of the CGW interfaces
-
-
Test End-to-End Connectivity through Ping
- Log into you workload EC2 instance using Serial Console Connect as detailed in previous step
-
Ping the on-prem device from workload:
ping 100.64.10.1- Output should resemble:
[ec2-user@ip-172-24-0-134 ~]$
[ec2-user@ip-172-24-0-134 ~]$ ping 100.64.10.1
PING 100.64.10.1 (100.64.10.1) 56(84) bytes of data.
64 bytes from 100.64.10.1: icmp_seq=1 ttl=253 time=21.0 ms
64 bytes from 100.64.10.1: icmp_seq=2 ttl=253 time=24.4 ms
64 bytes from 100.64.10.1: icmp_seq=3 ttl=253 time=21.6 ms
64 bytes from 100.64.10.1: icmp_seq=4 ttl=253 time=18.5 ms

--- 100.64.10.1 ping statistics ---
4 packets transmitted, 4 received, 0% packet loss, time 3005ms
rtt min/avg/max/mdev = 18.532/21.384/24.429/2.098 ms
[ec2-user@ip-172-24-0-134 ~]$
- Output should resemble:
-
Now lets ping from on-prem to AWS workload. To do this, we will use Catalyst Manager Troubleshooting Tools
- Navigate to Monitor > Devices
- Click the dCloud on-prem router:
BR1-CEDGE8Kv
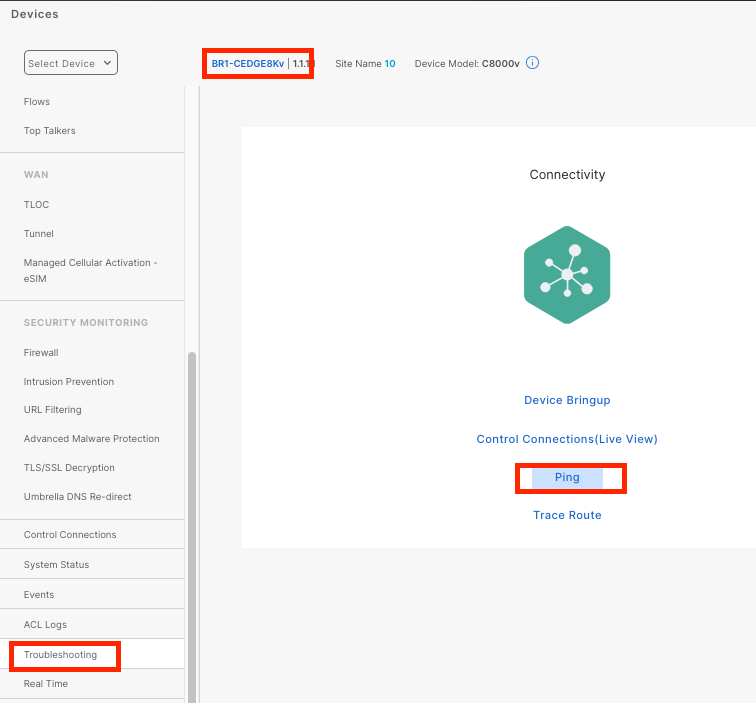
- Use
VPN - 10,Gi2, and the IP of your workload instance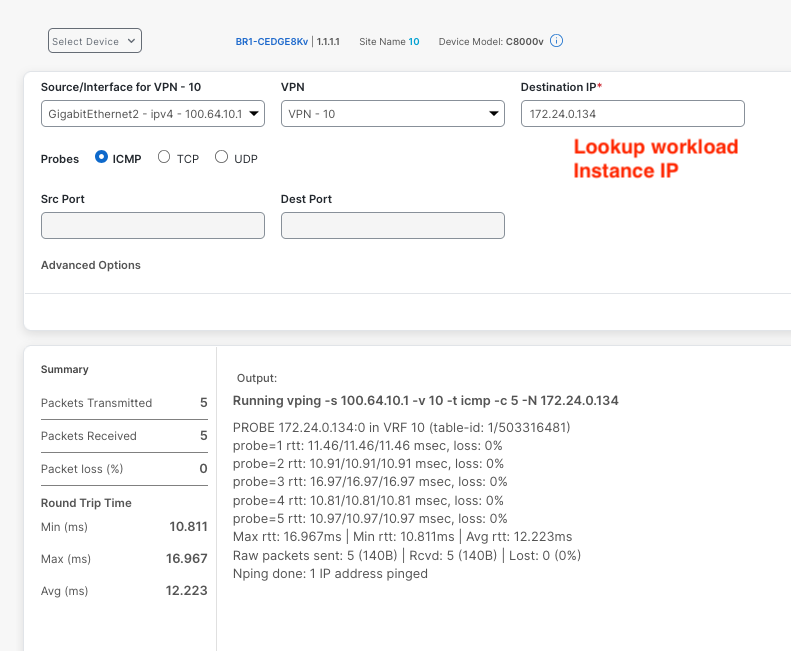
-
View CGW Route Tables
- Stay in the
BR1-CEDE8KvDevices portal if already there, otherwise navigate to Monitor > Devices >BR1-CEDGE8Kv - Click Real TIme > Device Options >
IP Route> Do Not Filter - Sort by
Source Protocoland find the172.24.0.0/24route in on-prem device. Next hop should be one of the Virginia CGWs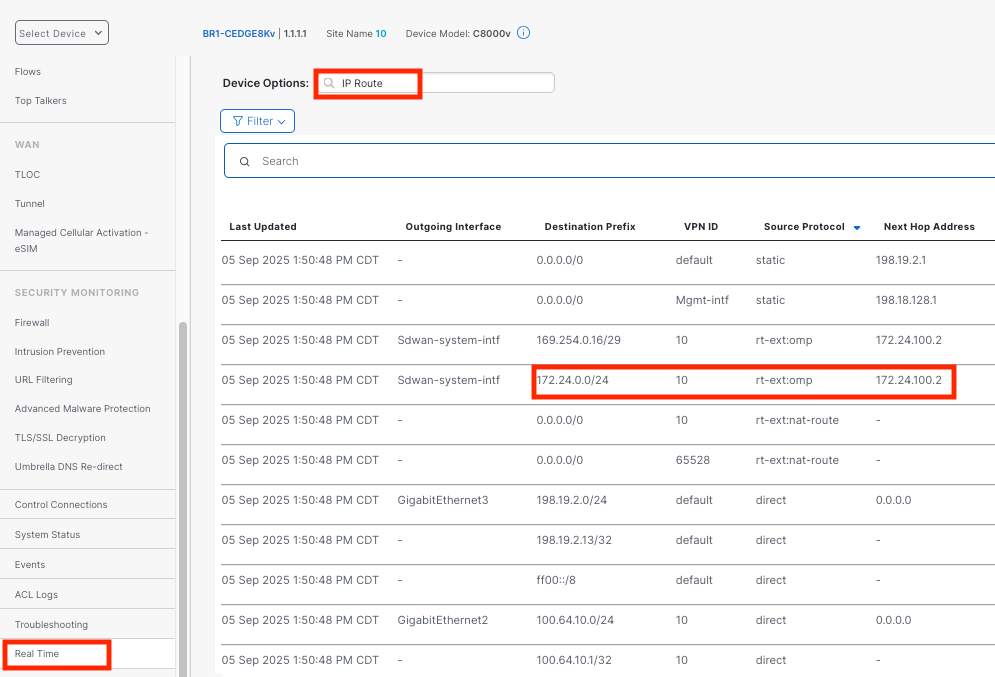
- Feel free to explore the virginia routers Route Table as well
Important
Hub subnets such as
172.24.100.0/23are not advertised into the workload segment in Cloud WAN and therefore will not have ping connectivity. - Stay in the
Repeat above steps for SD-WAN hub in separate AWS Region
-
Configure another CGW in the Ireland region
Config Example Value Site Site_16_IrelandCGW Name SDWAN-Hub-eu-west-1Region eu-west-1Site Name Site_16_IrelandCGW Details SW Image 17.15.03aInstance Size t3.mediumIP Subnet 172.16.100.0/23Config Group Create New: SDWAN-Hub-eu-west-1System IPs 172.16.100.1and172.16.100.2Host Names router1-Irelandandrouter2-IrelandUser / Pass adminandC1sco12345for bothWorkload VPC CIDR 172.16.0.0/24AZs 1 AZ, 0 Public and 1 Private Subnet SG workload-sgAllow ICMP Inbound 172.16.0.0/12and100.64.10.0/24EC2 Instance EC2 Details Update script used in EC2 steps -
Complete COR Connectivity
- Navigate to COR > Host Private Networks
- Edit existing tag
- Add eu-west-1 region and your new Ireland Workload VPC

- Add eu-west-1 region and your new Ireland Workload VPC
- COR will automatically modify Cloud WAN for connectivity
-
Update VPC Route Table and test connectivity
- Add
0.0.0.0/0to Core Network in Ireland Workload VPC - Connect to Ireland Instance using Console Session and ping
100.64.10.1as well as Virginia workload Instance in172.24.0.0/24range - Navigate to Cloud WAN Core Network Route Table for Workload segment and verify that both workloads and on-prem are available
- Explore the additional tunnels (site-to-site and site-to-cloud) and routes in Catalyst SD-WAN Manager
- Add
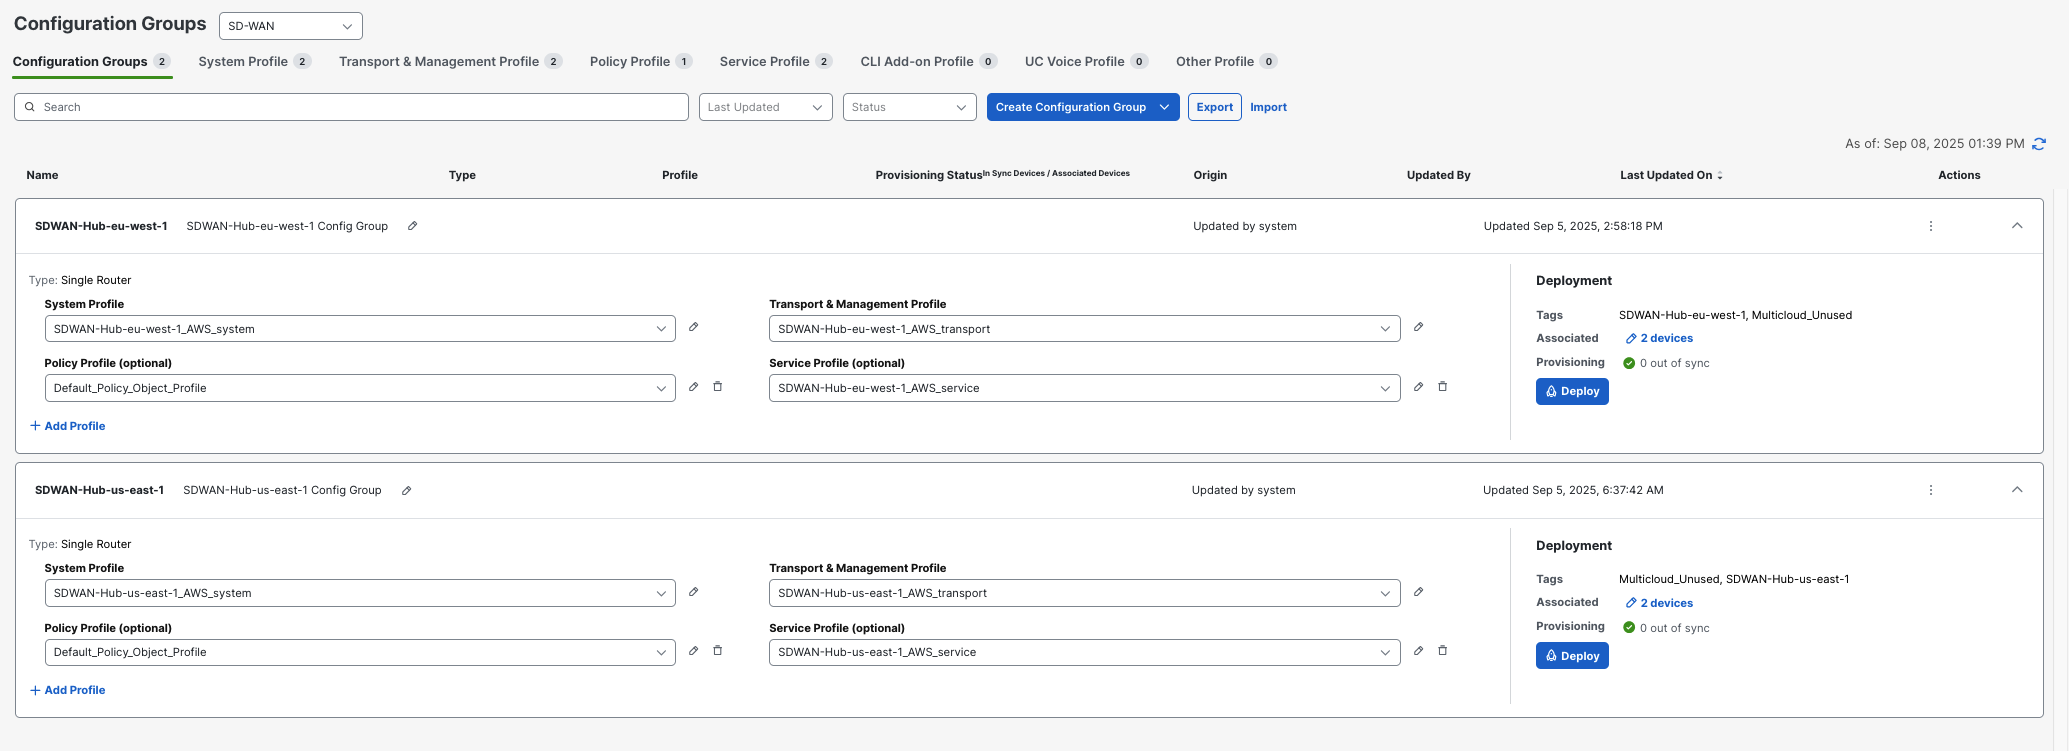
Examine Config Groups in Catalyst Manager
Navigate to COnfiguration > Config Groups > SDWAN-Hub-us-east-1
-
Transport Profile:
VPN 512 (Management VPN):
- Purpose: Out-of-band management - completely isolated network for device administration
- Associated Interface: GigabitEthernet1 (Management Interface)
- Usage: Allows network administrators to manage the router without interfering with production traffic
VPN 0 (Global/Transport VPN - The SD-WAN Fabric Foundation):
- Purpose: Creates the underlying SD-WAN transport network that connects all sites together
-
Associated Interfaces:
- GigabitEthernet2 (color "default" - typically internet connection)
- GigabitEthernet3 (color "private1" - typically MPLS or private circuit)
-
How It Works: When you configure
tunnel-interfaceon these physical interfaces, SD-WAN automatically creates overlay tunnels (Tunnel2 and Tunnel3) that form secure IPsec connections to other SD-WAN sites - BGP Routing Purpose:
- Runs BGP (AS 64550) with AWS Cloud WAN neighbors (172.24.100.10 and 172.24.100.52 using AS 64520) (NO_ENCAP Peers in Cloud WAN Connect Attachment)
- This BGP session enables the SD-WAN fabric to use AWS's backbone network instead of the public internet for site-to-site connectivity
- Provides redundant paths (2 BGP neighbors) for high availability
-
Service Profile:
Service VPN (VPN 10 - The Application Network):
-
Purpose:
- This is the network segment where actual business applications and workloads live
- Exists at ALL locations: branches (user networks), AWS (cloud workloads), and this hub site
- Enables secure communication between branch users and cloud applications
-
Key Integration Function:
- Routes learned from AWS workloads via BGP are shared with all branch sites through OMP (SD-WAN's routing protocol)
- Routes from branches are shared back to AWS, creating full connectivity
GRE Tunnel and AWS Integration:
-
GRE Tunnel (Tunnel15000512):
- IP: 169.254.0.17/29, connects to AWS Cloud WAN at 172.24.100.69 (GRE Connect Attachment in Cloud WAN)
- Uses GigabitEthernet2 as its transport path to reach AWS
- This is a dedicated tunnel specifically for connecting to AWS cloud services
-
BGP Inside the Tunnel:
- Two redundant BGP sessions (169.254.0.18 and 169.254.0.19) run inside this GRE tunnel
- These sessions exchange routes between the SD-WAN network and AWS workloads
- Route policy (AWS_TGW_CSR_ROUTE_POLICY) prevents routing loops and controls what routes are shared
-
-
How Everything Connects Together:
Interconnecting Cisco SD-WAN sites via AWS backbone:
- Branch user accesses application in VPN 10 network segment
- SD-WAN fabric (VPN 0) transports this VPN 10 traffic through secure overlay tunnels
- Hub site receives VPN 10 traffic via the SD-WAN overlay (Tunnel2/Tunnel3)
- GRE tunnel forwards VPN 10 traffic to AWS Transit Gateway
- AWS routes traffic to the appropriate cloud workload
- Return path follows the same process in reverse
Global Branch-to-Branch Communication via AWS Backbone:
- Branch A sends VPN 10 traffic destined for Branch B
- SD-WAN fabric may route this through AWS Cloud WAN backbone (instead of internet) using the BGP peering in VPN 0
- AWS backbone provides optimized routing between SD-WAN sites
- Branch B receives traffic through its SD-WAN connection
Key Technologies Explained:
- OMP (Overlay Management Protocol): SD-WAN's "brain" that automatically shares routing information between all sites, eliminating the need for manual route configuration
- Configuration Groups: Templates that standardize how sites connect (Transport Profile defines WAN connections, Service Profiles define the service VPNs where applications and users reside.)
- VPN Segmentation: Separates different types of traffic (management, transport, applications) for security and performance
- AWS Cloud WAN Integration: Allows SD-WAN to use AWS's global network infrastructure for better performance and reliability than internet-only connectivity
This architecture creates a unified network where branch offices, cloud workloads, and hub sites can communicate securely and efficiently, with AWS Cloud WAN providing both the backbone transport and cloud workload connectivity.
Verification
Verify deployment in AWS
- Core Infrastructure Status
- Global Network status: Available (AWS Console → Cloud WAN → Global Networks → [Select your Global network])
- Core Network status: Available (... → Core Network → Details (horizontal tab) )
- Policy version: Latest, no errors (... → Core Network → Policy Versions)
- Core Infrastructure Attachments
- VPC and Connect Attachment status: Available (... → Core Network → Attachments)
- Connect Peers BGP Status: UP (... → Core Network → Attachments → Connect Attachment → Details)
Verify COR deployment in Catalyst Manager
- Cloud Gateway Status: 2 Reachable (vManage Console → Configuration → Cloud OnRamp for Multicloud → Manage → Gateway Management )
- Shows at least 1 VPN exists in CGW
Conclusion
You have now successfully set up AWS Cloud WAN integration with Cisco SD-WAN using Cloud onRamp for Multicloud. The deployed configuration establishes secure connectivity between your SD-WAN fabric and AWS network infrastructure.