EC2 Instances
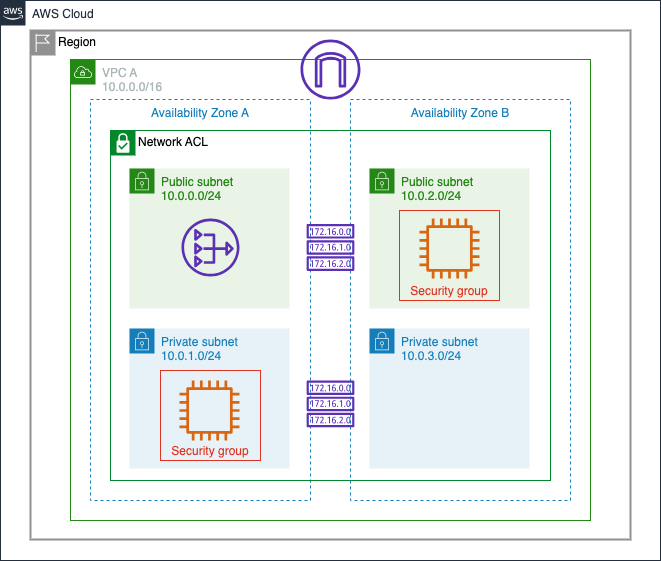
In this section, you will spin up EC2 instances in your VPC and protect them with a security group only allowing ICMP traffic to reach the hosts.
Launch an EC2 Instance into a Public Subnet
Important
In this section, you will create an EC2 instance in the Public Subnet of AZ2 (Availability Zone B). You will create the instance in AZ1 in the next section.
-
In the Instances section of the EC2 console click Launch Instances

-
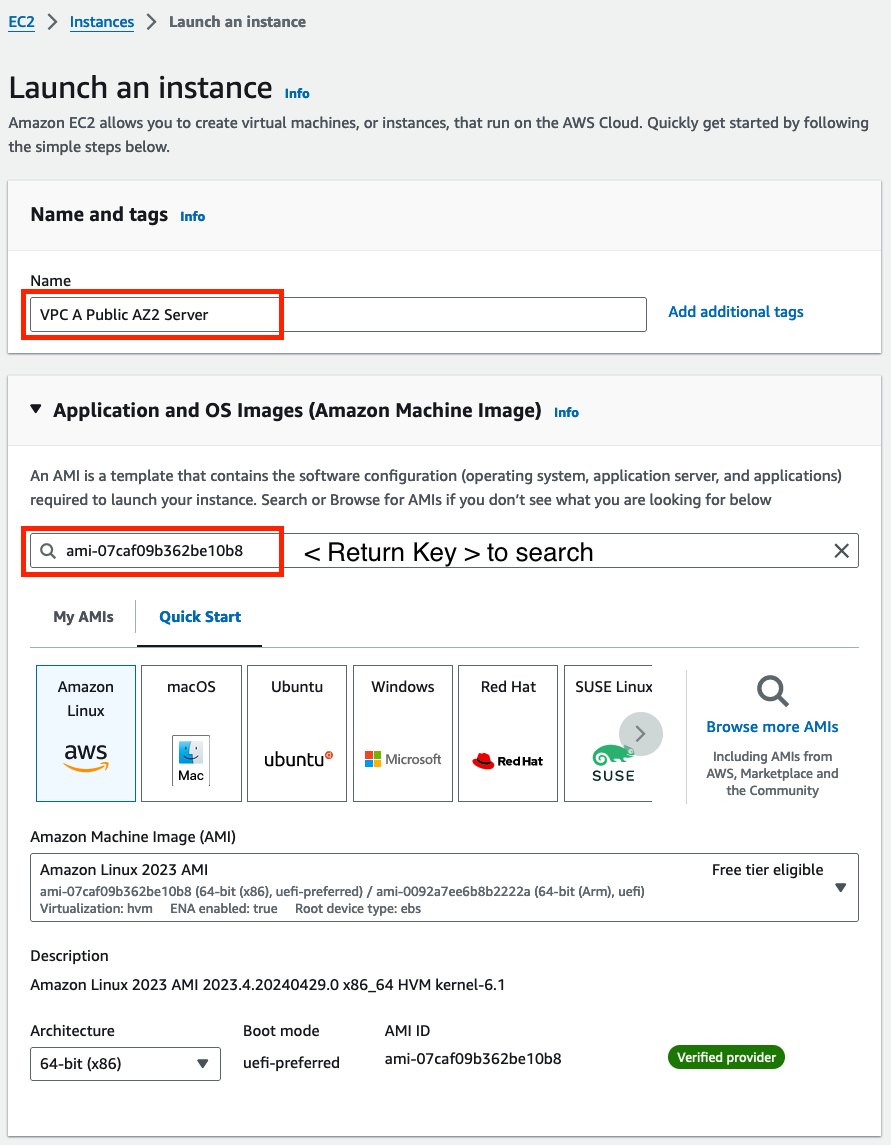
In the resulting Launch an instance screen
- Enter
VPC A Public AZ2 Serverfor the Name - Ensure that Amazon Linux 2023 AMI will be selected, and the instance type is t2.micro.
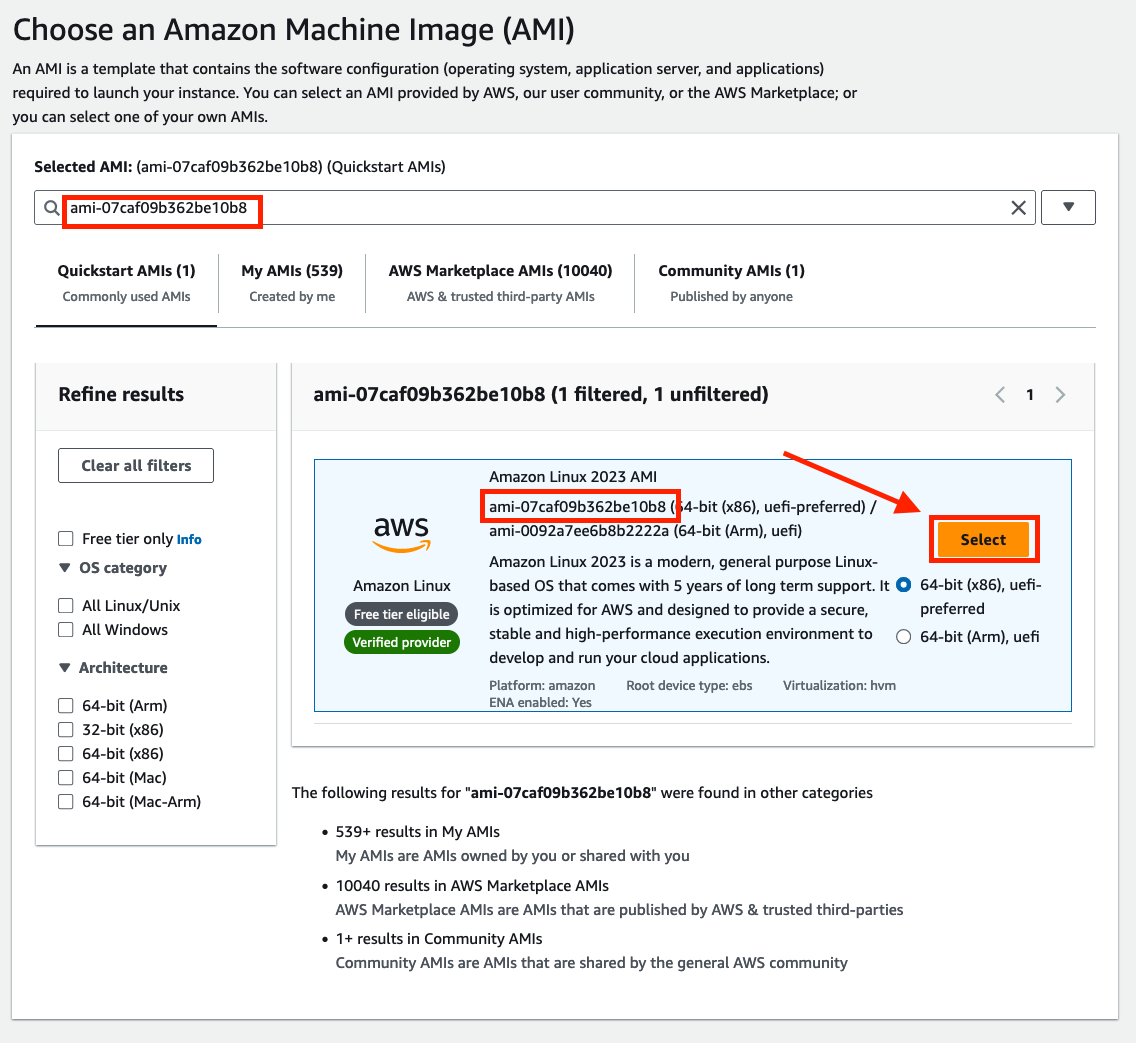
- AMIs in dCloud are whitelisted, we will be using
ami-07caf09b362be10b8which is an Amazon Linux 2023 AMI in us-east-1
- Enter
-
Under Key pair (login) select
Proceed without a key pair. A key pair is not needed since we will be using Systems Manager to connect to the instances.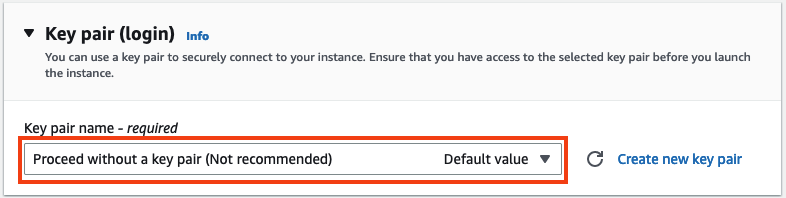
-
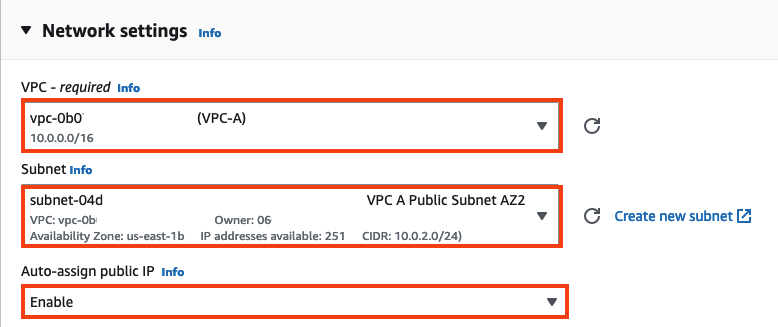
Under Network settings click Edit and
- Select
VPC Afrom the dropdown for the VPC field - Select
VPC A Public subnet AZ2from the dropdown for the Subnet field - Select
Enablefor the Auto-assign Public IP field
- Select
-
Select Create security group with the name
VPC A Security Group, description ofOpen-up ports for ICMP -
In Inbound security groups rules under Type select
All ICMP - IPv4and enter 0.0.0.0/0 as the Source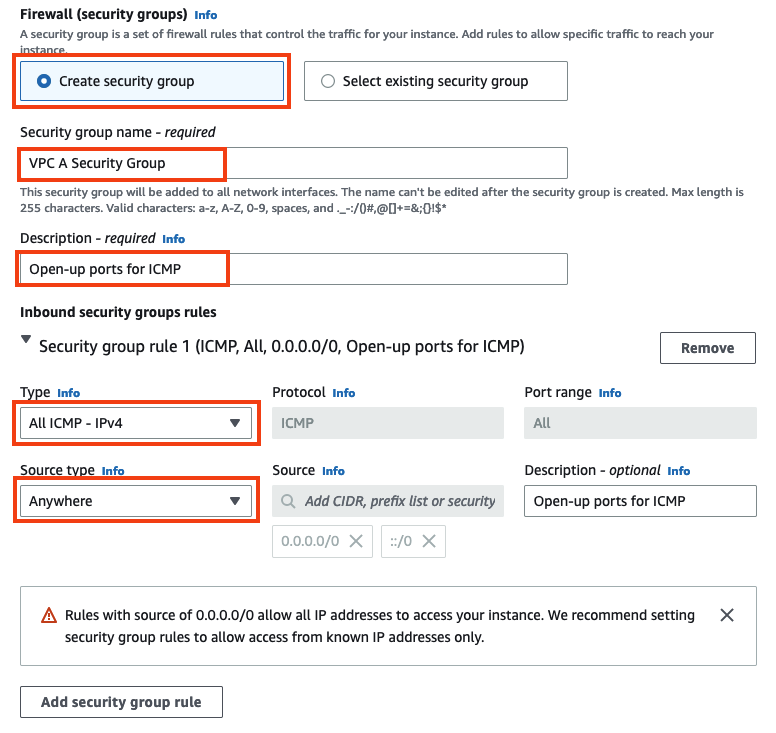
Since security groups are stateful, you don’t need to edit the outbound rules. The security group will allow the instance to respond to the ping since it saw the ping arrive at the instance.
-
Expand Advanced network configuration and under Primary IP enter
10.0.2.100.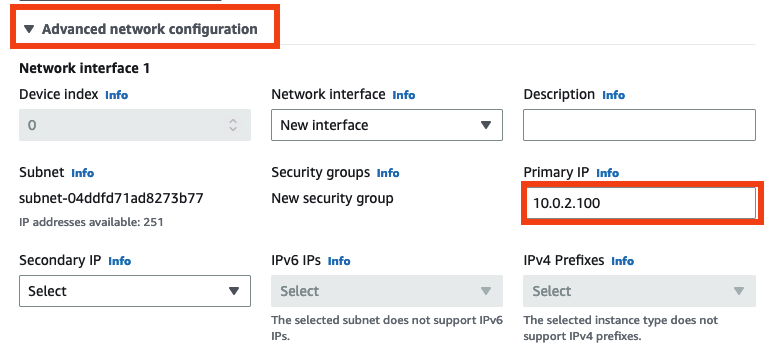
-
At the bottom of the section
- Expand Advanced details
- Under IAM Instance profile select
US-instance-profilewhich was created in the pre-requisites section. - Click Launch instance

-
Click View all instances

Important
If you just finished the last step, your EC2 instance might still be spinning up. You can tell by looking at the Instance State and Status Checks columns. If you see Pending state or status Initializing, the instance is not ready yet. After few minutes, you should have an EC2 instance in the "running" state.
Congratulations! You have just launched a virtual server in your public subnet in AZ2.
Launch Instance in Private Subnet
You could follow the same process in the last two sections in order to deploy an EC2 instance into a private subnet, however it is also possible to launch a new instance using the same settings as previously.
-
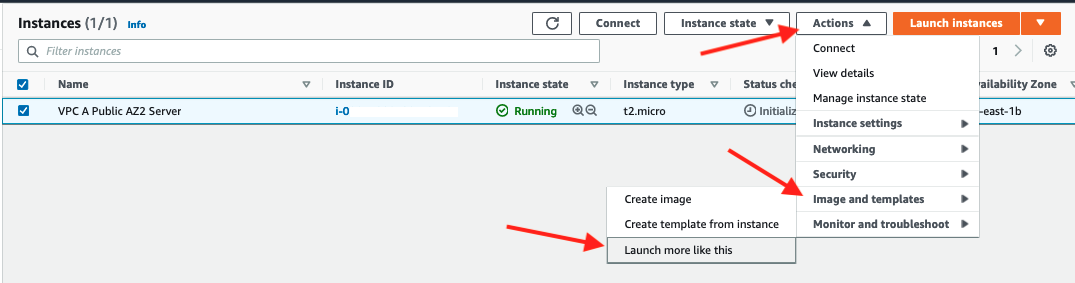
In the Instances section of the EC2 console
- Select the running public instance
VPC A Public AZ2 Server - Click Actions then Image and templates then Launch more like this
- Select the running public instance
-
In the settings screen
- Update the Name to
VPC A Private AZ1 Server - Under Key pair (login) select
Proceed without a key pair. - Update the Subnet to be
VPC A Private Subnet AZ1 - Set the Auto-Assign Public IP setting to
Disable. - Expand Advanced network configuration and under Primary IP enter
10.0.1.100. - Click Launch instance

- Update the Name to
-
Click View all instances. There should now be two EC2 instances running in the VPC

Congratulations, you now have an EC2 instance running in both a public and private subnet.