Route Tables
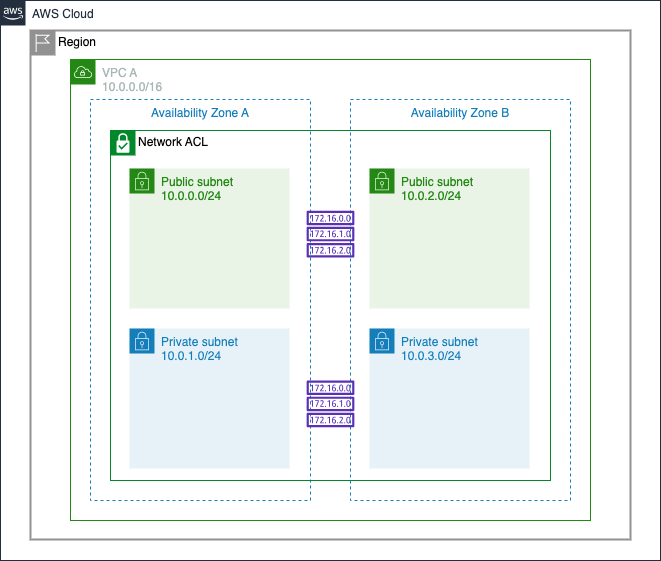
Your VPC has an implicit router, and you use route tables to control where network traffic is directed. Each subnet in your VPC must be associated with a route table, which controls the routing for the subnet (subnet route table). You can explicitly associate a subnet with a particular route table. Otherwise, the subnet is implicitly associated with the main route table. A subnet can only be associated with one route table at a time, but you can associate multiple subnets with the same subnet route table.
Create Route Table for Public Subnets
-
In left hand panel of the VPC Dashboard click on Route Tables
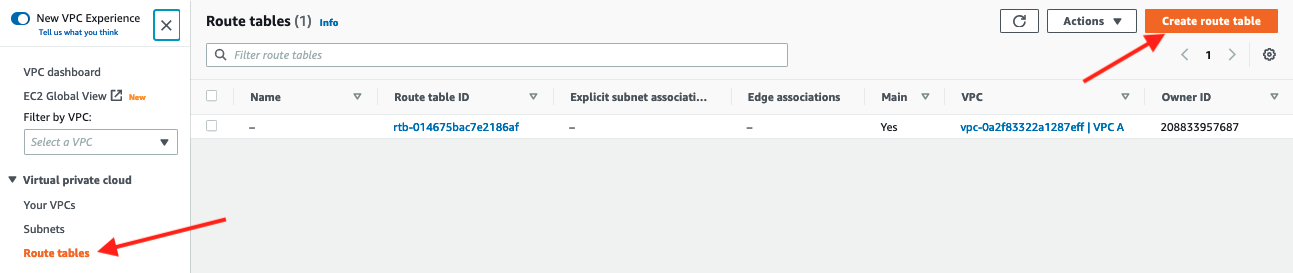
You will see the default route table that was created as part of the VPC creation, and in the Subnet Associations tab below the four subnets created earlier. We will now create a new public route table for the public subnets with a route to the internet via the Internet Gateway.
-
Add new public route table by clicking on Create route table in the right hand corner
-
Enter
VPC A Public Route Tableas the name and selectVPC Afrom the VPC dropdown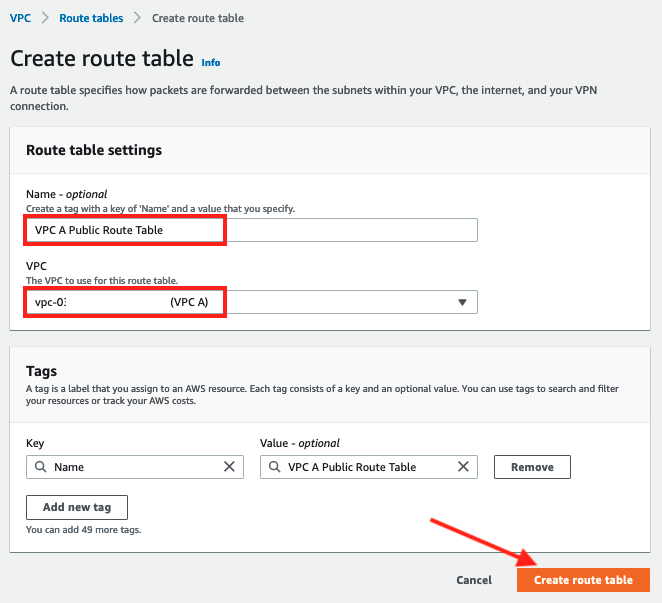
-
Click Create route table and a new route table will be created
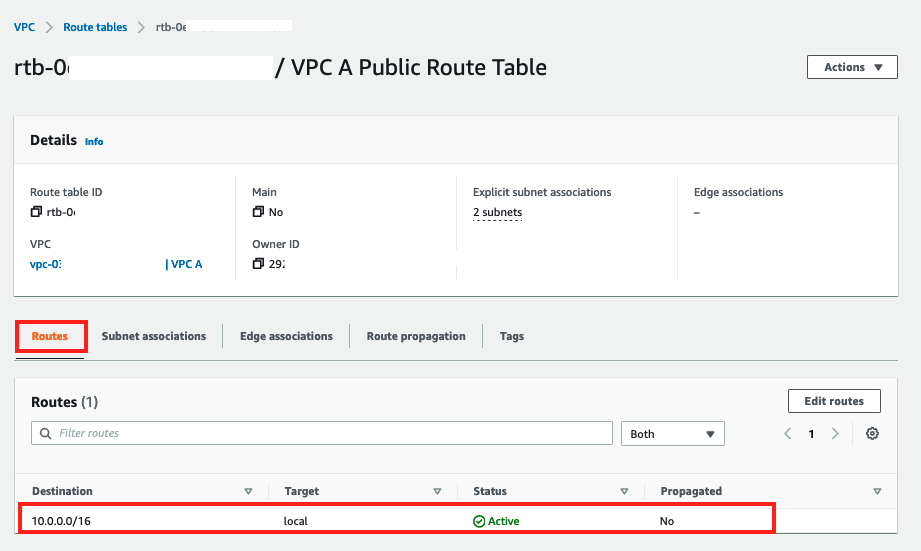
As you can see there is only a local route, so we're going to enable internet access by adding a route to an Internet Gateway in a later step. For now we need to associate this public route table with the public subnets we created earlier.
-
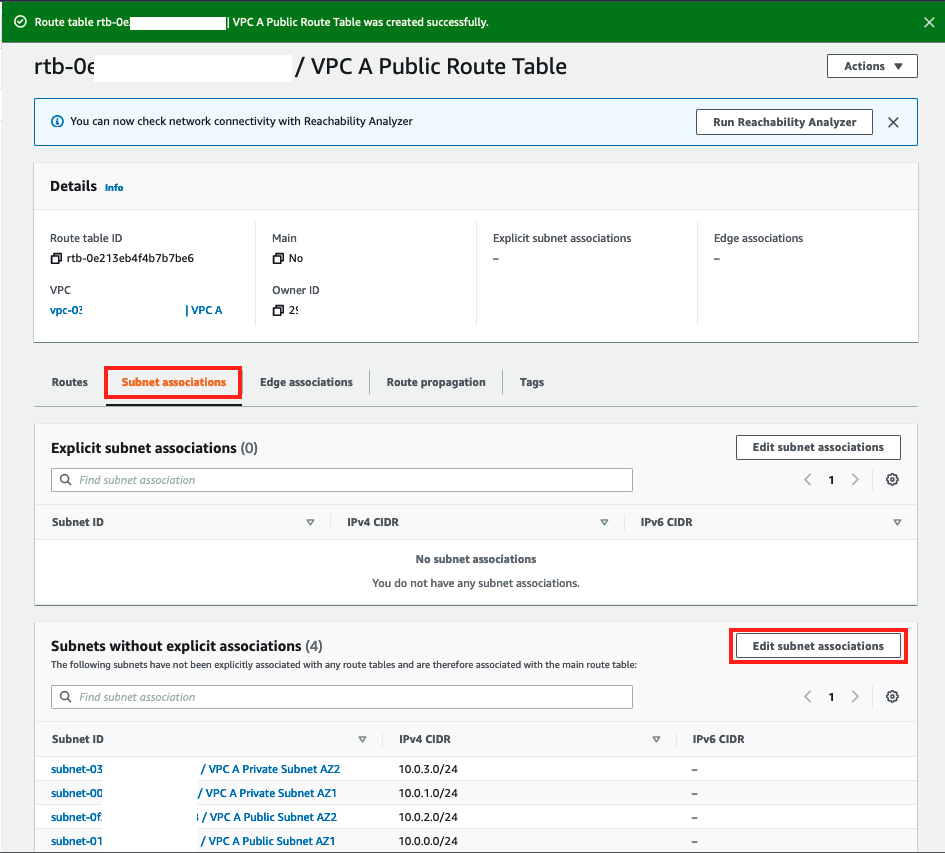
Scroll down and click on the Subnet Associations tab
-
Click on Edit subnet associations
-
Select
VPC A Public Subnet AZ1andVPC A Public Subnet AZ2and click Save association

-
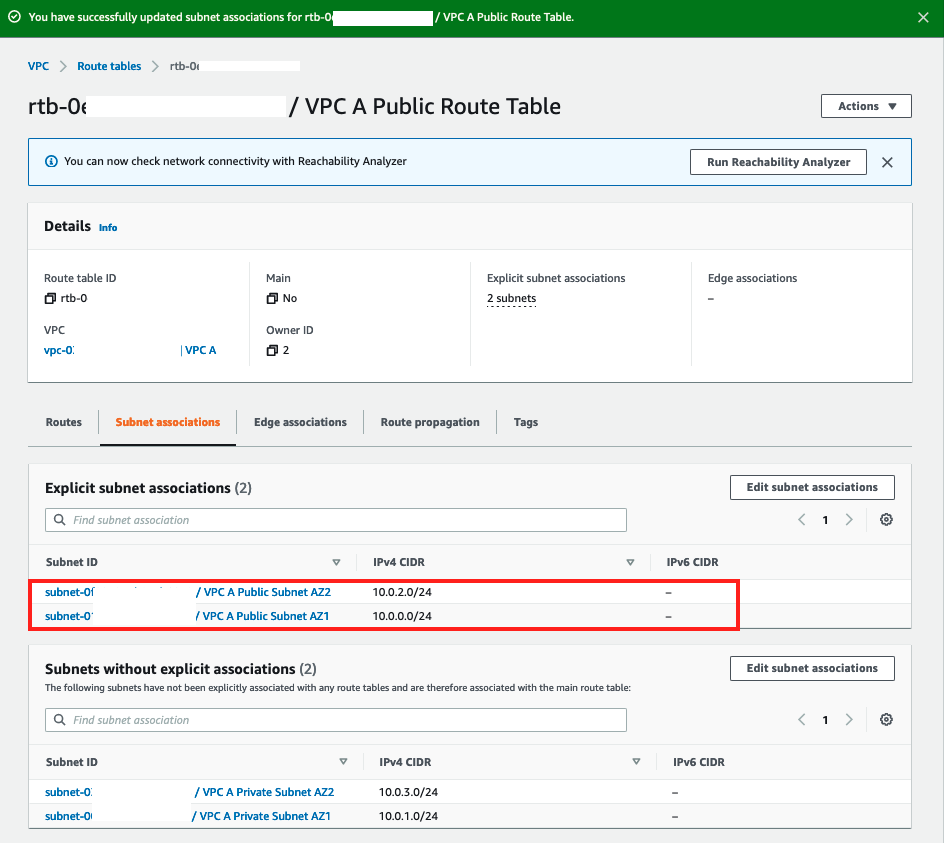
The two public subnets will now be associated with the public route table under Explicit Subnet Associations within the Subnet associations tab.
Create Route Table for Private Subnets
-
In the left hand panel of the VPC Dashboard click on Route Tables and click on the Create route table button in the top right corner
-
In the Create route table screen
- Enter
VPC A Private Route Tableas the Name - Select
VPC Afrom the dropdown for VPC ID - Click on Create route table

- Enter
-
A new route table will be created with a local route
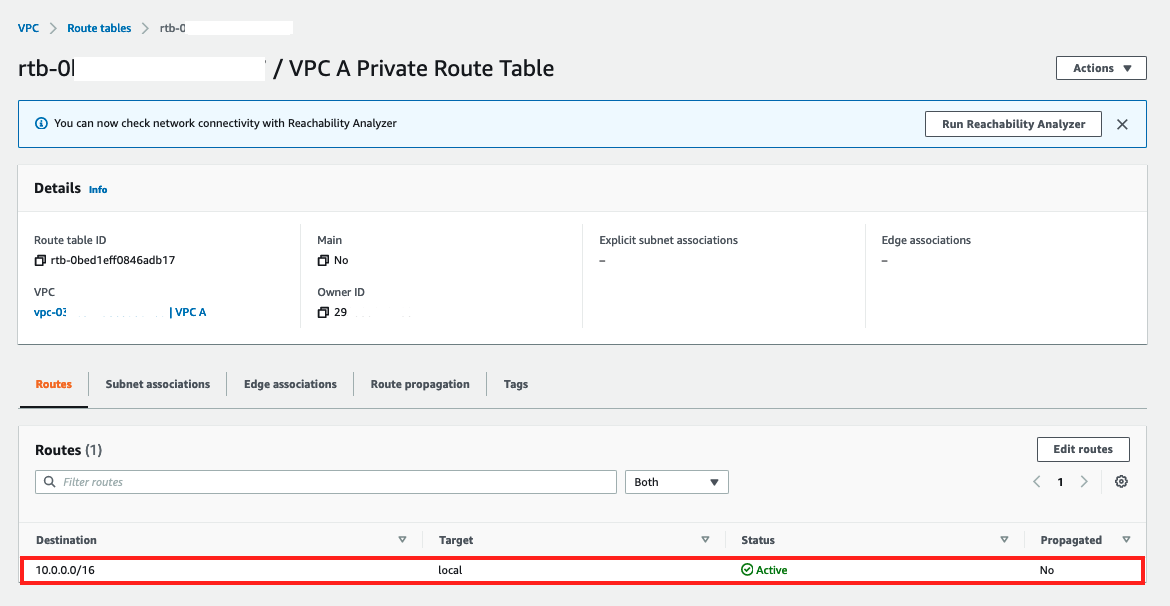
We're going to enable outbound internet access by adding a route to the Internet via a NAT Gateway in the next step. For now we need to associate the private subnets to the route table.
-
In the Subnet Associations tab click on Edit subnet associations

-
Select the two private subnets
VPC A Private Subnet AZ1andVPC A Private Subnet AZ2and click Save associations
-
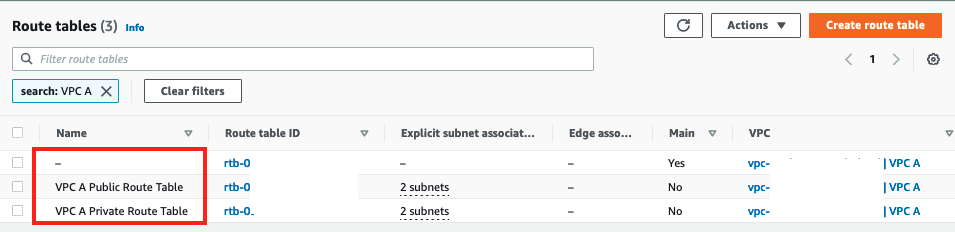
In the resulting screen click on Route tables and confirm that there are three route tables under VPC A: main/default, Public and Private.