Network ACLs
A network access control list (ACL) is an optional layer of security for your VPC for controlling traffic in and out of one or more subnets.
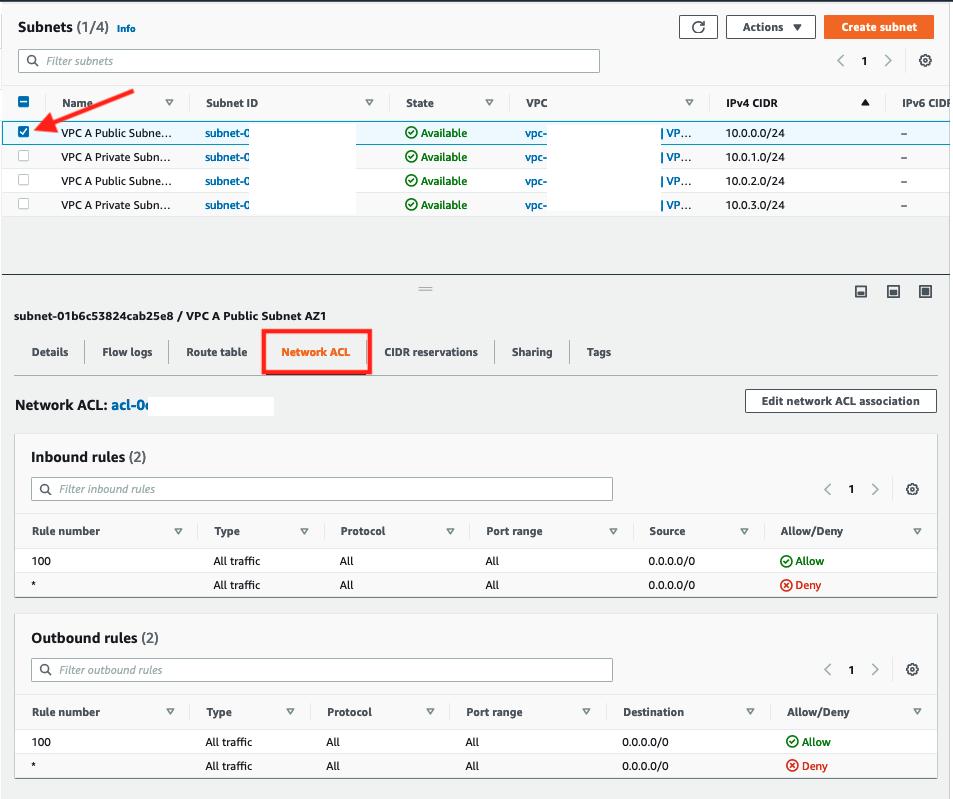
Select any of the subnets, and scroll down to the Network ACL tab to look at the default NACL rules. Rules are evaluated in order from lowest to highest. If the traffic doesn’t match any rules, the * rule is applied, and the traffic is denied. Default NACLs allow all inbound and outbound traffic, as shown below, unless customized.
Create a new Network ACL for workload subnets in VPC A
-
On the VPC Dashboard click on Network ACLs
-
Click Create network ACL

-
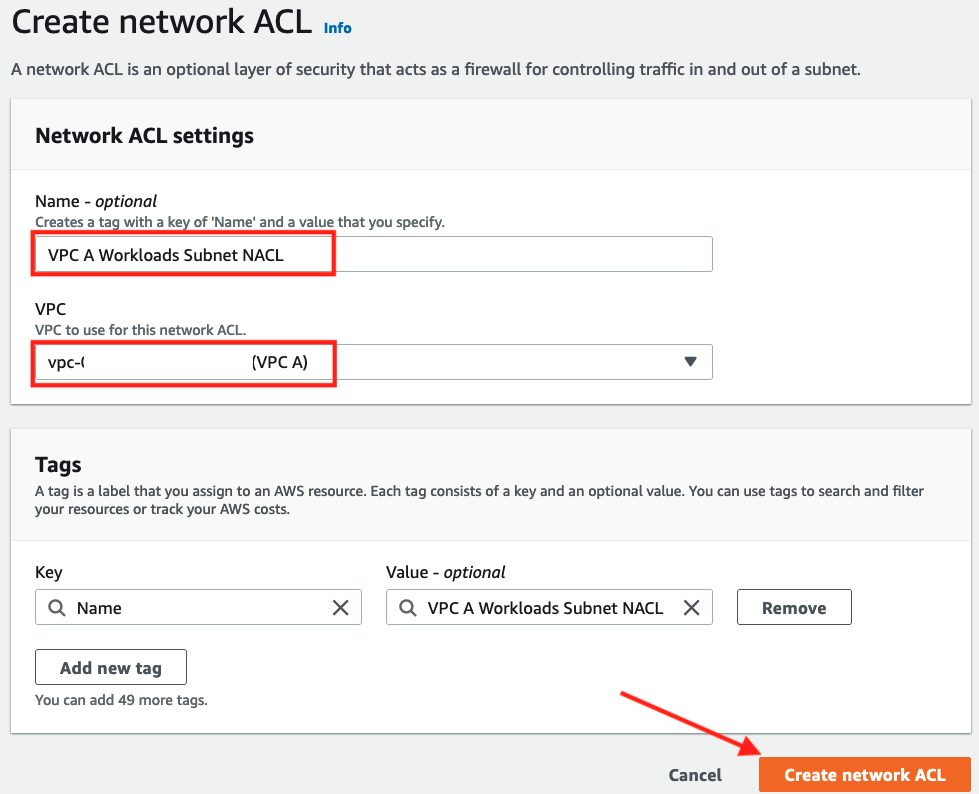
In the Network ACL settings screen
- Enter a name of
VPC A Workload Subnets NACL - Select
VPC Afrom the dropdown - Click Create network ACL
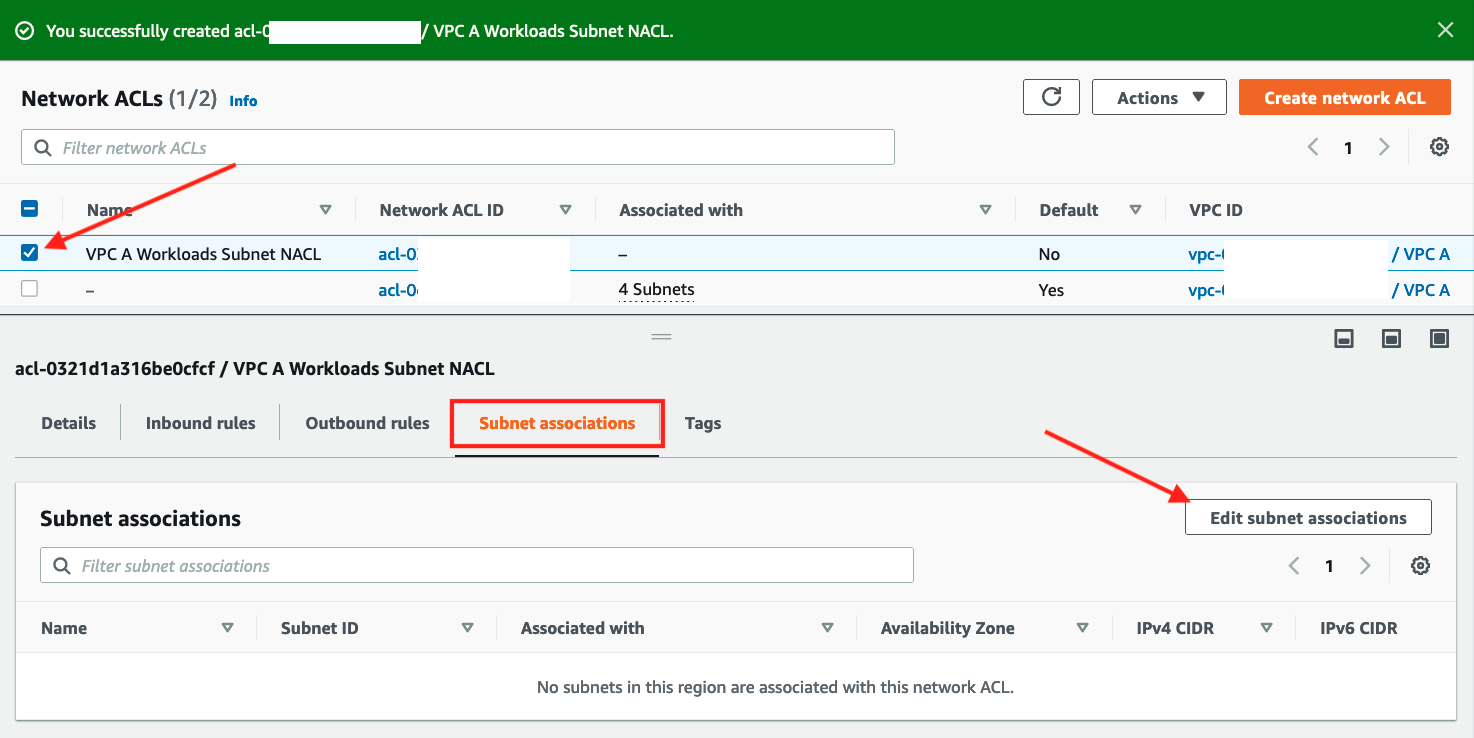
The result will be a new NACL for VPC A alongside the default NACL created when the VPC was created.
- Enter a name of
-
In the resulting Network ACLs screen
- Select the checkbox for
VPC A Workload Subnets NACL - Scroll down to the Subnet associations tab
- Click Edit subnet associations
- Select the checkbox for
-
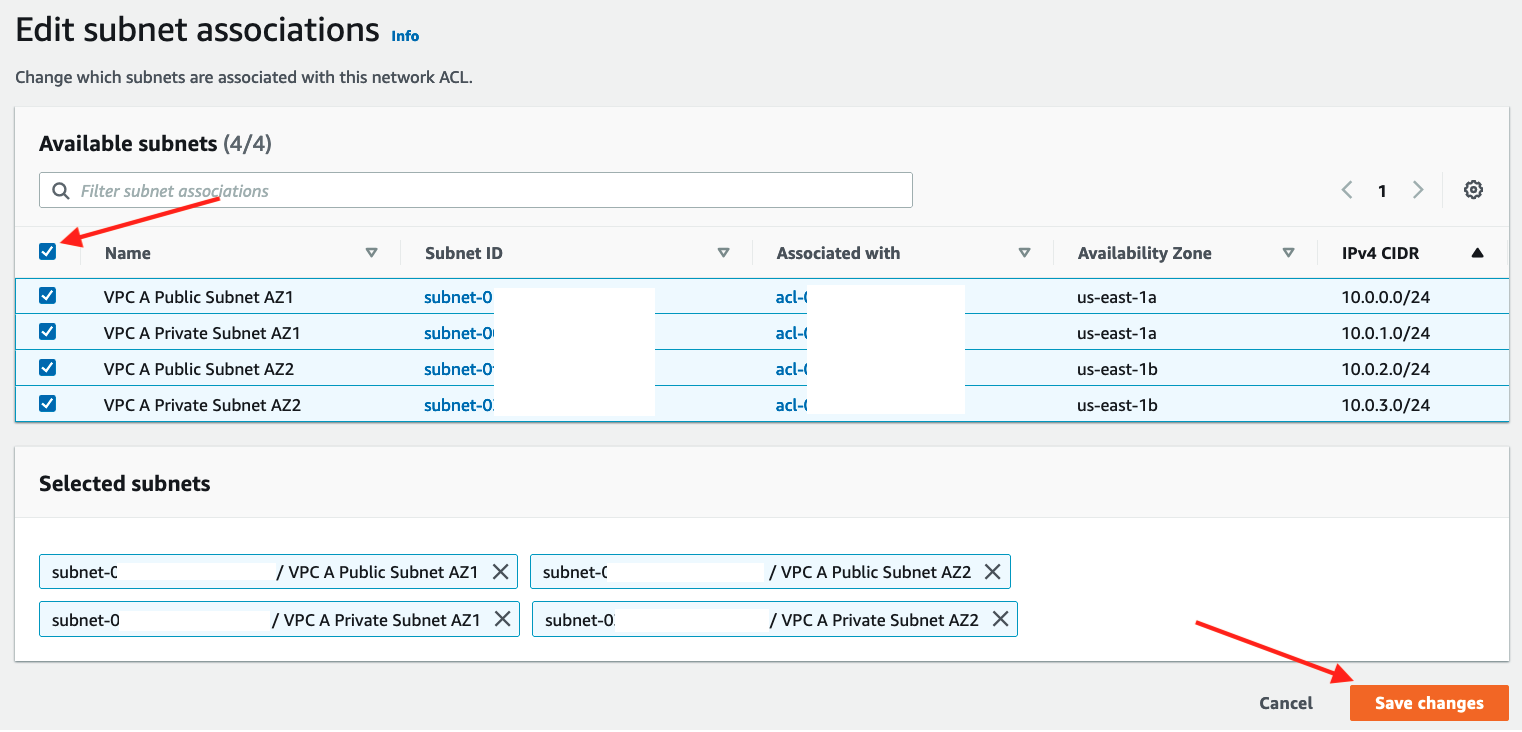
In the Edit subnet associations screen
- Select all four VPC A subnets to associate them with the NACL
- Click Save changes.
The NACL should now be associated with four subnets on the following screen but because NACLs are created with only a DENY rule for inbound and outbound we will now change the default NACL rules to allow all traffic in both directions.
-
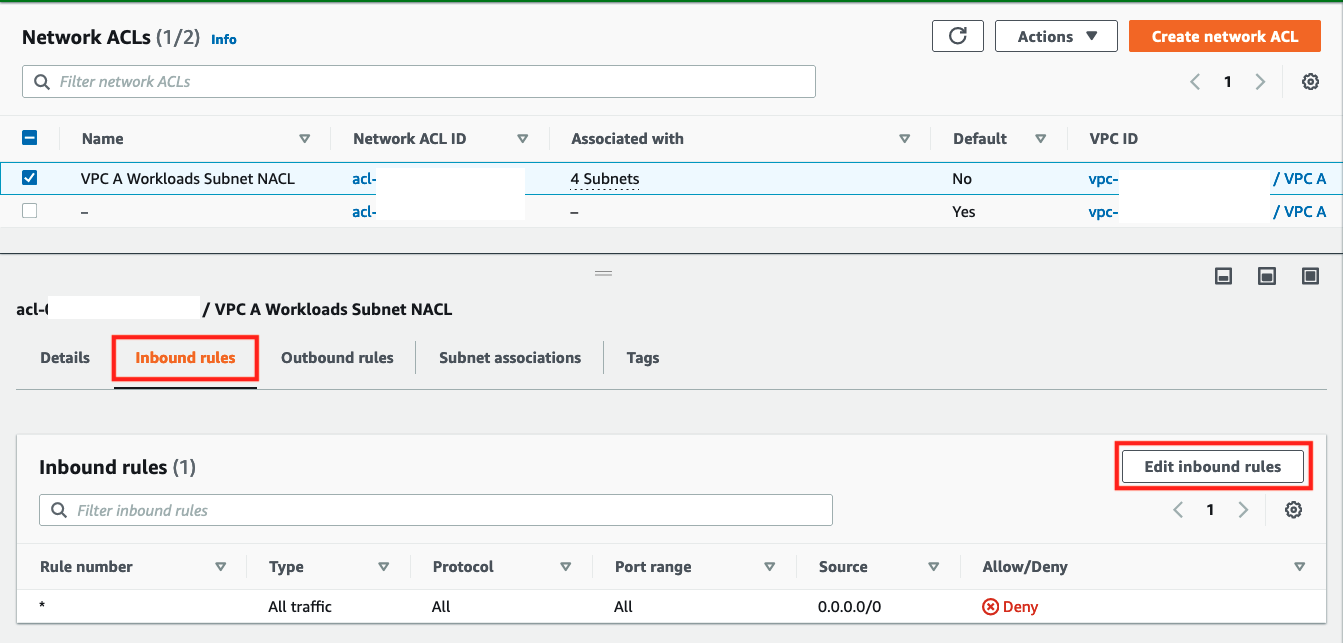
In the Network ACLs screen
- Select the check box for
VPC A Workload Subnets NACLfor VPC A - Scroll down and select the Inbound Rules tab below
- Notice that we have only
DENYall rule - Click Edit inbound rules
- Select the check box for
-
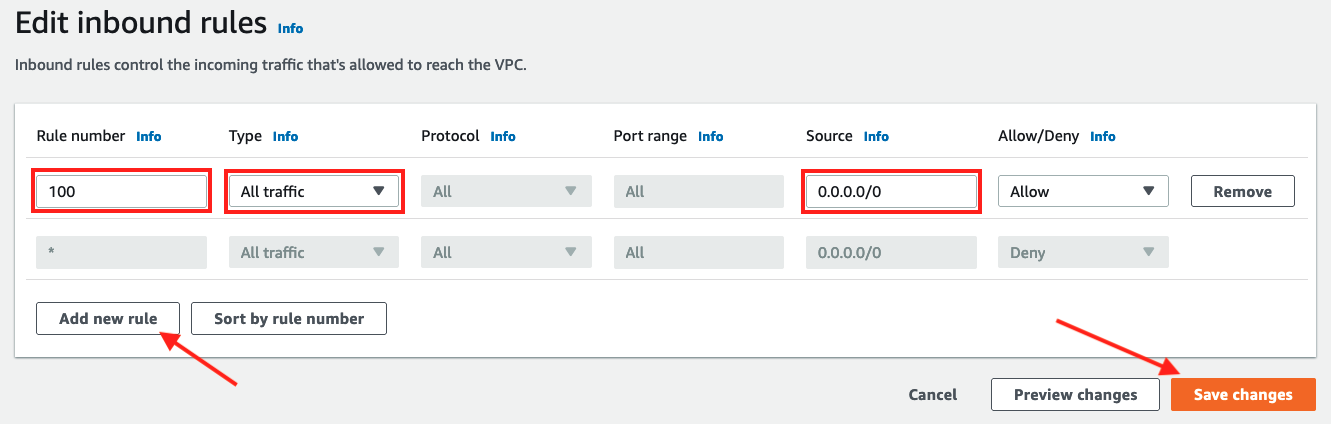
In Edit inbound rules screen
- Click Add new rule
- Input
100in Rule number - Choose
All trafficin Type - Leave Source as
0.0.0.0/0 - Click Save changes
-
In the resulting screen you should have a success banner and a new
Allowrule under the Inbound rules tab: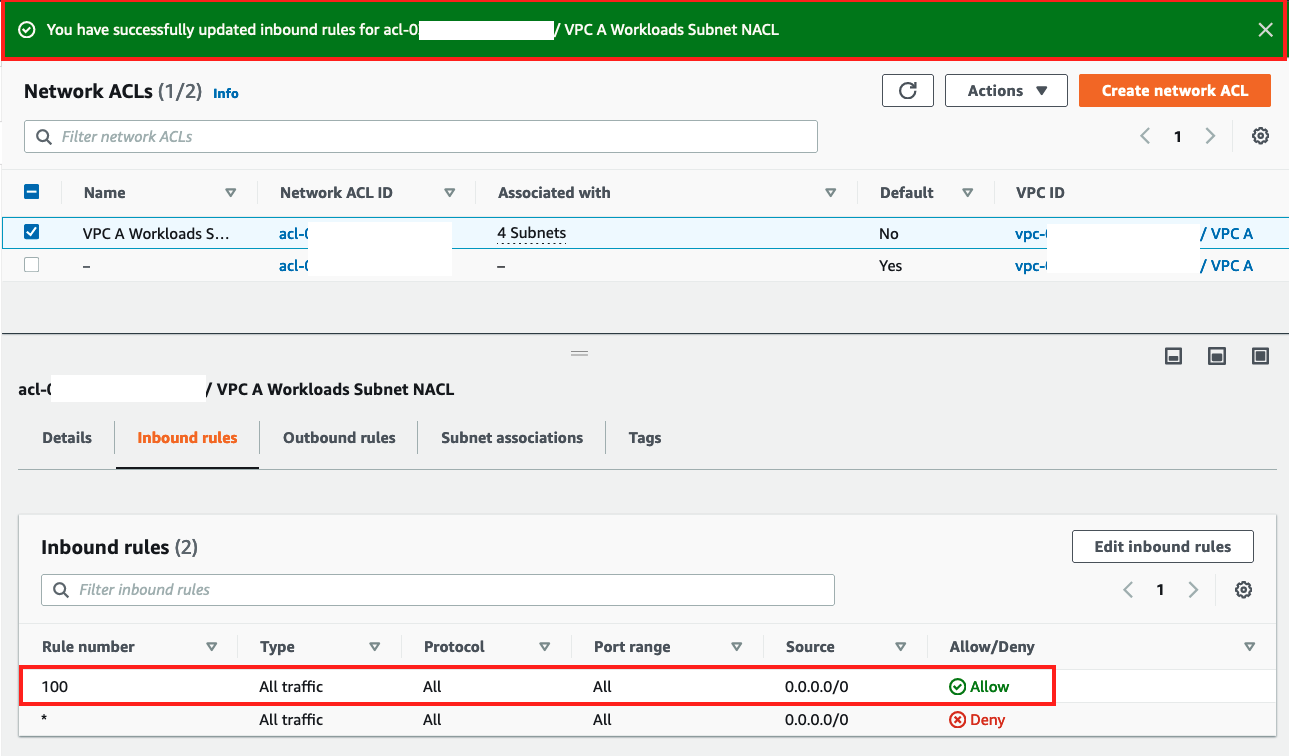
Now follow the same steps described above for Inbound, but work on Outbound Rules tab of NACLs
-
On the Outbound Rules tab
- Note that we have only
DENYall rule - Click Edit outbound rules
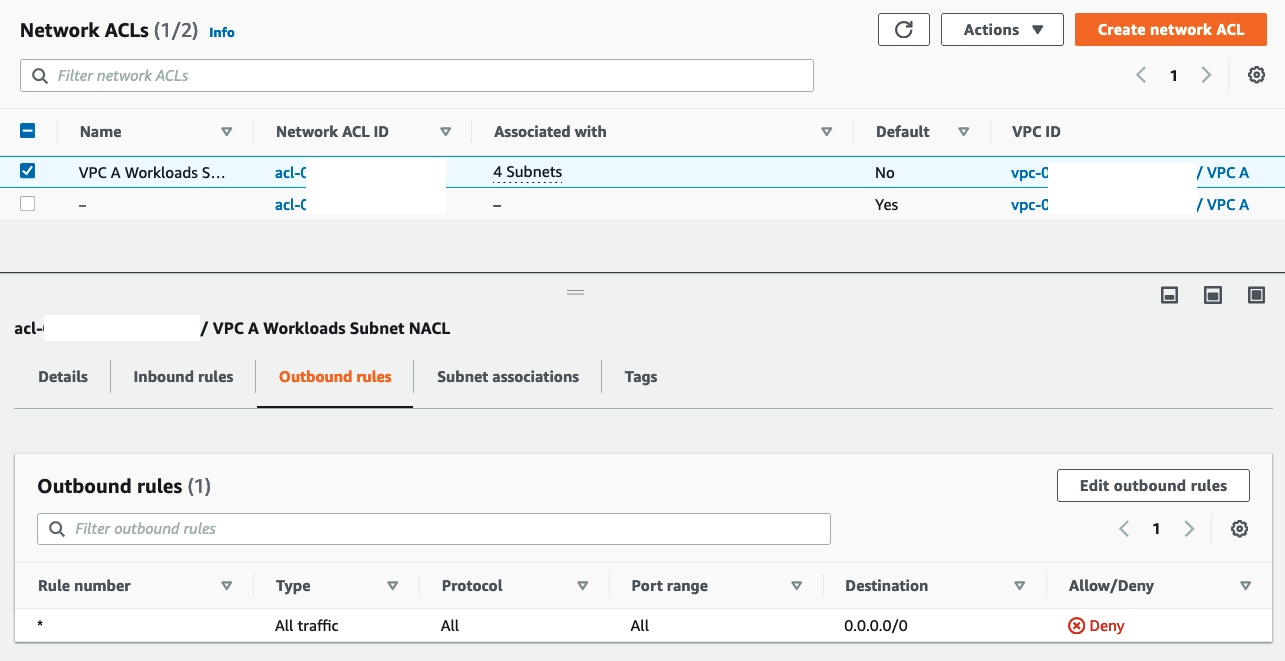
- Note that we have only
-
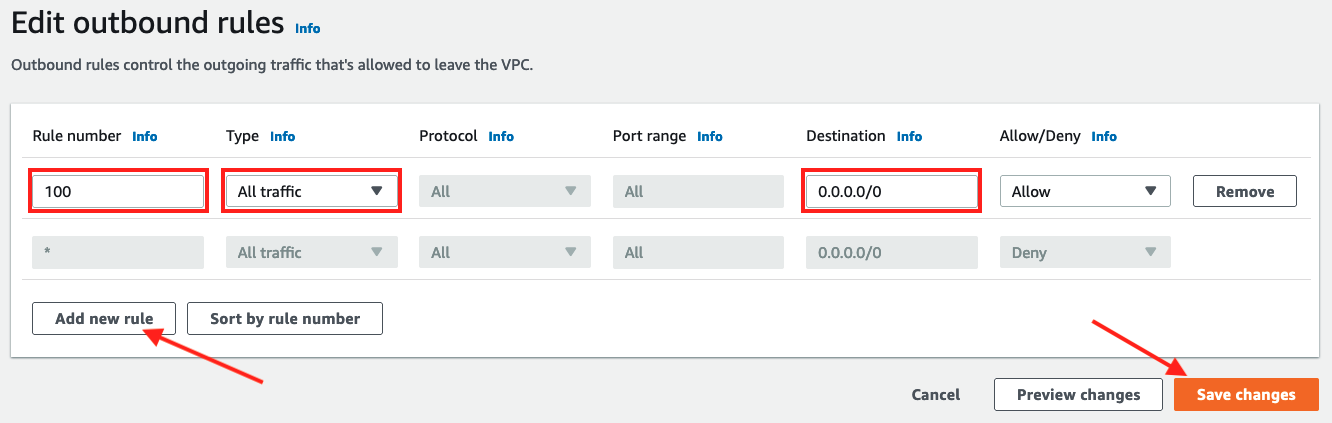
In the Edit outbound rules screen
- Click Add new rule
- Input
100in Rule number - Choose
All trafficin Type - Leave Destination as
0.0.0.0/0 - Click Save changes
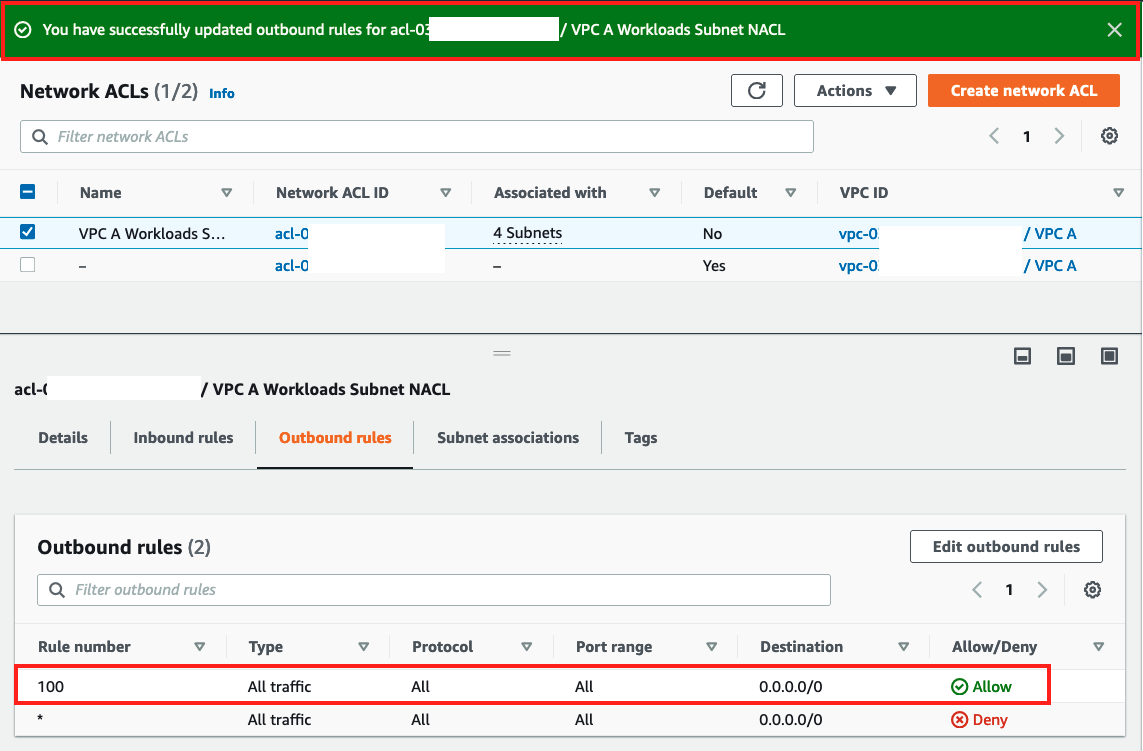
-
On the resulting screen check that the rule has been added under the Outbound rules tab
Important
Allowing all traffic in and out of your subnets is not a good security posture. You can use NACLs to set broad rules and/or DENY rules, and then use Security Groups to create fine grained rules. For example, you can deny traffic from specific IPs with NACLs but not with Security Groups.
We will explore Network ACLs and Security Groups more in the Basic Security section.