Intro
Important
Please note, this on-prem VPN module is stand alone and is not required to be completed to proceed with the Network Monitoring moduel.
Amazon Virtual Private Cloud (Amazon VPC) provides multiple options to integrate existing data center networks with your AWS VPCs, including AWS Managed Site-to-site (IPsec) VPNs and Direct Connect connections. AWS VPN connections provide up to 1.25gbps of throughput per tunnel. When used in conjunction with the Transit Gateway, AWS VPN supports Equal-Cost Multipathing (ECMP) to allow you to scale VPN throughput.
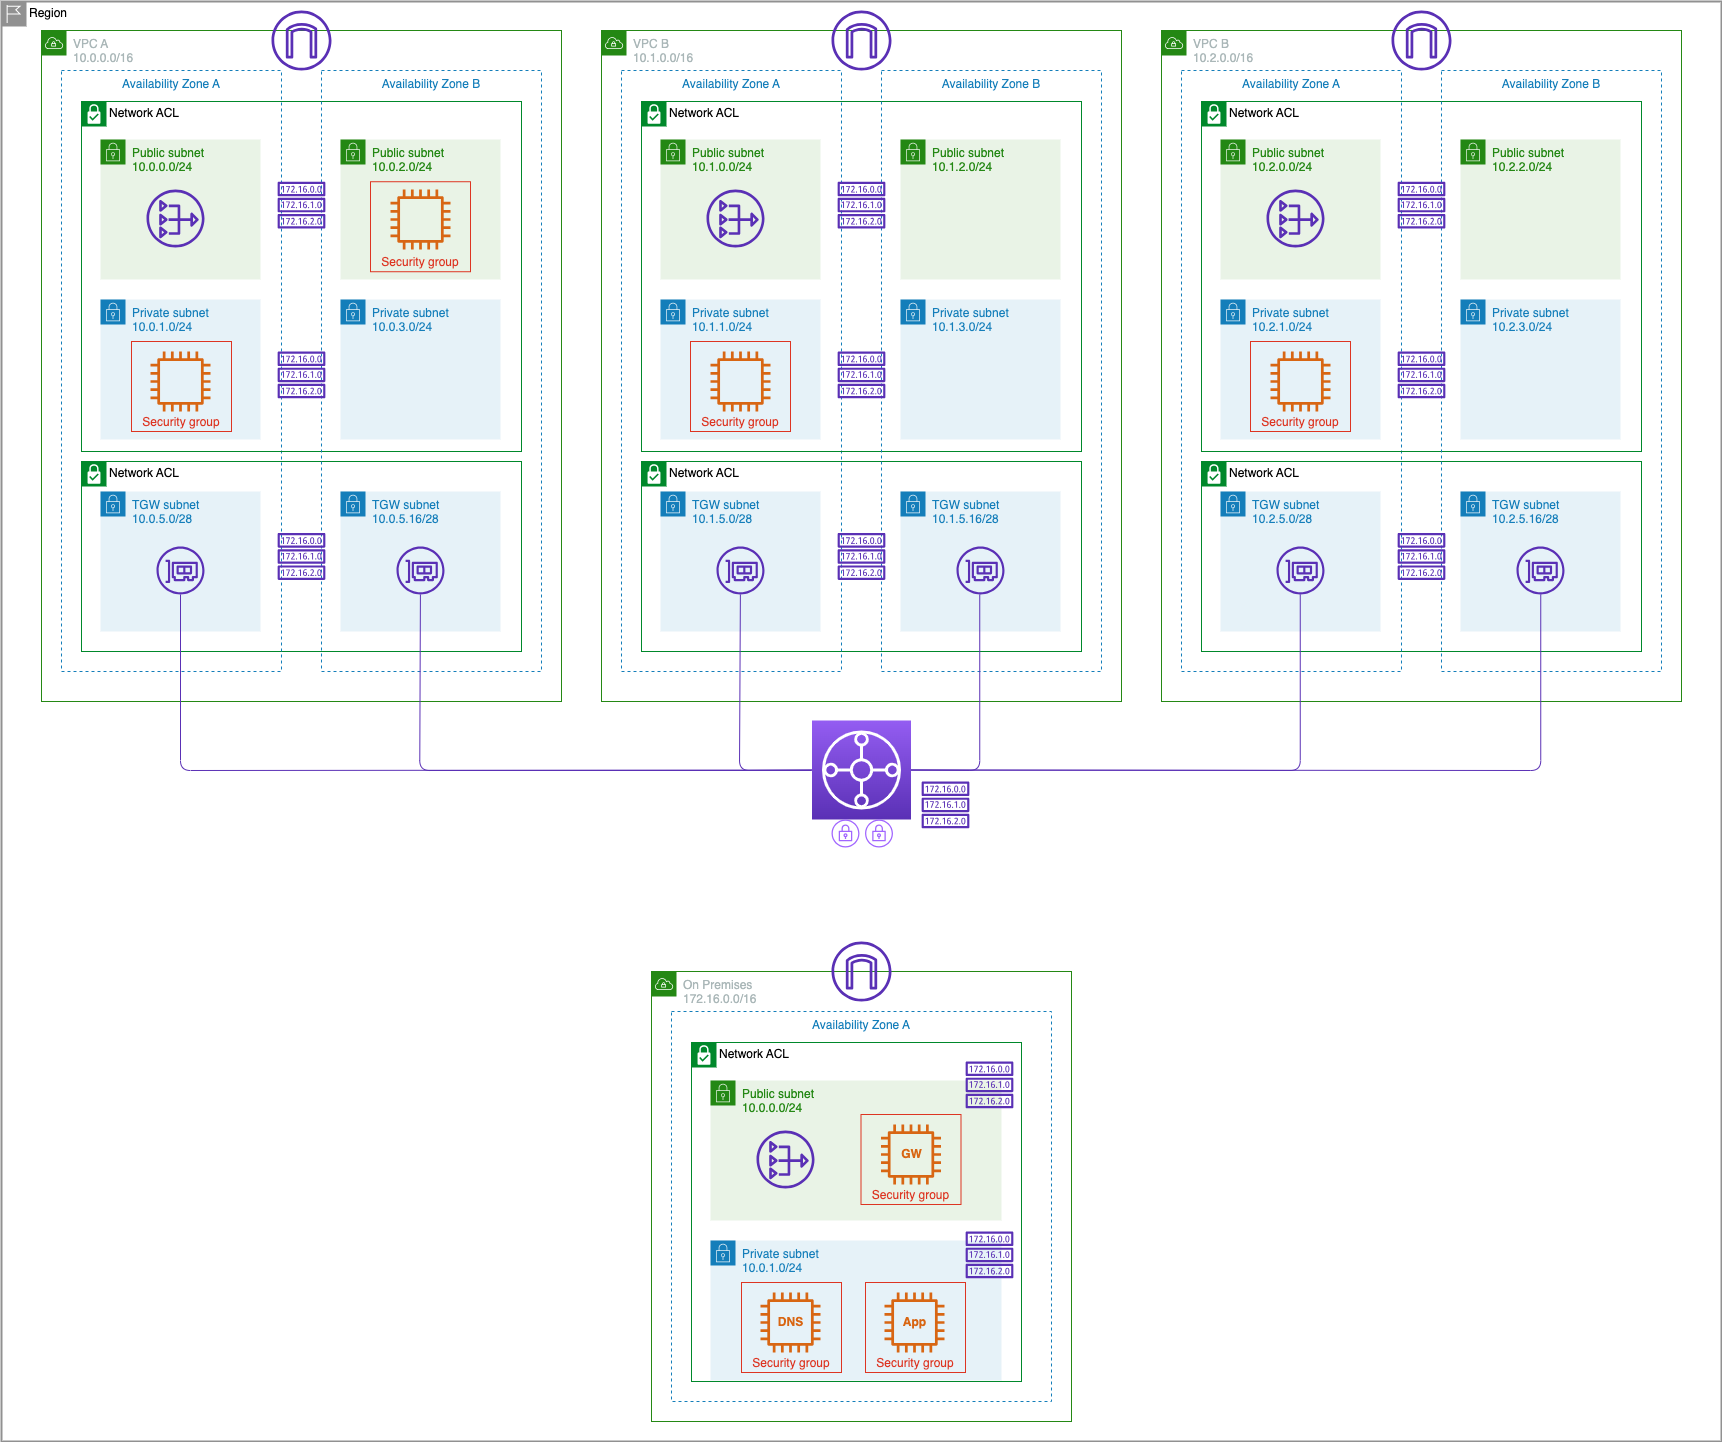
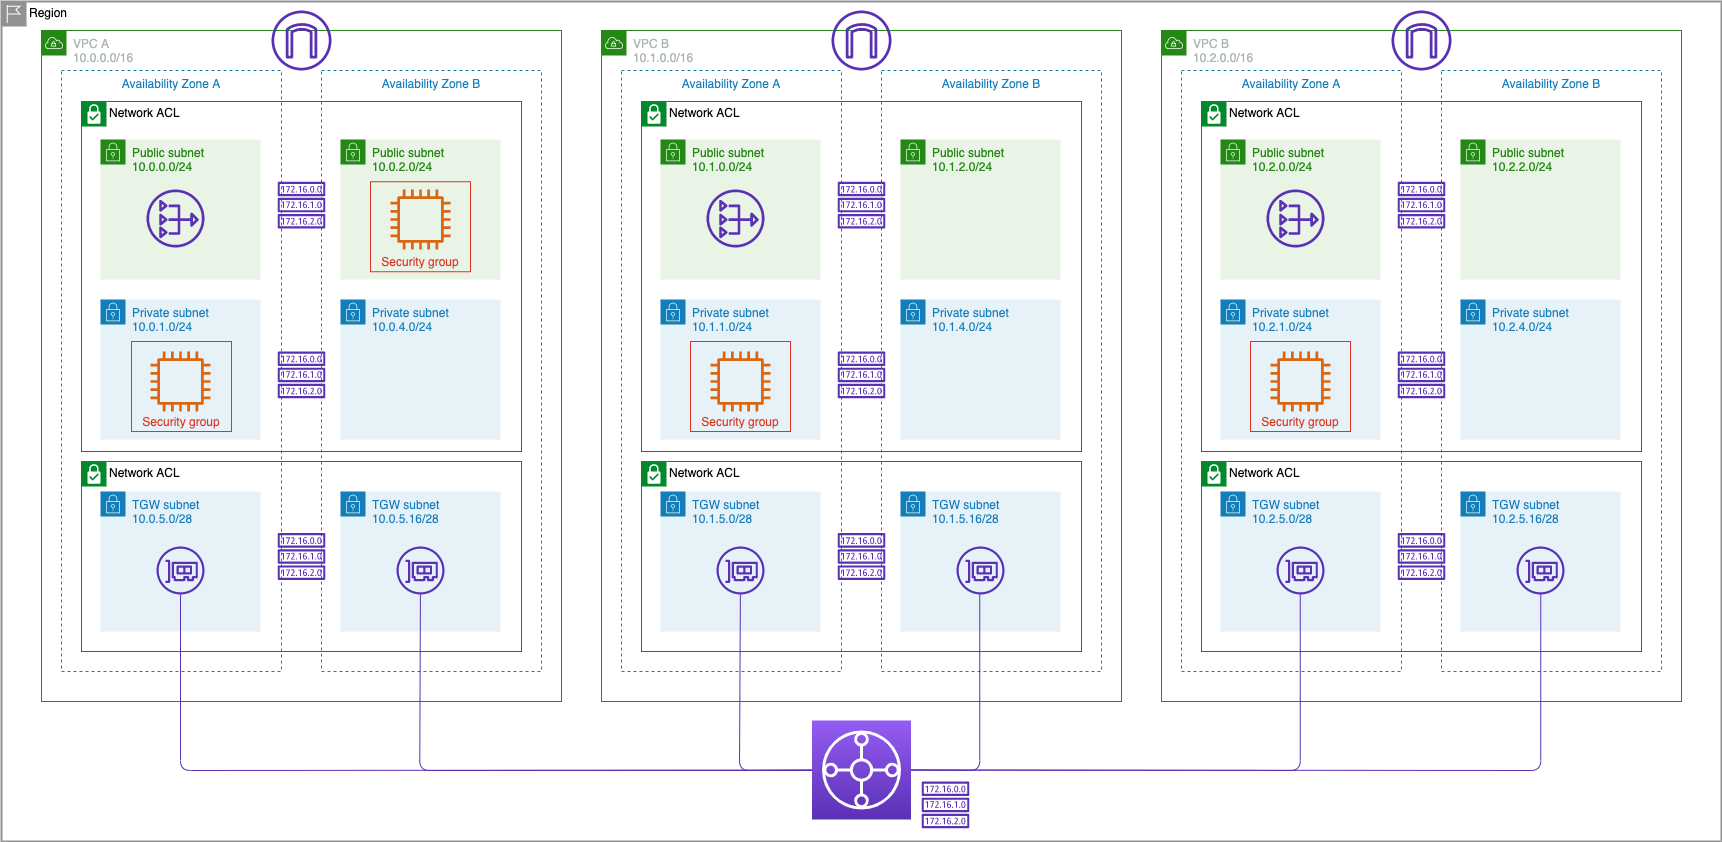
In this lab, we will be standing up a simulated data center environment and connecting it with the existing Transit Gateway that was set up in the "Multiple VPCs" lab. Recall that at the end of that lab, we had provisioned 3 AWS VPCs and EC2 instances in each VPC. The VPCs were interconnected using Transit Gateway.
To build out our simulated data center environment and connect it to our AWS environment, we will:
- Deploy a VPC containing a simulated datacenter environment, with DNS server and a simple web application.
- Establish VPN connectivity between the simulated datacenter and the AWS environment.
- Set up DNS resolution between the AWS environment and simulated datacenter.
- Test connectivity from the AWS environment to the simulated datacenter.
Important
If you are running this lab in AWS Workshop Studio, the region has been set by your facilitator. The region you see in screenshots may not match your environment. This will not cause any problems.
If you are running this lab in your own AWS Account, it is recommended for all lab resources to be created in us-east-1 region so that the screenshots match your environment. This is not mandatory.
Prerequisites
If you have not completed the Multiple VPCs sections...
- Download the following CloudFormation template to create three VPCs connected by a Transit Gateway:
-
Navigate to CloudFormation section in the AWS console. Click Create stack button and select With new resources (standard).
-
Under Specify template, select Upload a template file, click Choose file and select the CloudFormation template that you downloaded above. Click Next.
-
Enter the Stack name
NetworkingWorkshopMultiVPCandTGW. Update the Parameter ParticipantIPAddress. Leave the other parameter defaults unchanged if you are running in us-east-1 and click Next. If you are running in another region, update the availability zones.

- Scroll to the bottom of the Configure stack options page and click Next again.
- Scroll to the bottom of the Review page and click the Submit button.
- The CloudFormation will begin deployment which you can follow by refreshing the Events and Resources tab.
- Once the CloudFormation template finishes lets go take a look at what it created. Click on the resources tab and you will find all the resources that were built as part of the CloudFormation stack.
This stack will create 3 VPCs each with two public subnets and two private subnets, a Transit Gateway to provide private connectivity between the VPCs, as well as EC2 instances in the VPCs.
Wait for the stack to be created before proceeding. This can take 3-5 minutes. Verify that the status in CloudFormation Console show as CREATE_COMPLETE, indicating successful creation of the stack.
Deploy VPC to simulate 'On-Premises'
Now we are ready to deploy a provided CloudFormation template a the simulated on-premises environment. This stack will create a VPC that will act as our on-premises environment with a public and private subnet as well as the three EC2 instances for a Customer Gateway Server, DNS Server, and Application Server.
-
Load the following CloudFormation template:
-
Enter the Stack name
NetworkingWorkshopOnPremisesVPC - Update ParticipantIPAddress and then accept the remaining default values in Configure stack options
- Click on Next
- Click on Create stack

Wait for the stack to be created. This can take up to 10 minutes.
Important
If the deployment of the CloudFormation template fails due to the Elastic IP address limit being reached and you are using your own AWS account, please refer to the Elastic IP Quota section in Prerequisites - Your own AWS Account.
Now we are ready to create the VPN connection between AWS and the on-premise Customer Gateway