Transit Gateway
AWS Transit Gateway connects your Amazon Virtual Private Clouds (VPCs) and on-premises networks through a central hub. This simplifies your network and puts an end to complex peering relationships. It acts as a cloud router – each new connection is only made once.
Create the Transit Gateway
- In the left hand pane of the VPC Dashboard scroll down and click on Transit Gateways
-
Click on Create Transit Gateway

3. Add a name for the new Transit Gateway asTGWand add a description ofTGW for us-east-1.
4. SelectMulticast supportand keep the remaining settings at the defaults. You will need this option enabled if you progress to the advanced multicast lab. Click on Create transit gateway.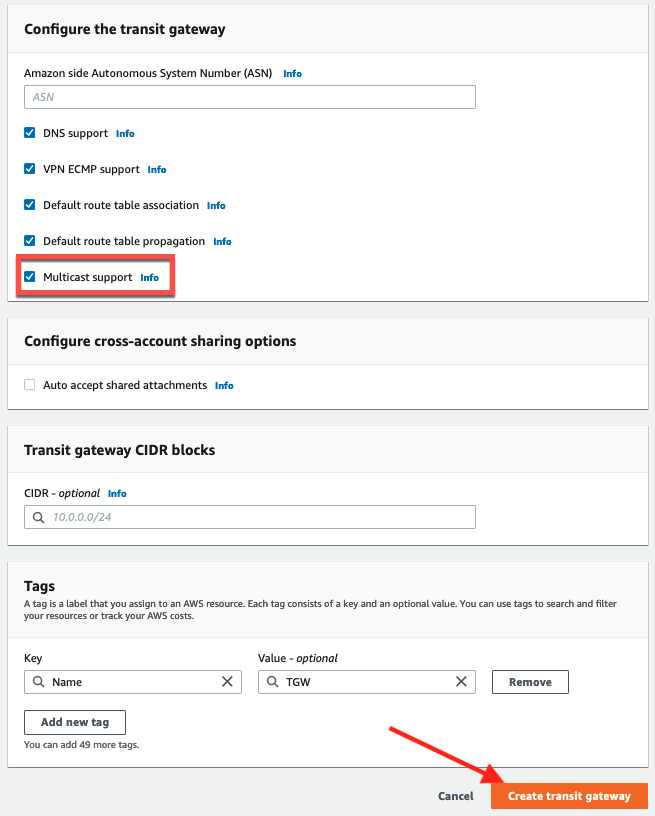
5. The state of the new transit gateway will show as pending for a few minutes.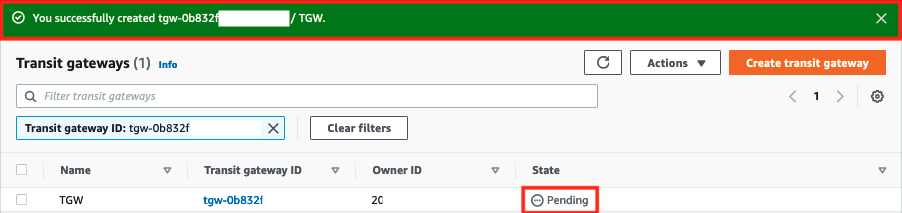
Attach VPCs to Transit Gateway
The best practice for connecting VPCs to Transit Gateway is to use a dedicated /28 subnet in each availability zone and the CloudFormation run earlier created these for VPC B and VPC C alongside two private and public /24 subnets for hosting workloads.
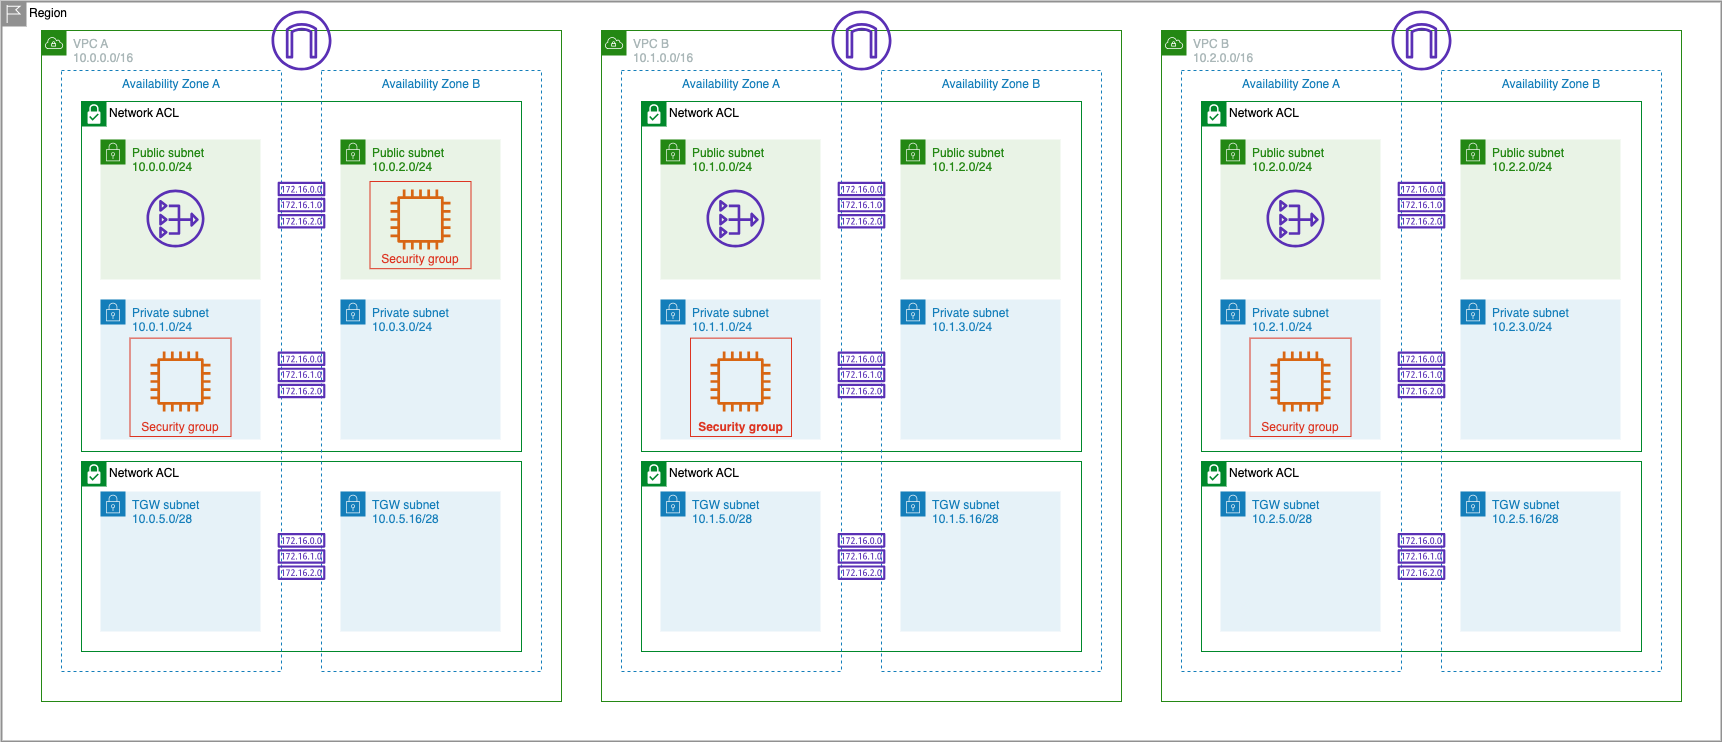
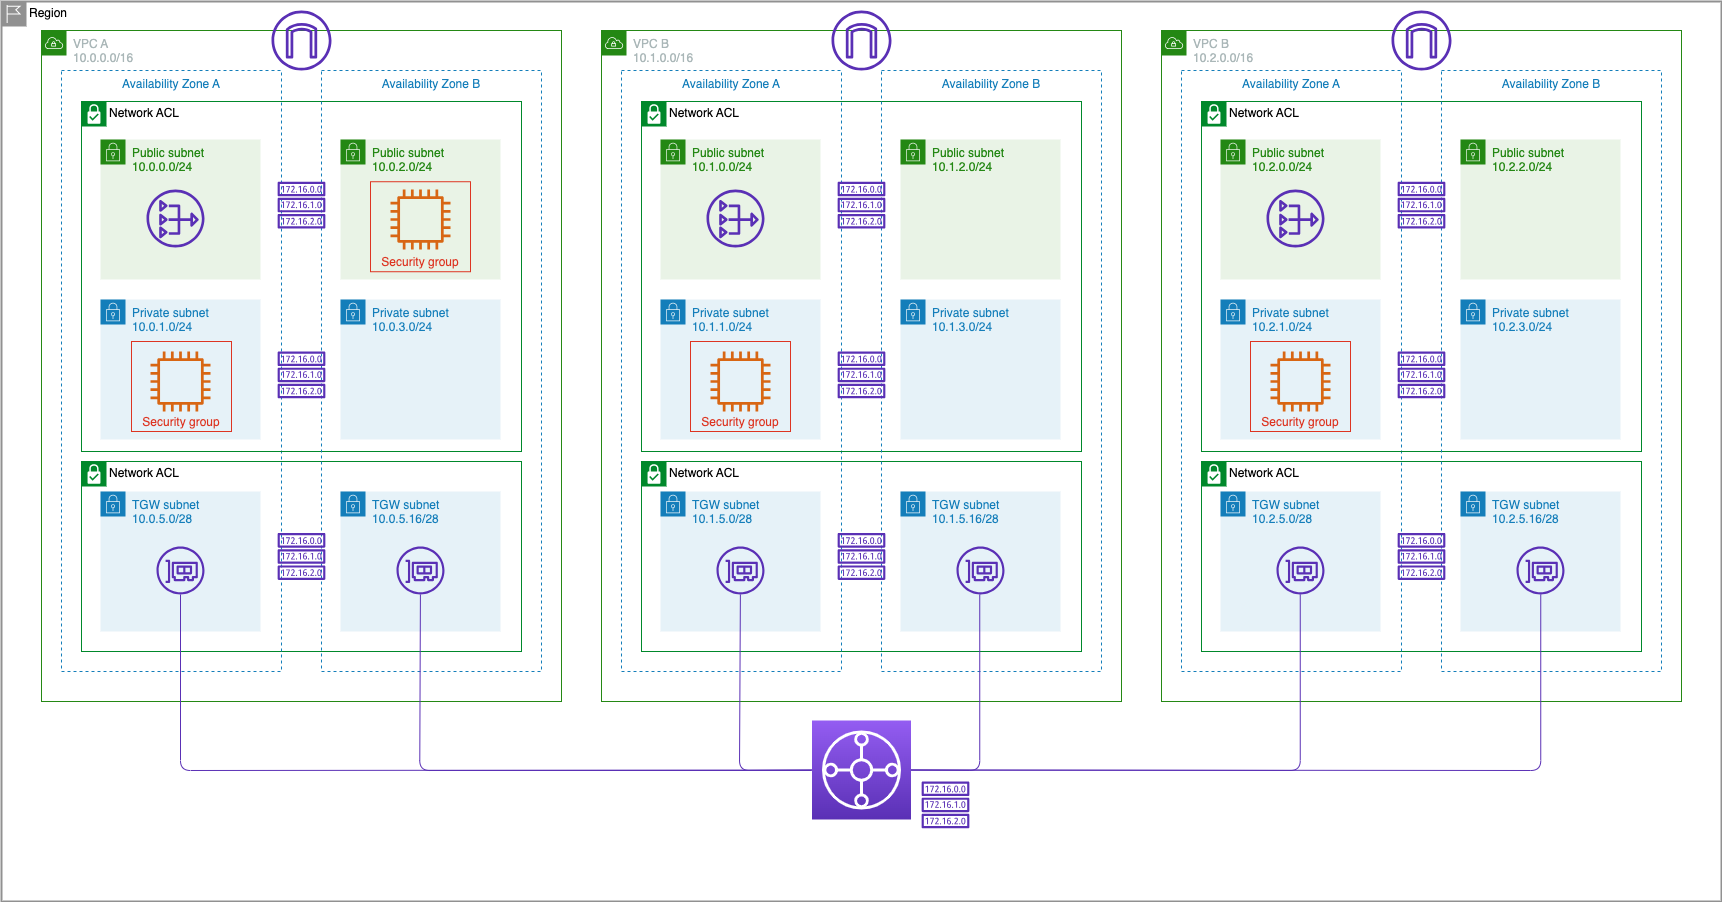
However the "VPC Fundamentals" lab only created the two public and two private /24 subnets for VPC A and our AWS environment currently looks like this:
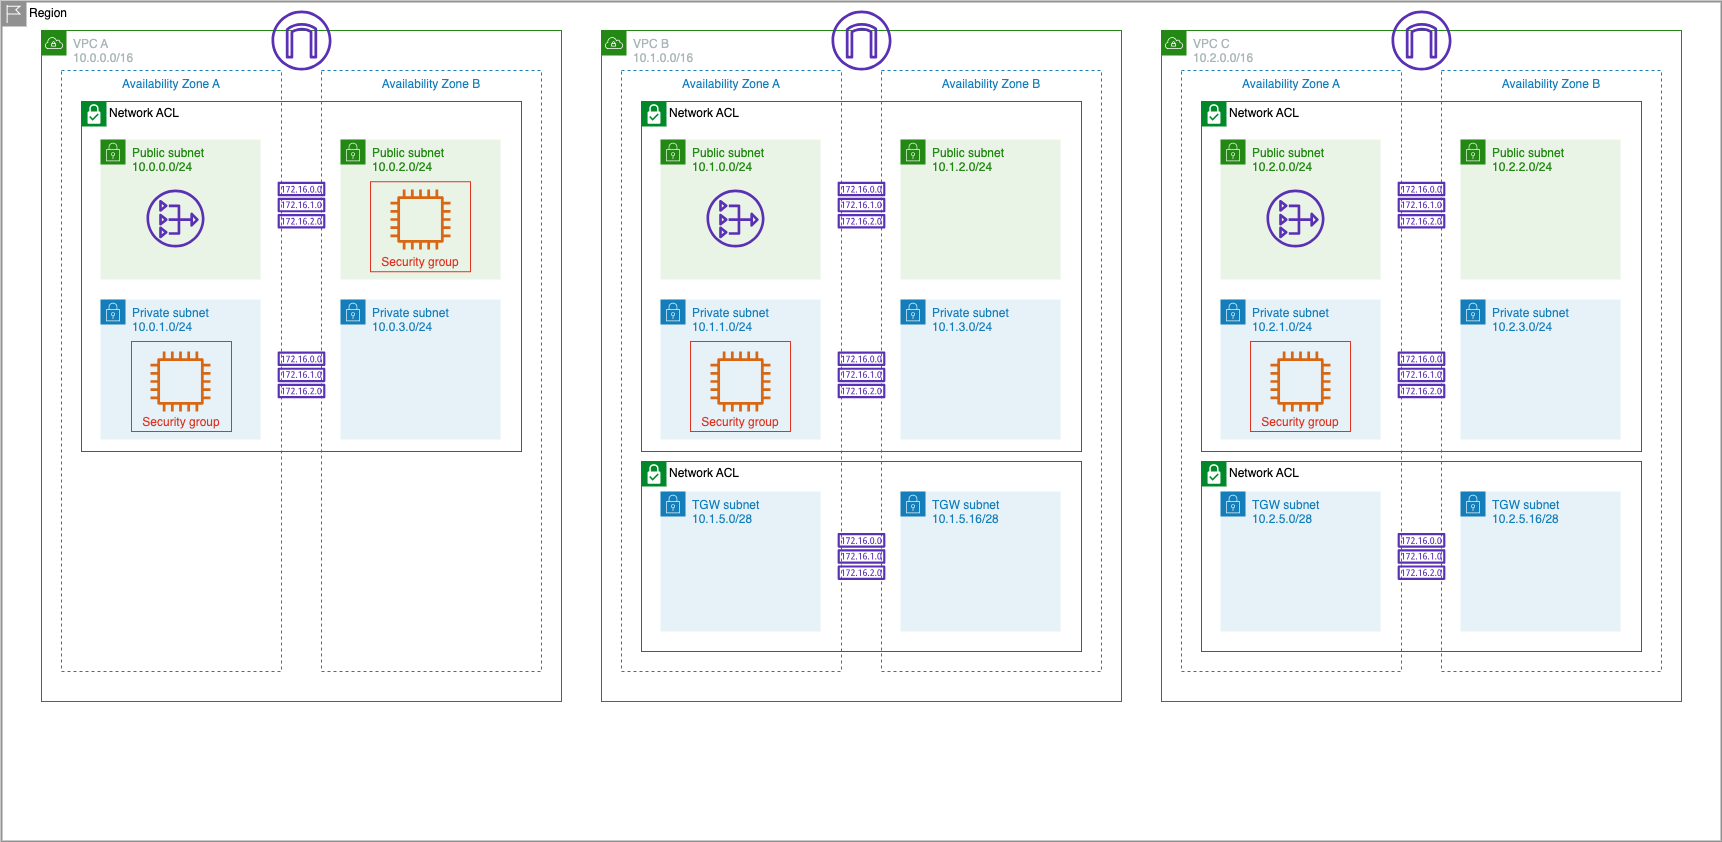
Therefore before we create the transit gateway we need to add a dedicated /28 subnet in each availability zone in VPC A for the transit gateway attachments.
Create Transit Gateway Subnets in VPC A
-
Within the VPC Dashboard click on Subnets and click the Create subnet button

2. Create a subnet under VPC A with a name ofVPC A TGW Subnet AZ1inus-east-1awith a CIDR block of10.0.5.0/28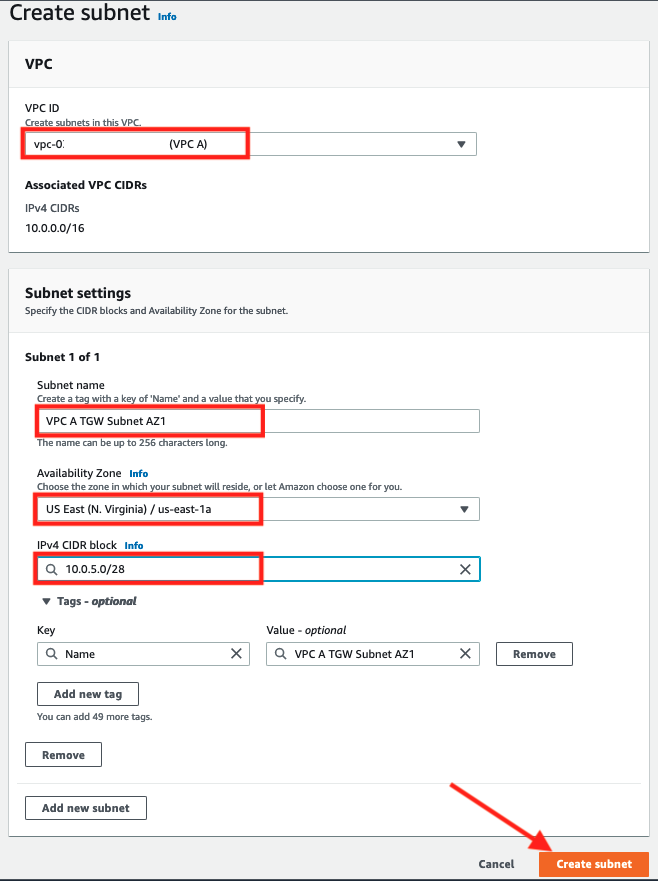
3. Create another subnet under VPC A with a name ofVPC A TGW Subnet AZ2inus-east-1bwith a CIDR block of10.0.5.16/28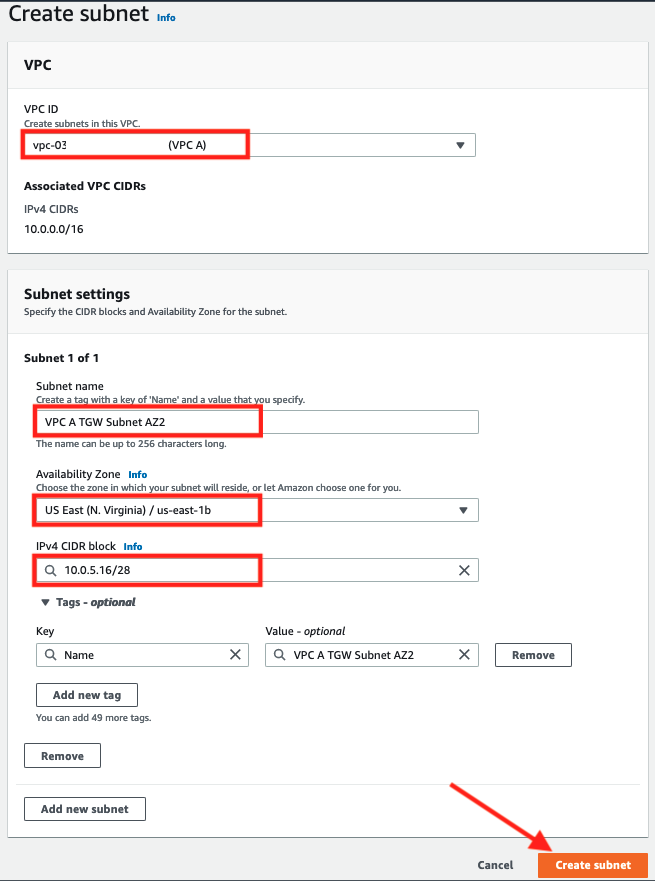
Now that we have subnets to place the transit gateway attachments into we will attach VPC A, VPC B, and VPC C to the transit gateway and test connectivity between our EC2 instances in each VPC.
Create Transit Gateway Attachment for VPC A
- On the left navigation pane go to Transit Gateway Attachments
-
Click on Create Transit Gateway Attachment.

3. EnterVPC A Attachmentas the Name tag.
4. Select the transit gateway from the dropdown for Transit Gateway ID.
5. Leave Attachment Type asVPC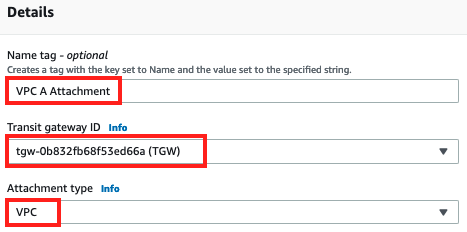
6. Select VPC A from the VPC ID drop down.
7. SelectVPC A TGW Subnet AZ1andVPC A TGW Subnet AZ2for the Subnet IDs.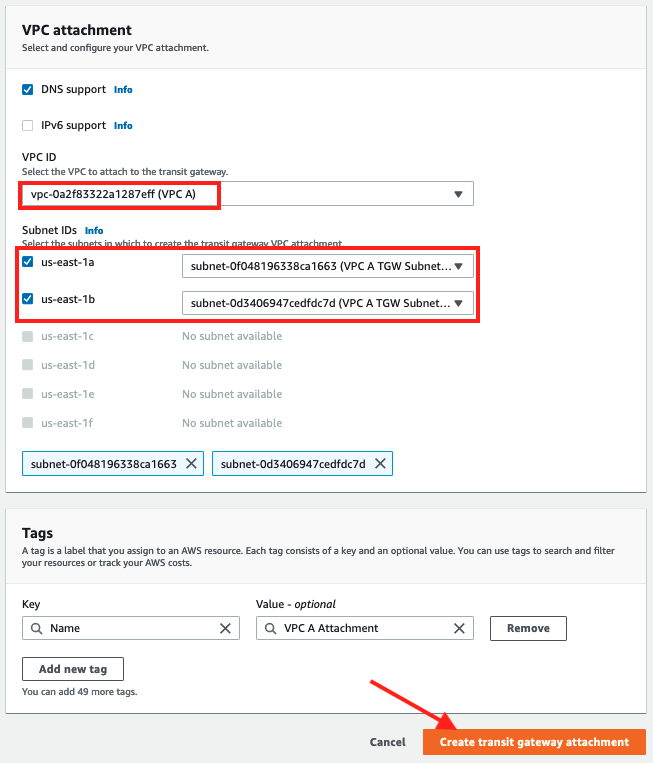
Important
Note that the TGW subnets will not be selected by default, double check the subnets are the TGW ones.
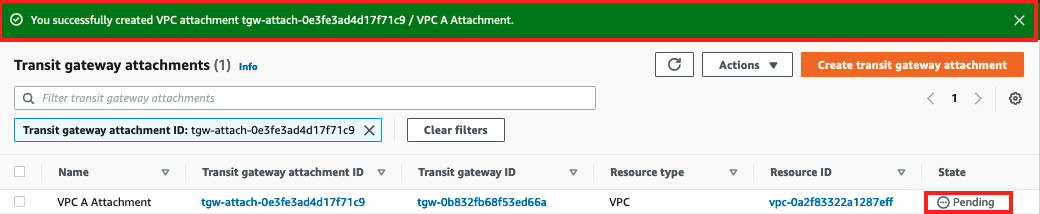
- Click Create transit gateway attachment on the bottom right corner.
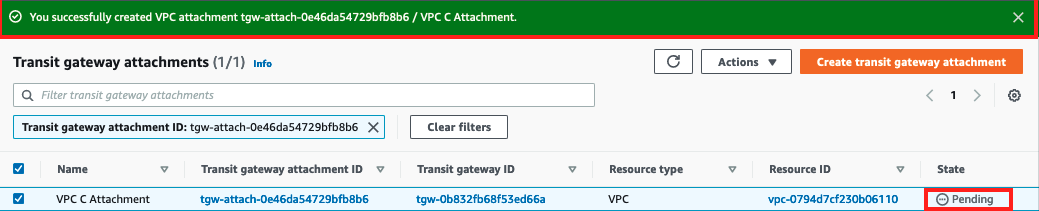
- VPC attachment should create successfully and will be in a pending state initially
Create Transit Gateway Attachment for VPC B
- Click Create Transit Gateway Attachment.
- Enter
VPC B Attachmentas the Name tag. - Select the transit gateway from the dropdown for Transit Gateway ID.
-
Leave Attachment Type as
VPC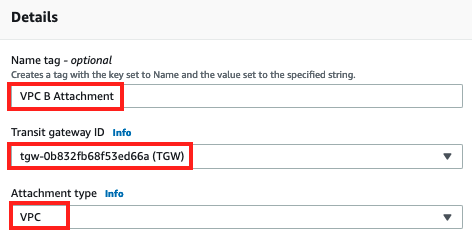
5. Select VPC B from the VPC ID drop down
6. SelectVPC B TGW Subnet AZ1andVPC B TGW Subnet AZ2for the Subnet IDs.
Important
Note that the TGW subnets will not be selected by default, double check the subnets are the TGW ones.
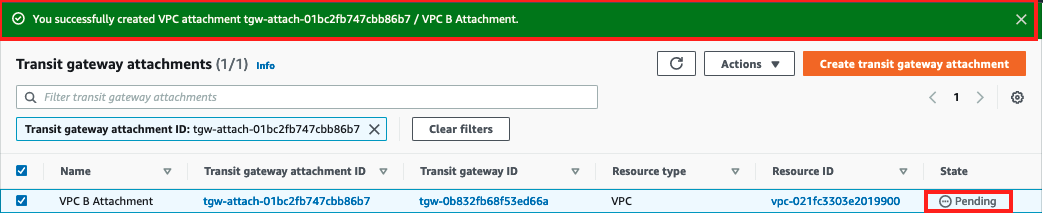
- Click Create transit gateway attachment on the bottom right corner.
-
VPC attachment should create successfully and will be in a pending state initially
Create Transit Gateway Attachment for VPC C
- Click Create Transit Gateway Attachment.
- Name the attachment as
VPC C attachment. - Select the transit gateway from the dropdown for Transit Gateway ID.
-
Leave Attachment Type as
VPC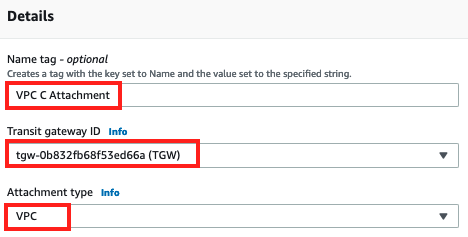
5. SelectVPC Cfrom the VPC ID drop dowm.
6. SelectVPC C TGW Subnet AZ1andVPC C TGW Subnet AZ2for the Subnet IDs.
Important
Note that the TGW subnets will not be selected by default, double check the subnets are the TGW ones.
- Click Create transit gateway attachment on the bottom right corner.
-
VPC attachment should create successfully and will be in a pending state initially
Let’s go take a look at how the Transit Gateway attached to the VPC.
On the left in the EC2 Dashboard click on Network Interfaces

There are now six interfaces with a Description beginning Network Interface for Transit Gateway Attachment... representing the Elastic Network Interfaces that have been placed in each of the two Transit Gateway subnets in each of the three VPCs.
Now that we have attachments in all three VPCs, we need to add routes to their route tables to point traffic to the interfaces.
Add Routes to TGW in the VPC Route Tables
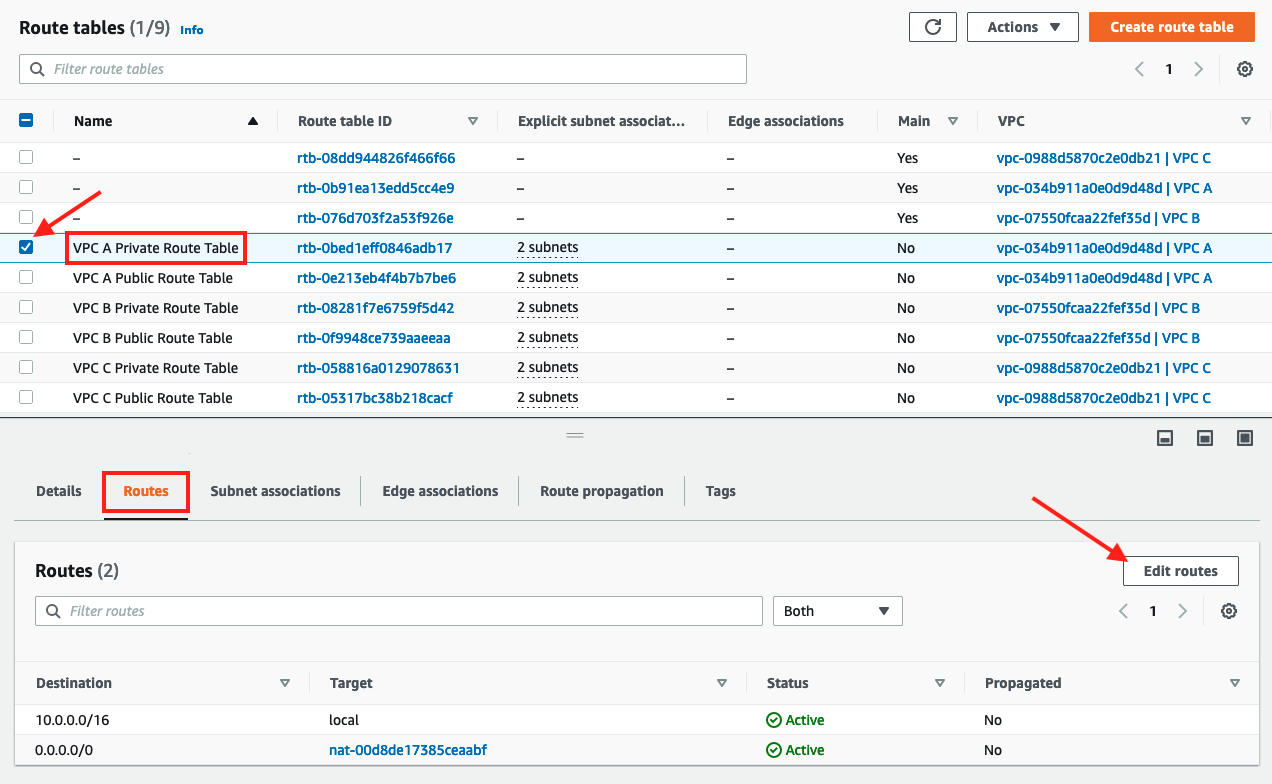
- On the left in the VPC Dashboard click on Route Tables
- Select the check box for
VPC A Private Route Table, scroll down select the Routes tab and click on Edit routes.
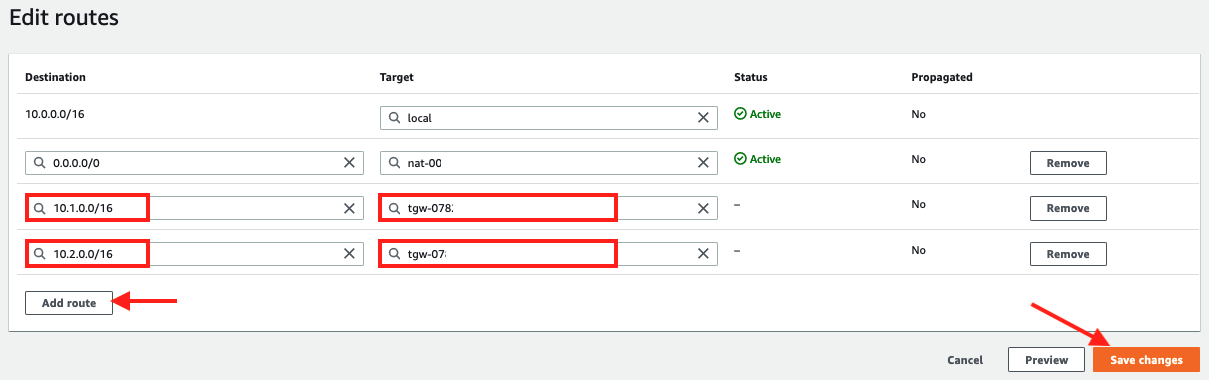
- Add a route to VPC B in the VPC A Private Route Table using a Destination of
10.1.0.0/16with a Target as the transit gateway. - Add a route to VPC C in the VPC A Private Route Table using a Destination of
10.2.0.0/16with a Target as the transit gateway. -
Click Save routes.
6. Confirm that the routes have been added to the route table.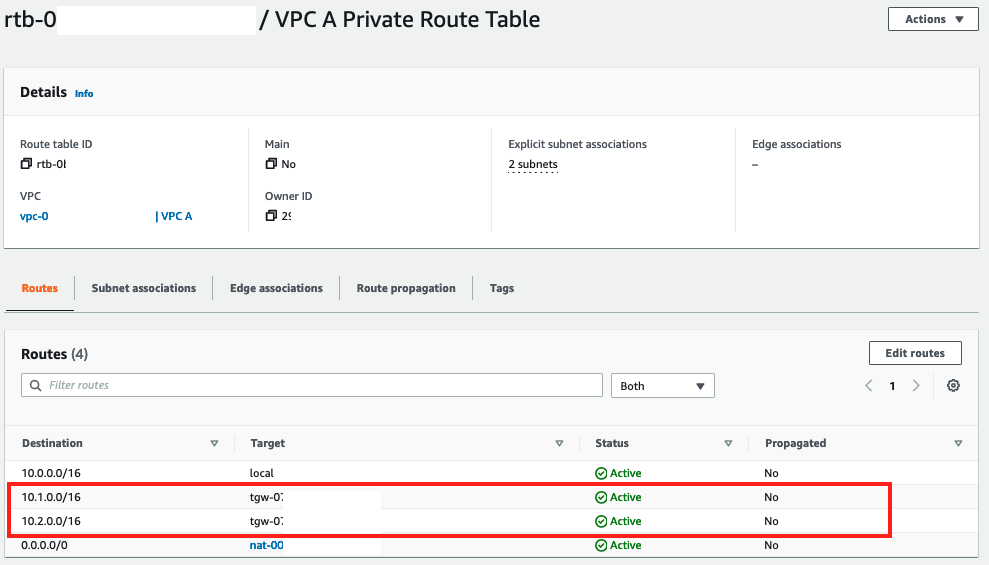
7. Click on Route tables
8. Select the check box forVPC B Private Route Table, scroll down select the Routes tab and click on Edit routes.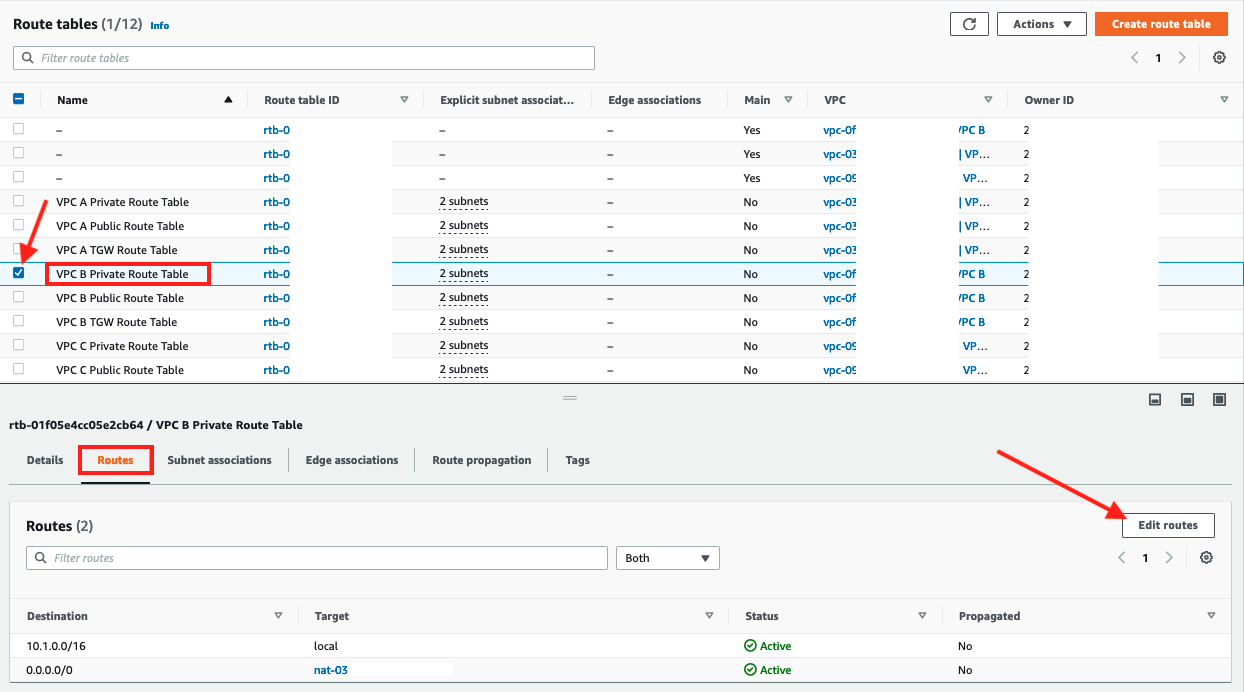
9. Add an aggregate route with a Destination of10.0.0.0/8with a Target as the transit gateway. Click Save routes.
10. Confirm that the route has been added to the VPC B Private Route Table.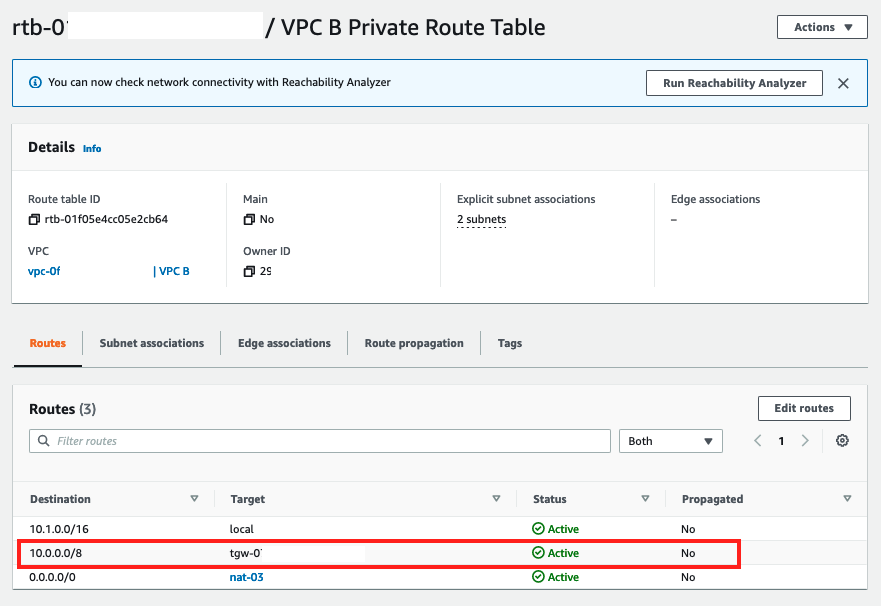
11. Click on Route tables
12. Select the check box forVPC C Private Route Table, scroll down select the Routes tab and click on Edit routes.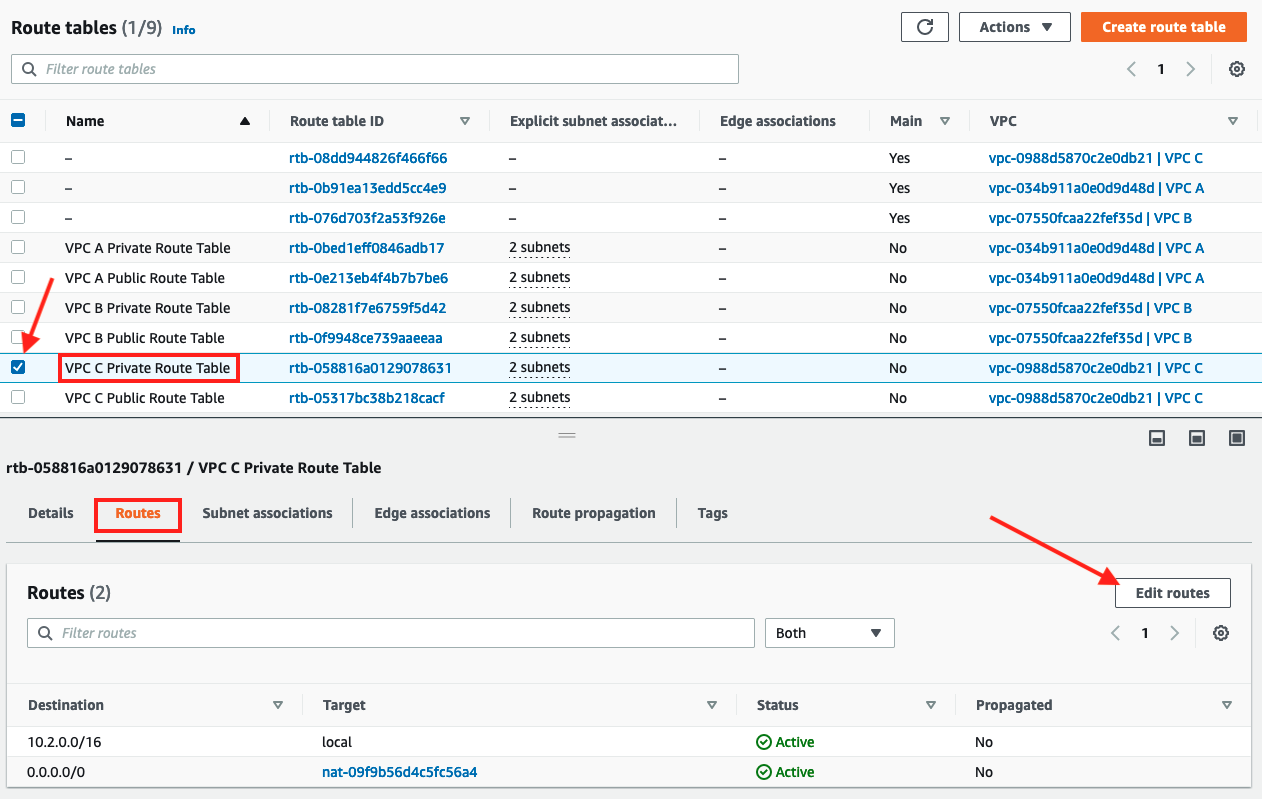
13. Add an aggregate route with a Destination of10.0.0.0/8with a Target as the transit gateway. Click Save routes.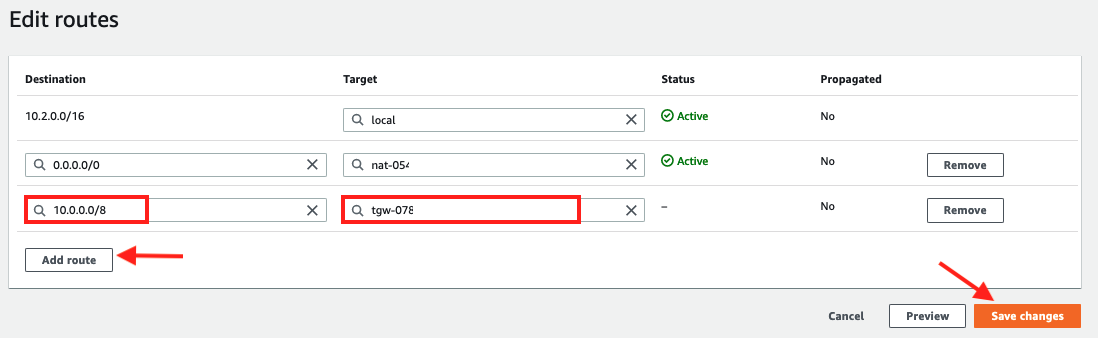
14. Confirm that the route has been added to the VPC C Private Route Table.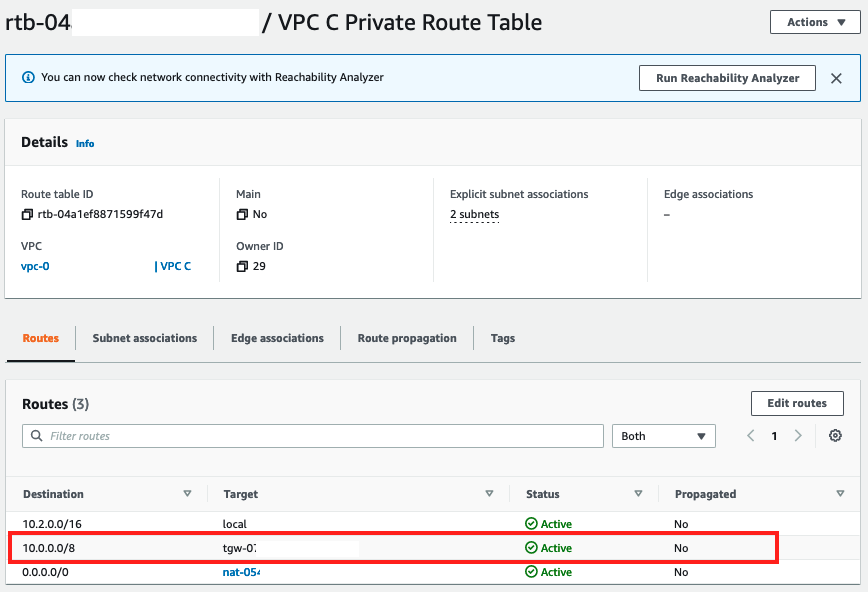
Test Connectivity
Now let’s test the connectivity between the instances in the private subnets in VPC A, B & C.
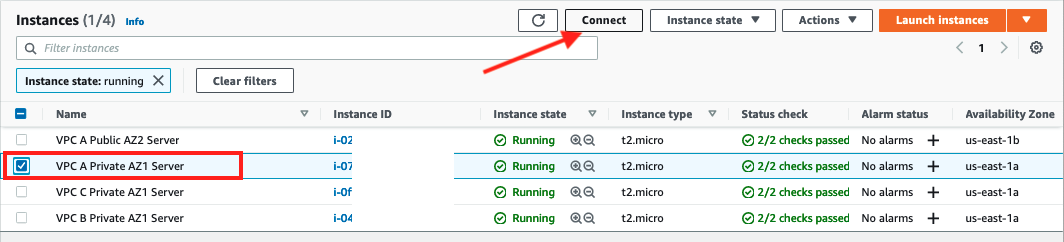
- Navigate to Instances in the EC2 Dashboard
- Select the check box for
VPC A Private AZ1 Serverand click Connect to use Session Manager to connect
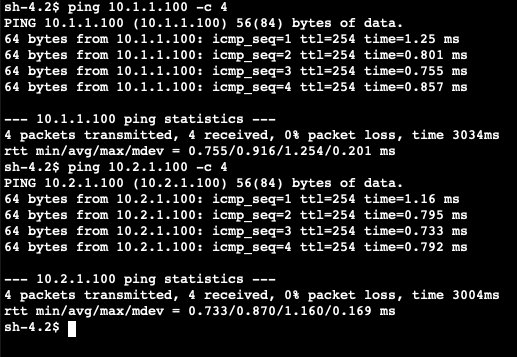
- Confirm connectivity between the VPCs by pinging the IP address on the instances in VPC B and VPC C with the following commands:
ping 10.1.1.100 -c 5
ping 10.2.1.100 -c 5
- You should see a response from both EC2 instances
Congratulations you now have a multi-VPC architecture with connectivity between the VPCs provided by Transit Gateway.
