Setting Up AWS Cloud WAN with Cisco SD-WAN Cloud onRamp
This guide will walk you through the process of configuring AWS Cloud WAN integration with Cisco SD-WAN using the Cloud onRamp for Multicloud feature in vManage.
Prerequisites
Note: These are provided in dCloud, but will be needed if configuring in your own account
- Access to vManage interface
- C8Kv device list already uploaded to vManage
- AWS account with appropriate permissions
- Access and Secret keys for AWS account
Lab Environment Setup
Step 1: Access the Lab Environment
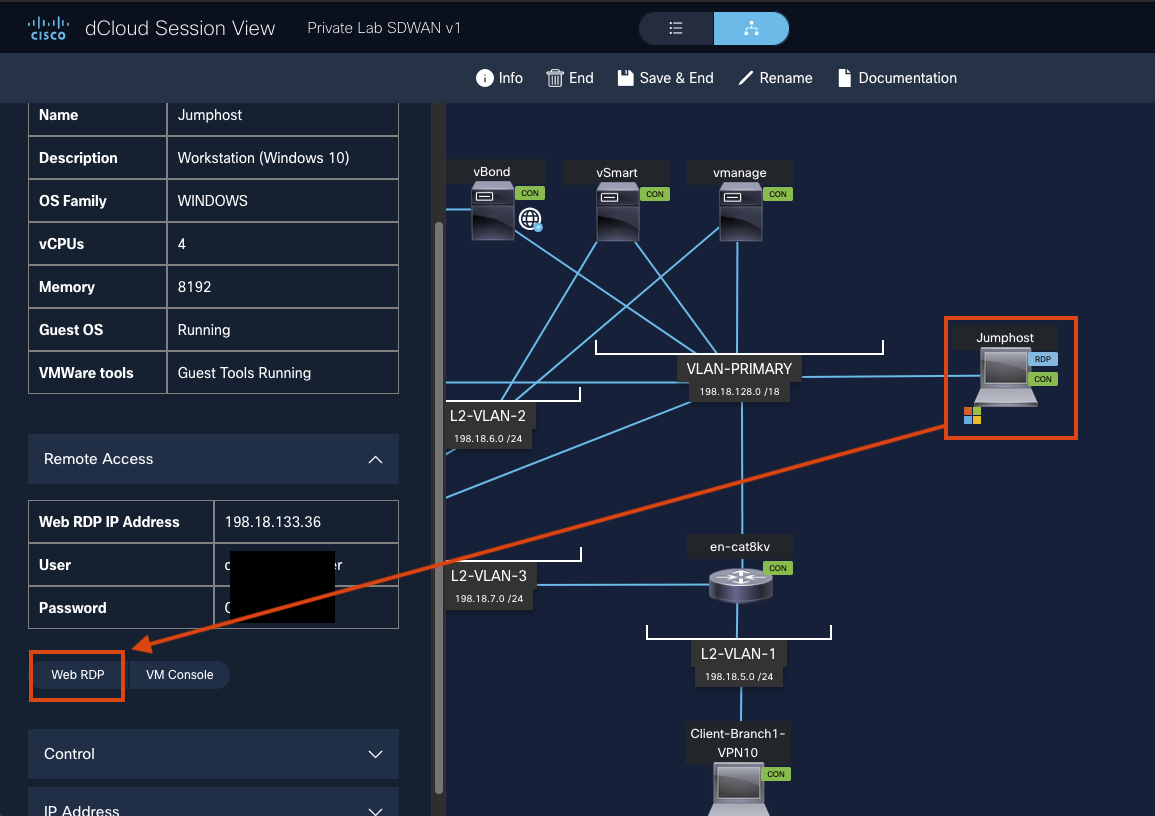
- Navigate to your dCloud session and select Jumphost.
-
On the left panel, click Web RDP to launch the Windows instance in your browser.
-
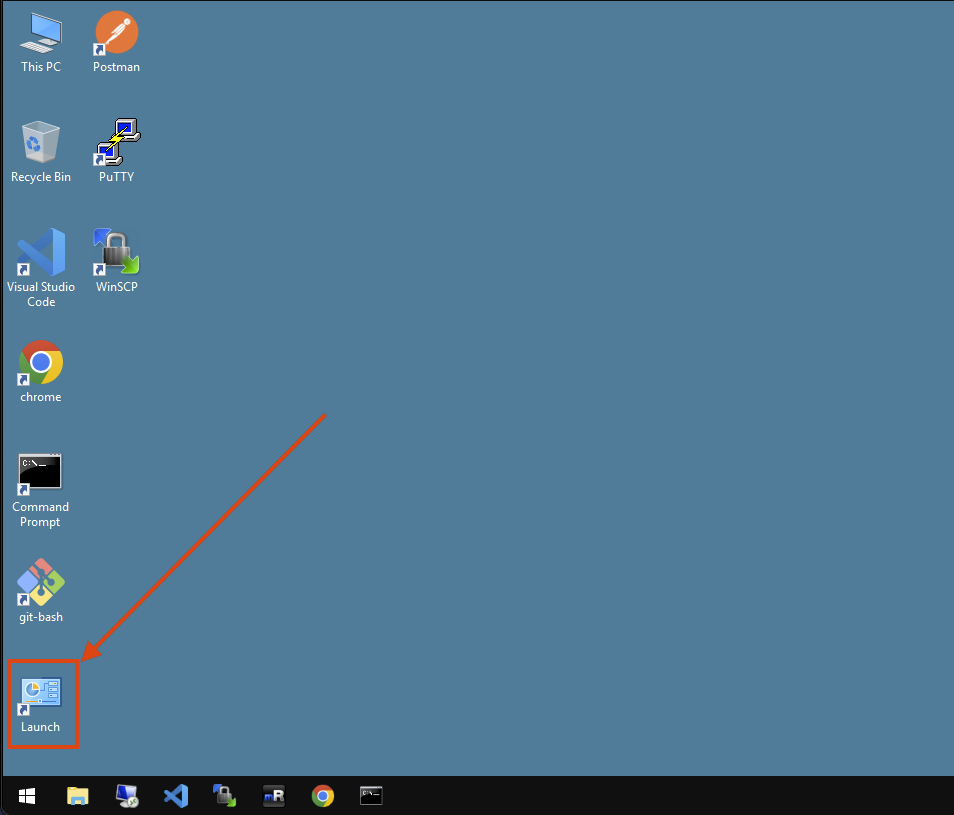
If the browser is not already open, click the browser launch icon to access the AWS portal.
-
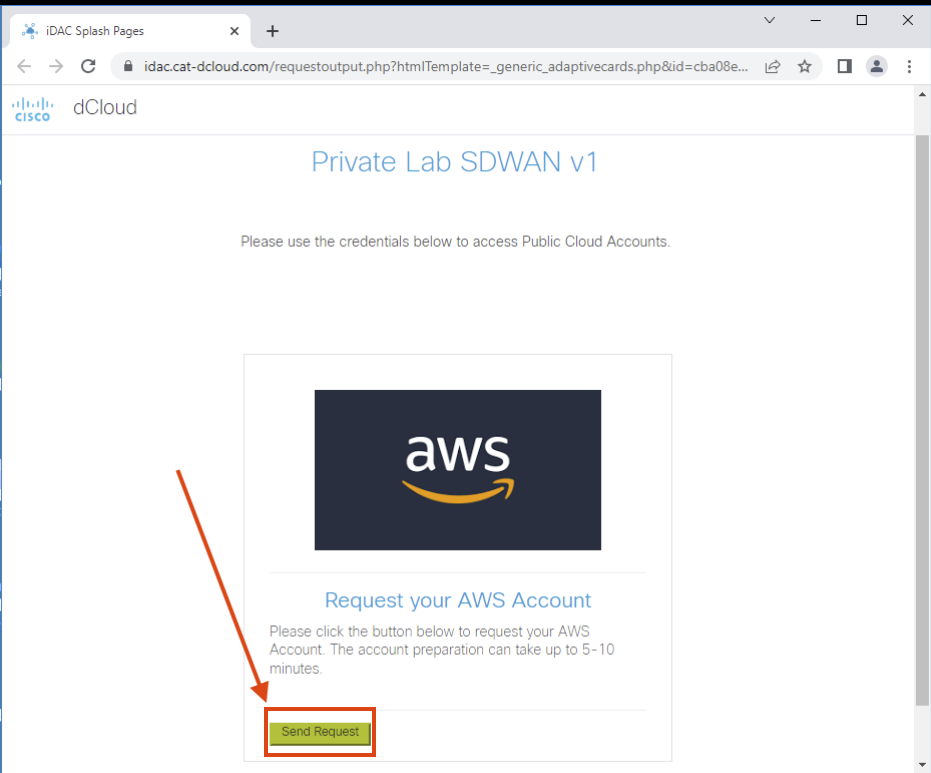
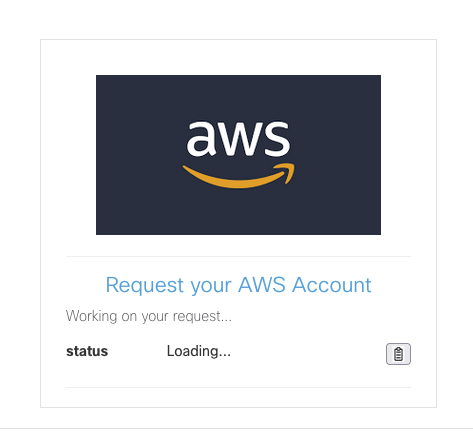
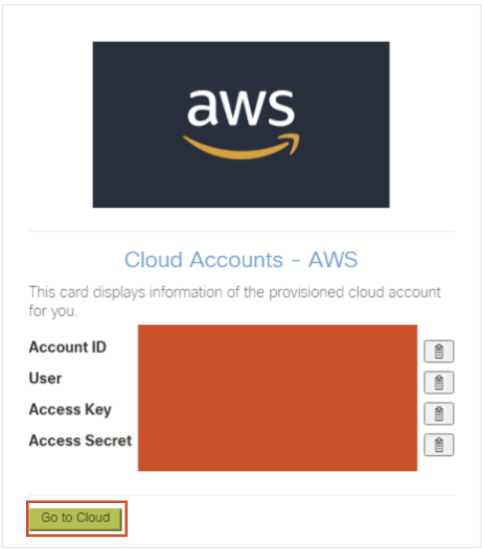
Click Send Request in the AWS account request box. The system will show a "Loading..." status while processing.
-
For optimal experience, access the AWS console through your local browser:
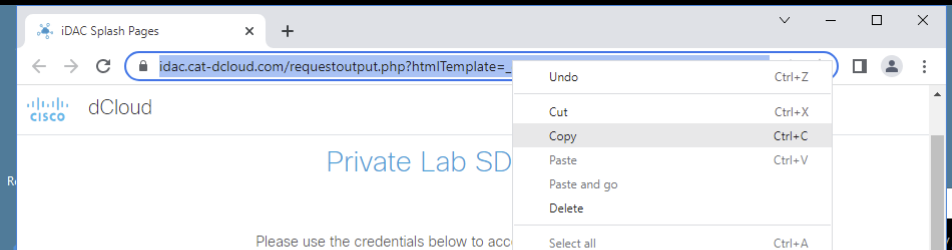
- Right-click the URL and select "Copy"
- Open your local browser (outside the RDP session) and paste the URL
- Wait approximately 5 minutes for account provisioning
- Click Go to Cloud when the button becomes available
Note: Safely proceed to the next step while you wait for account provisioning
Step 2: Access vManage in Your Local Browser
-
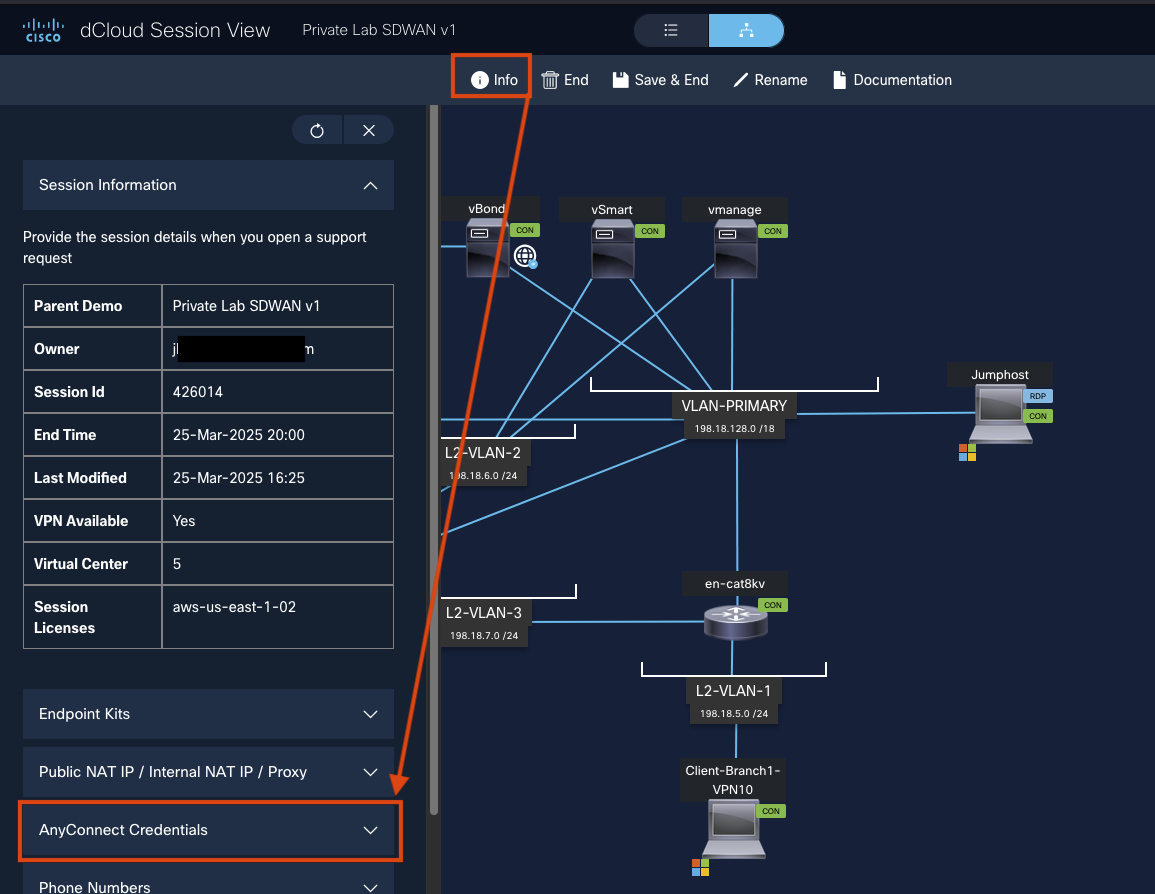
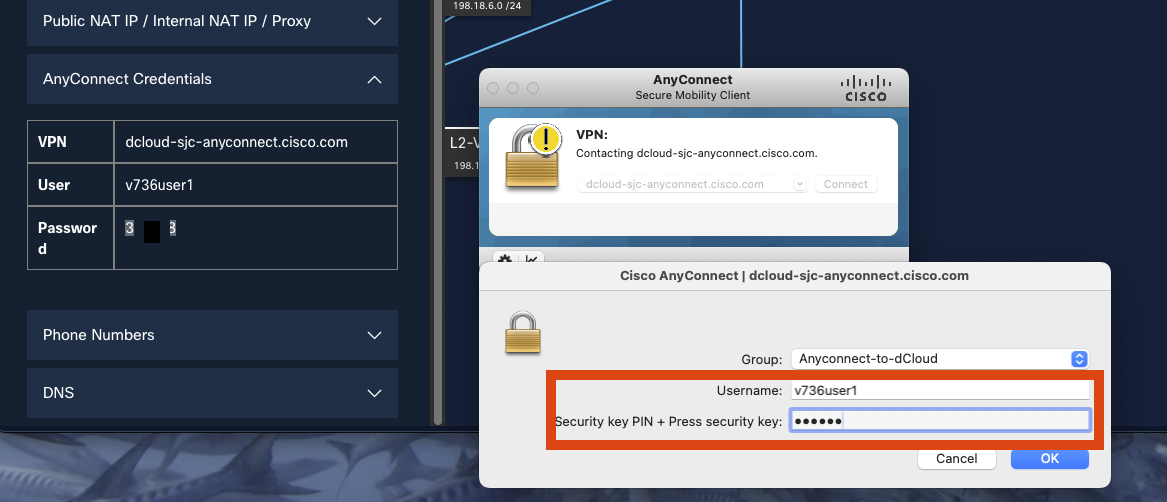
Return to your dCloud session in your local browser and click Info at the top, then select AnyConnect Credentials.
-
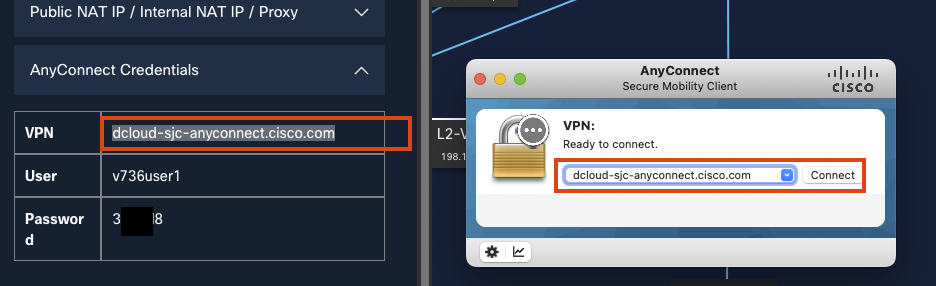
Open AnyConnect VPN client and enter the provided VPN domain.
-
Enter the DemoUsername and DemoPassword provided in the dCloud portal.
-
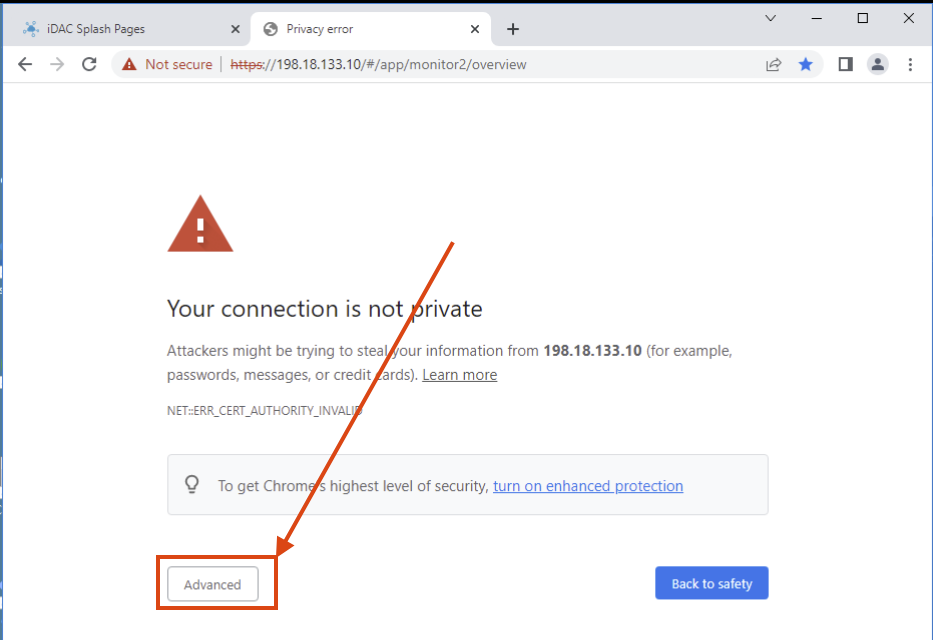
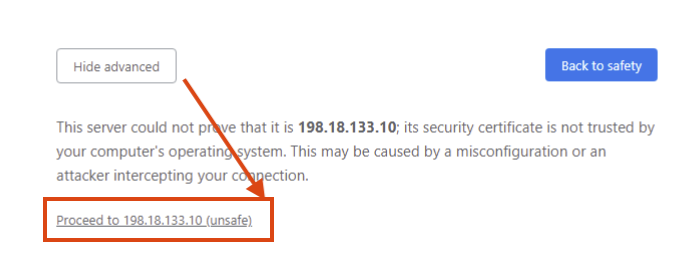
After connecting to the VPN, open a new browser tab and navigate to: 198.18.133.10
-
Click Advanced, then Proceed...(unsafe) to bypass the certificate warning.
-
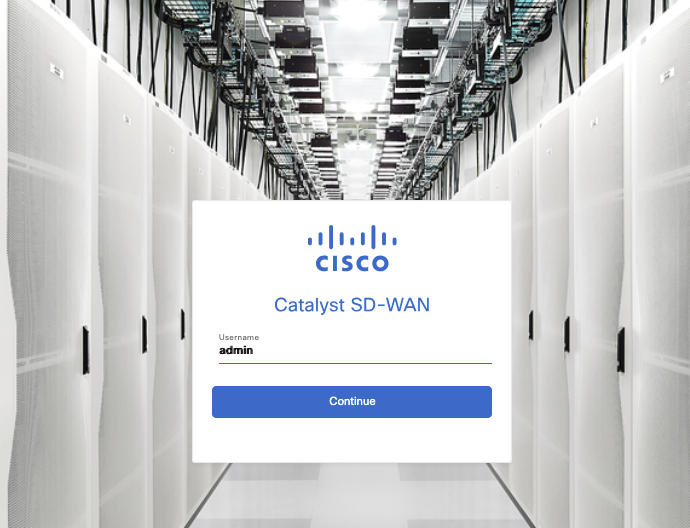
Log in to the vManage environment using:
- DemoUsername: admin
-
DemoPassword: C!sco12345
 You now have access to both an AWS account and the vManage environment needed to complete this lab.
Configuration Steps
Step 1: Prepare the Device Template
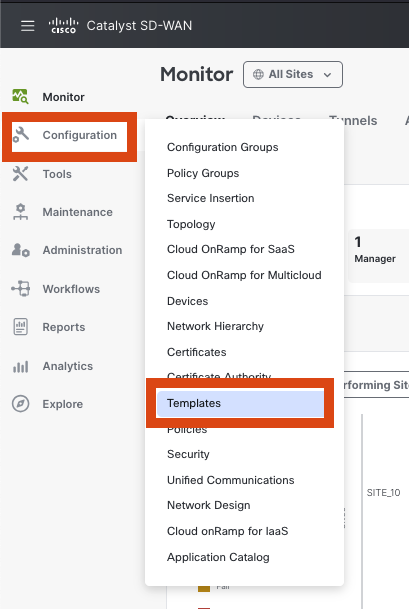
-
Open the Cisco SD-WAN Manager menu and navigate to Configuration > Templates
-
Locate the aws-cat8kv-multicloud template (you might need to change Template Type to Non-Default ), then click the 3 dots to the right for edit

-
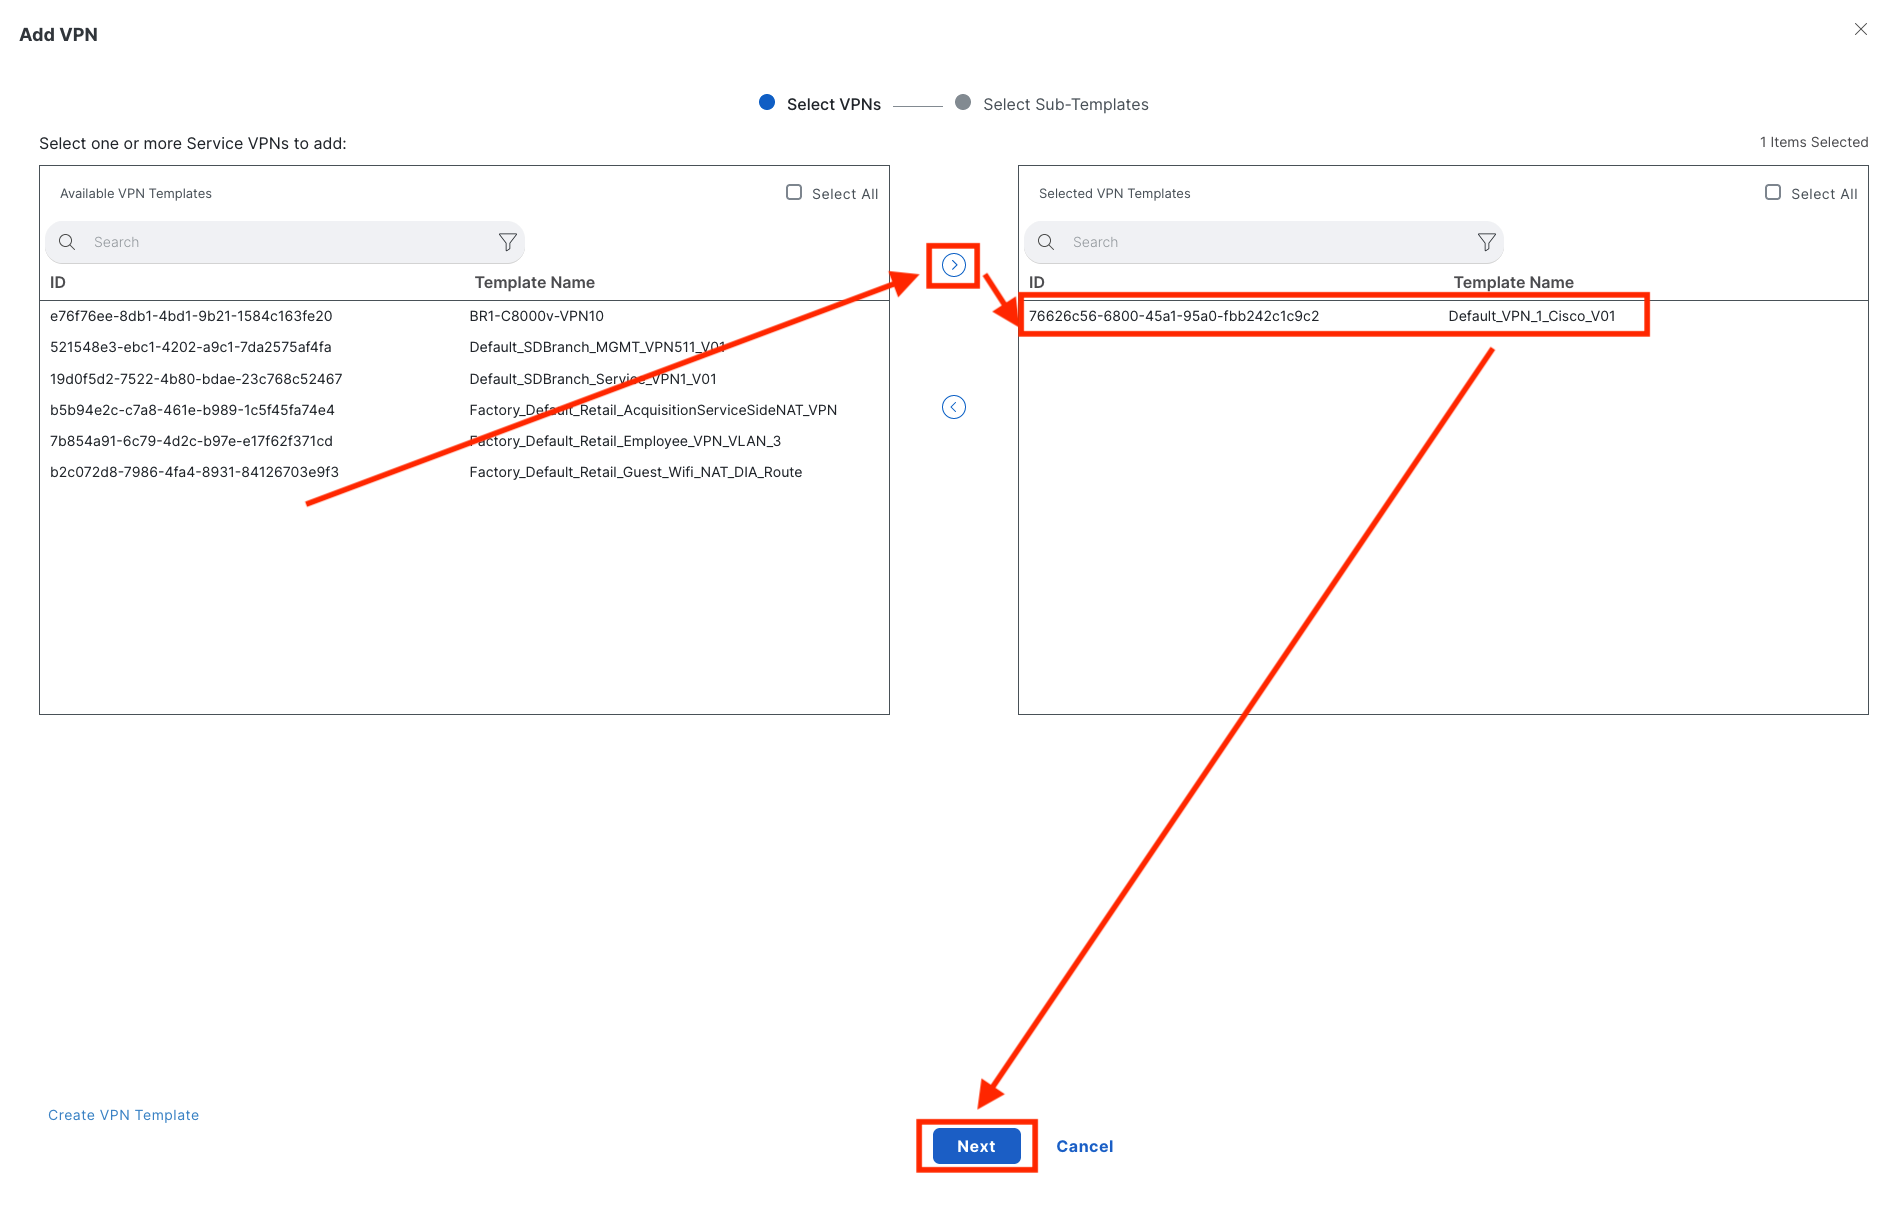
Edit the template and add a service VPN
- You can use the
Default_VPN_1_Cisco_V01that comes as a default templateNote: Adding a service VPN is required for Cloud onRamp functionality.
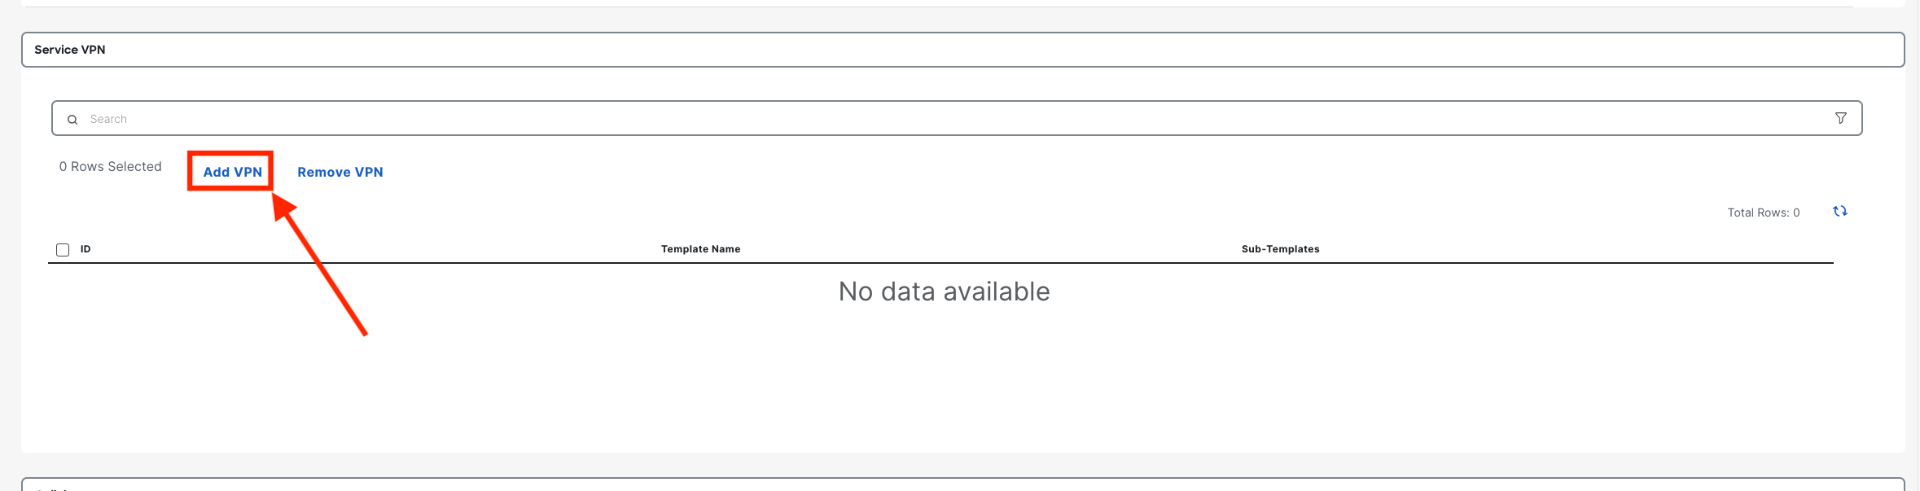
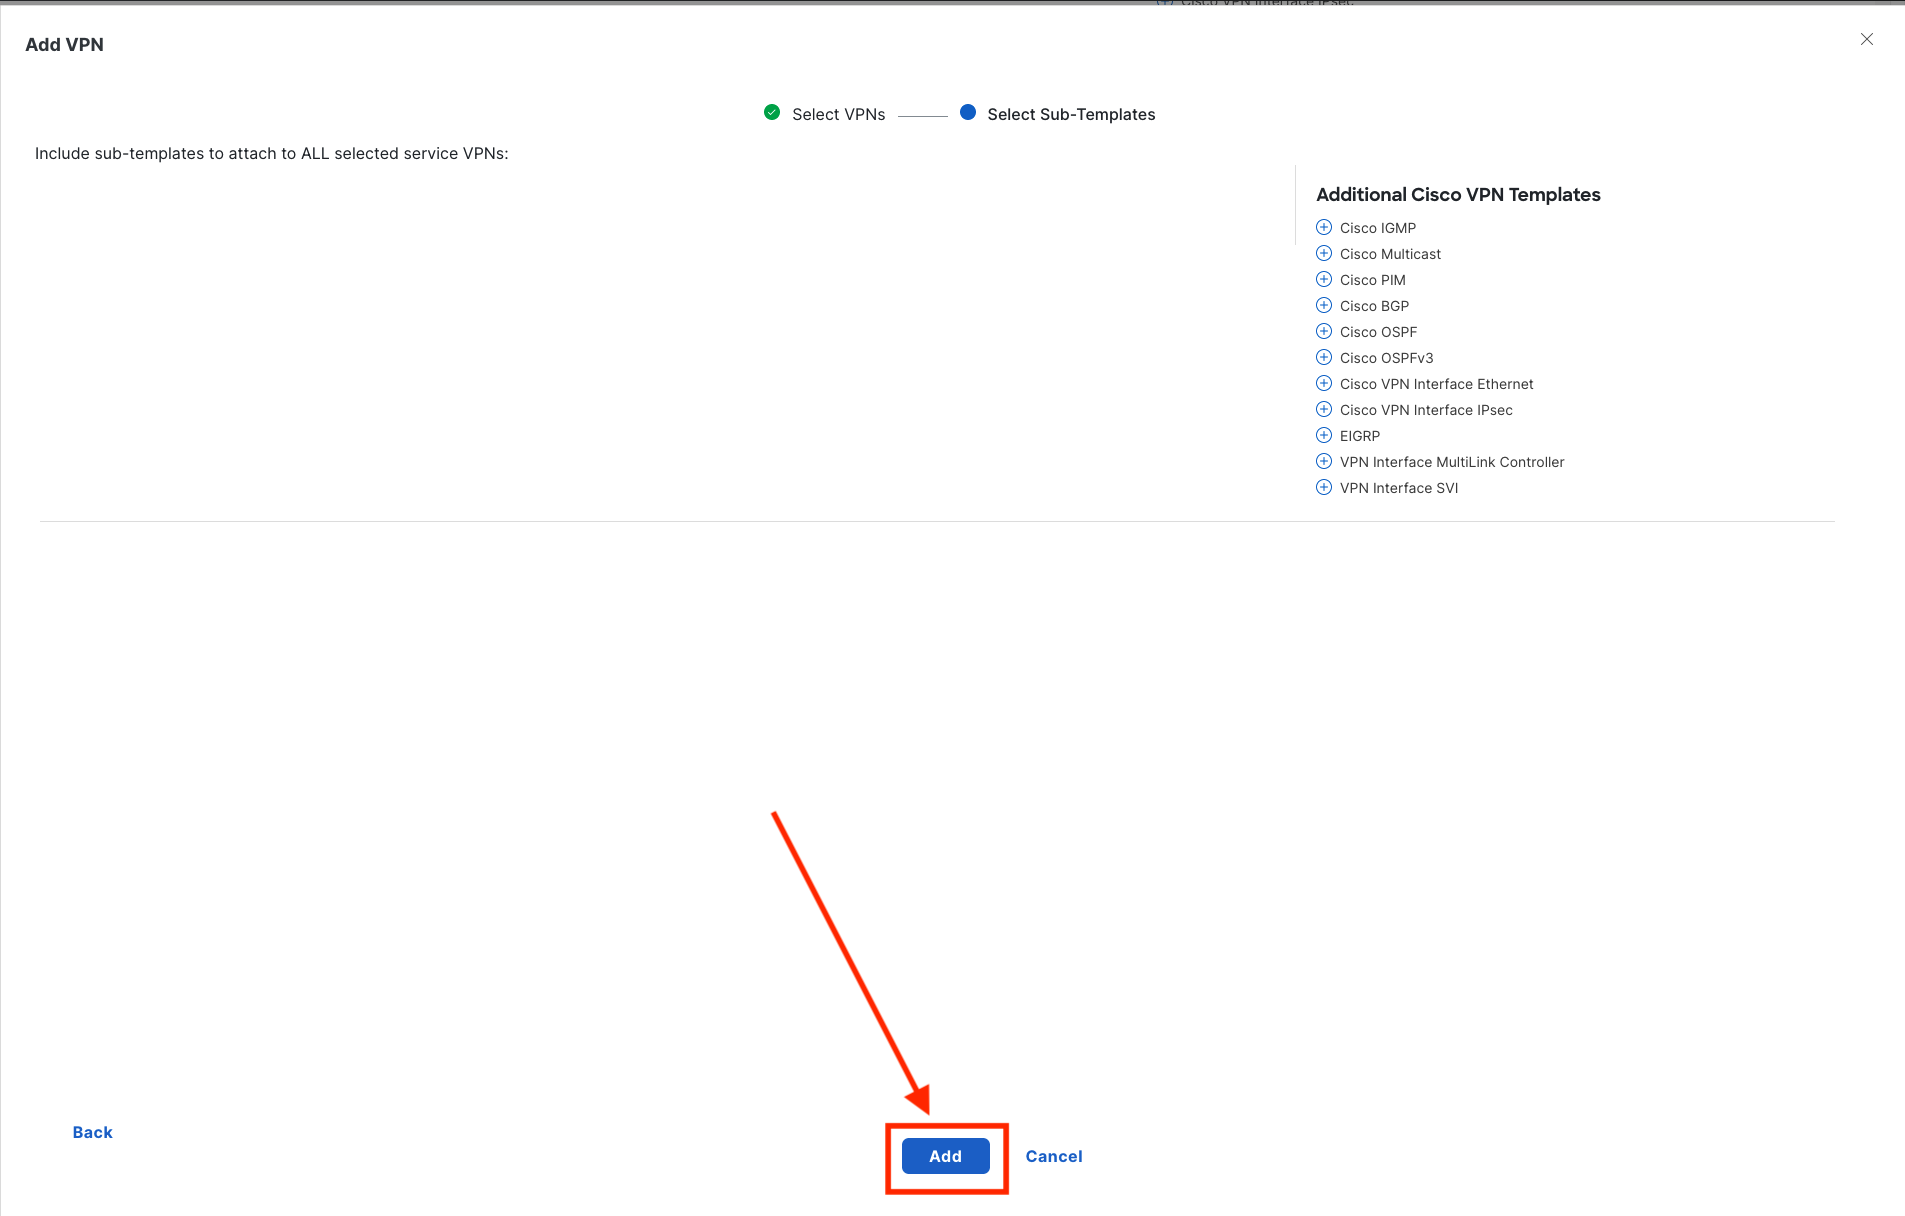
Note: Leave Empty and click Add. The Cloud onRamp automation will create everything else you need.
- You can use the
-
Save the template with a new name, for example: aws-cat8kv-multicloud-service-vpn-added
Step 2: Attach Devices to the Template
-
After saving the template, click on the Attach Devices option

-
Select the two devices you want to use for the AWS Cloud WAN integration
- dCloud comes with licensed devices, select any two that start with
C8K-
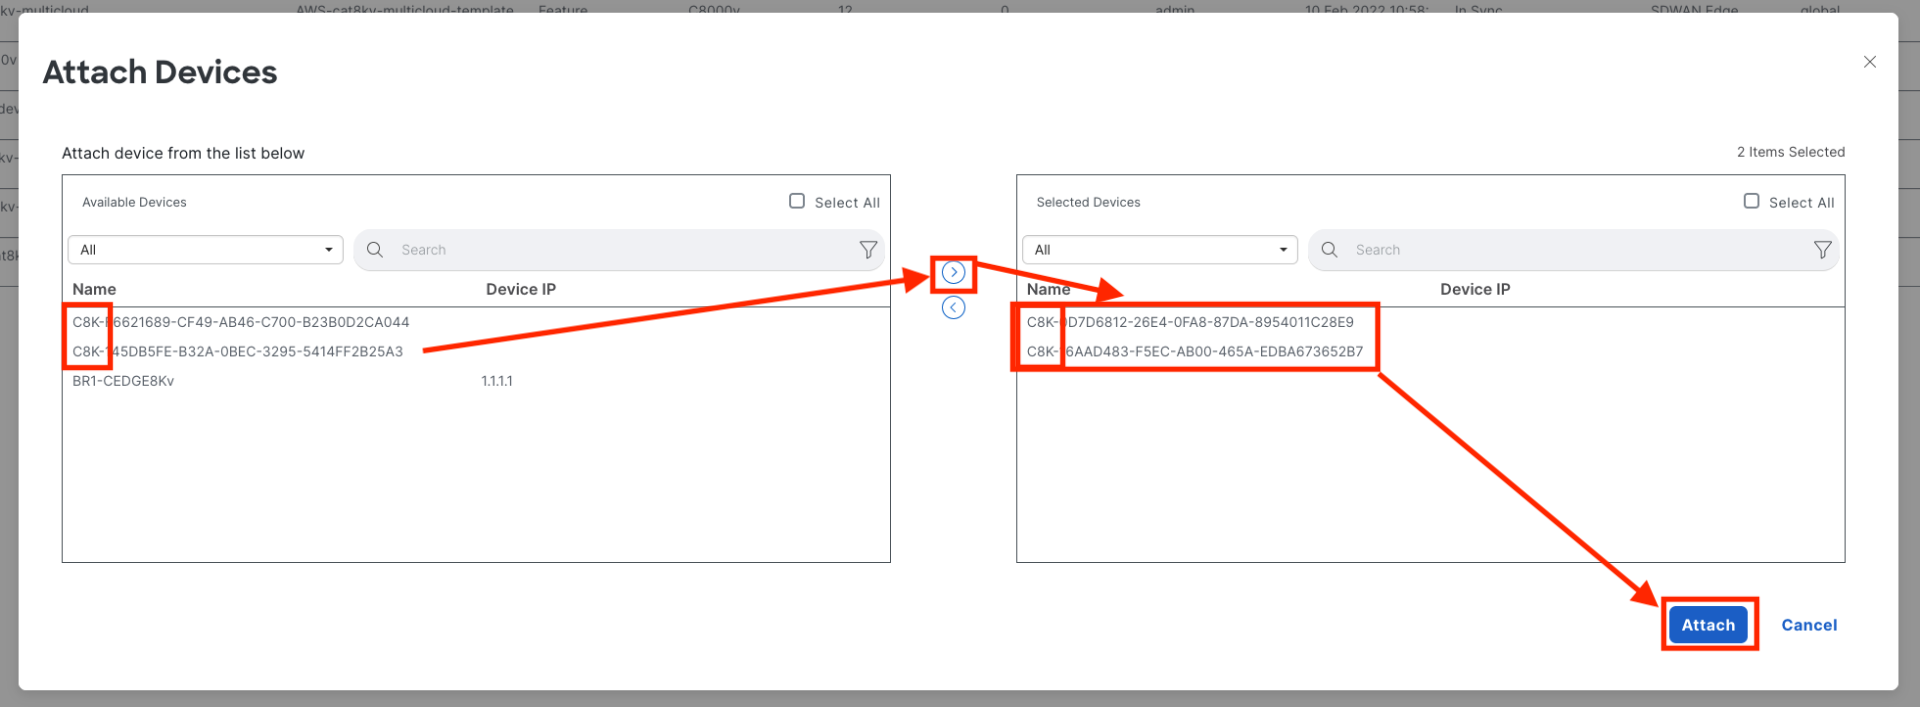
- dCloud comes with licensed devices, select any two that start with
-
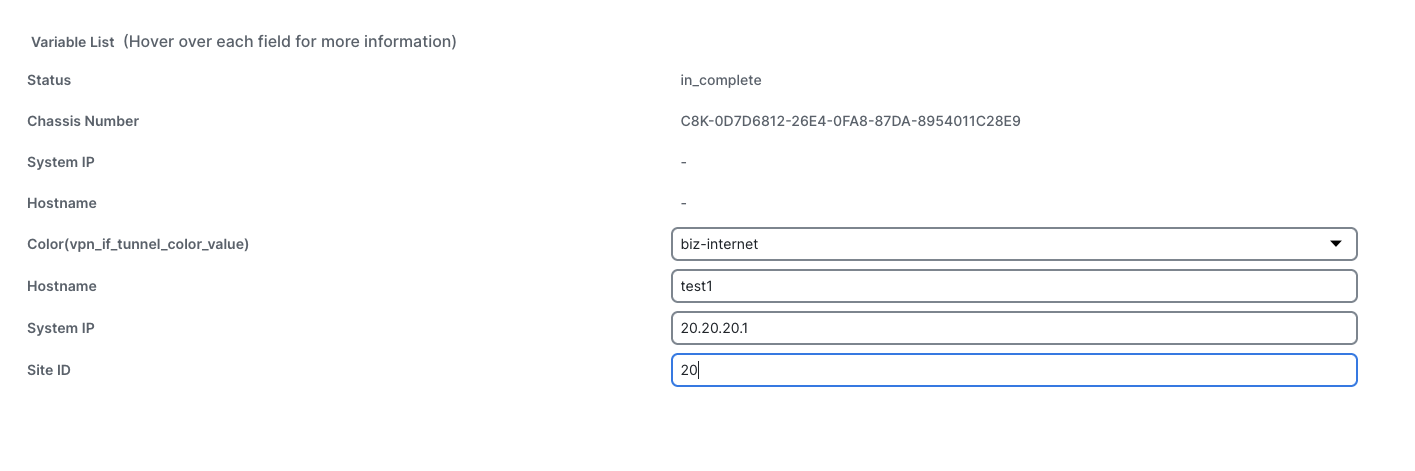
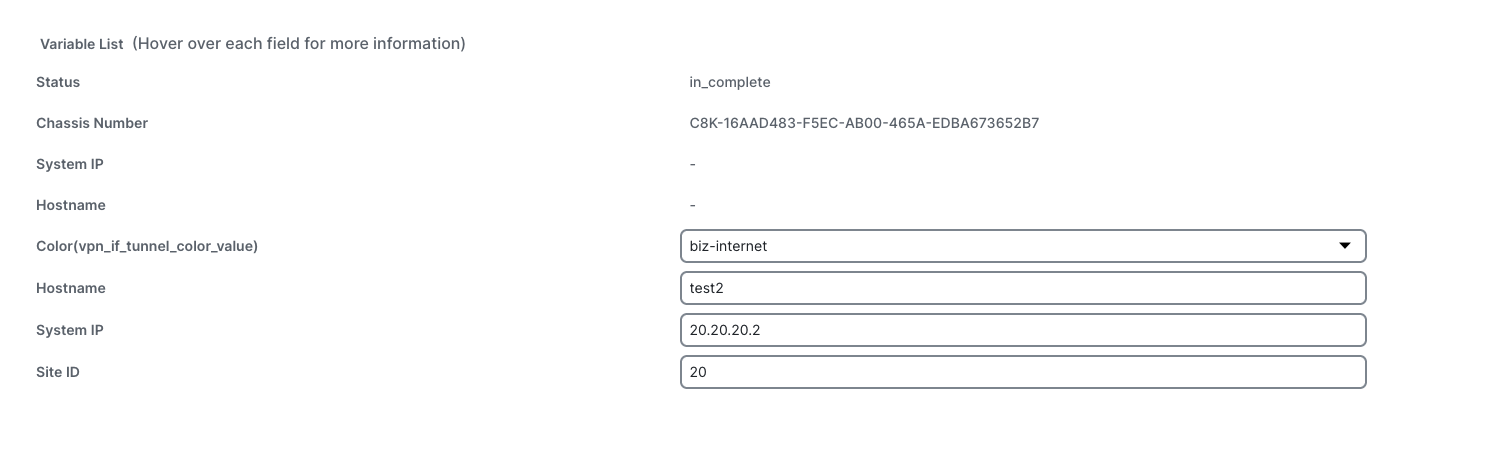
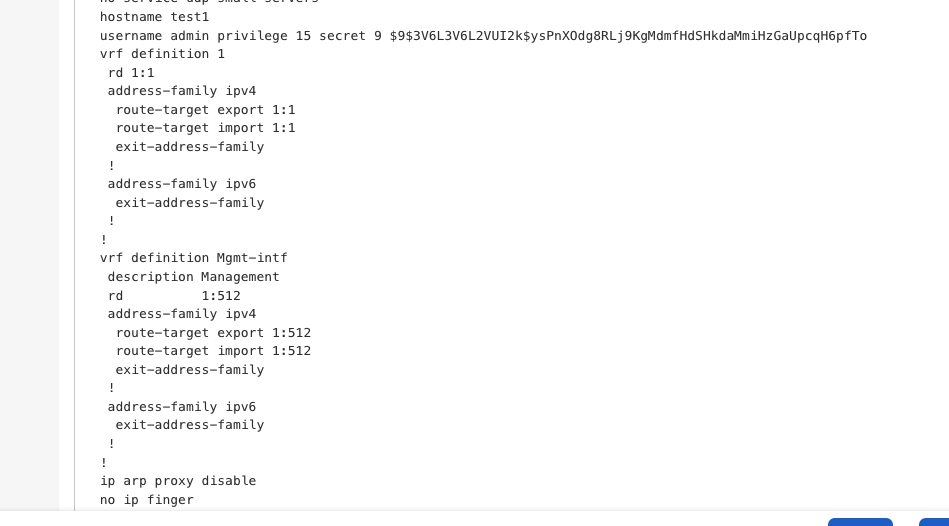
Edit each device to configure the required settings: Each device will have the same Site ID but different System IPs
- Device 1:
- Color:
biz-internet - Hostname:
test1 - System IP:
20.20.20.1 - Site ID:
20
- Color:
- Device 2:
- Color:
biz-internet - Hostname:
test2 - System IP:
20.20.20.2 - Site ID:
20
- Color:
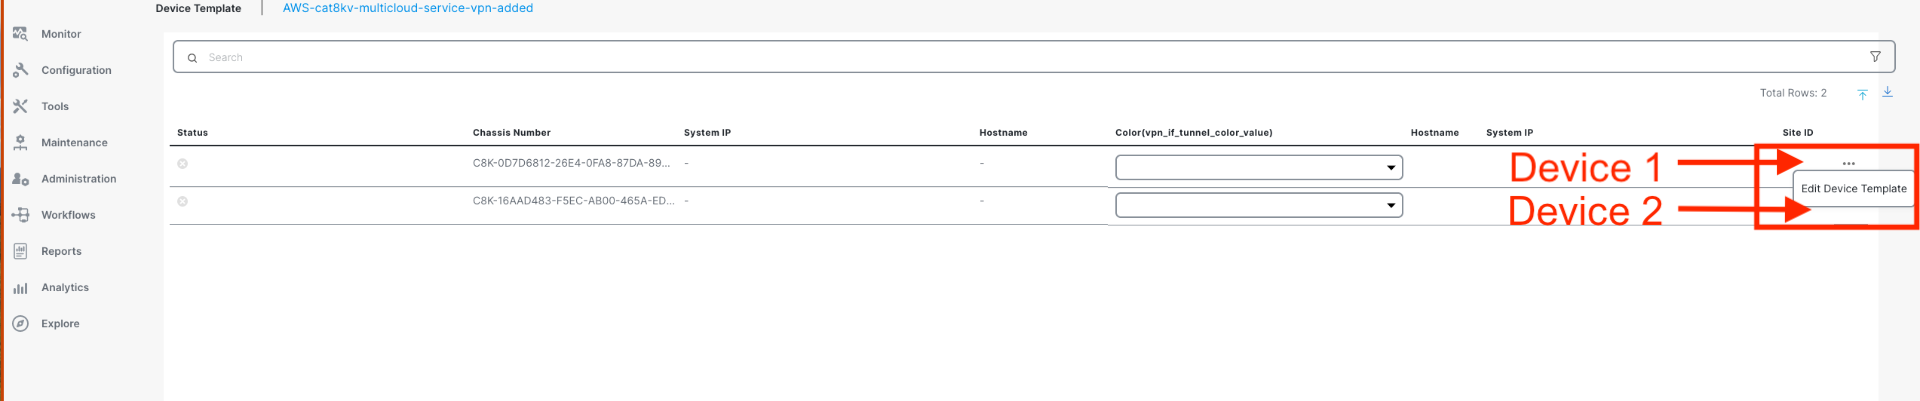
- Device 1:
-
Explore created Config and then move to next step
Note: Service VPN is under VRF1
Step 3: Configure Cloud OnRamp for Multicloud
-
From the Cisco SD-WAN Manager menu, navigate to Configuration > Cloud OnRamp for Multicloud
-
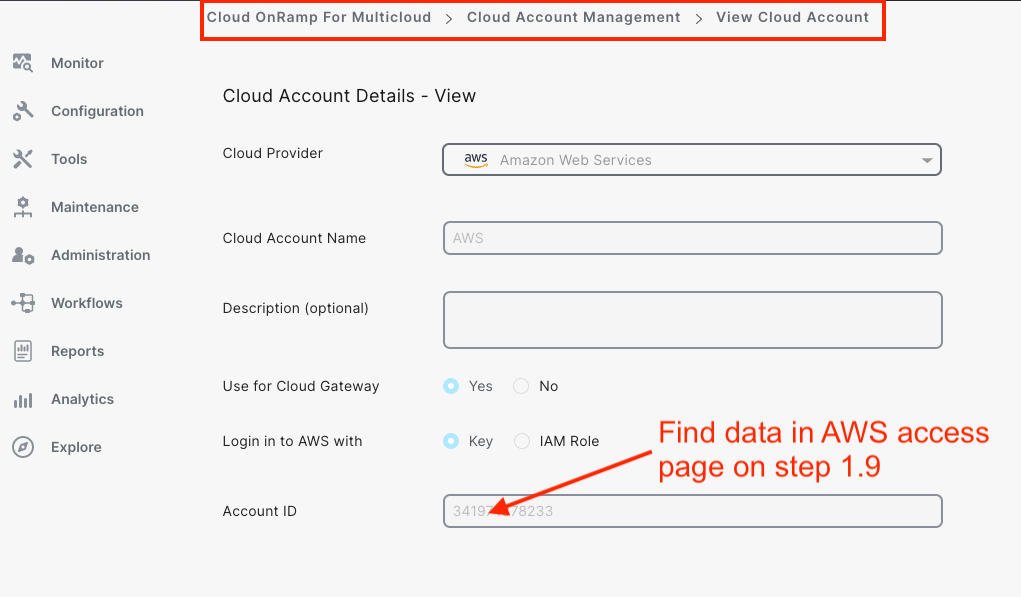
Connect your AWS account by providing AWS Access and Secret keys
-
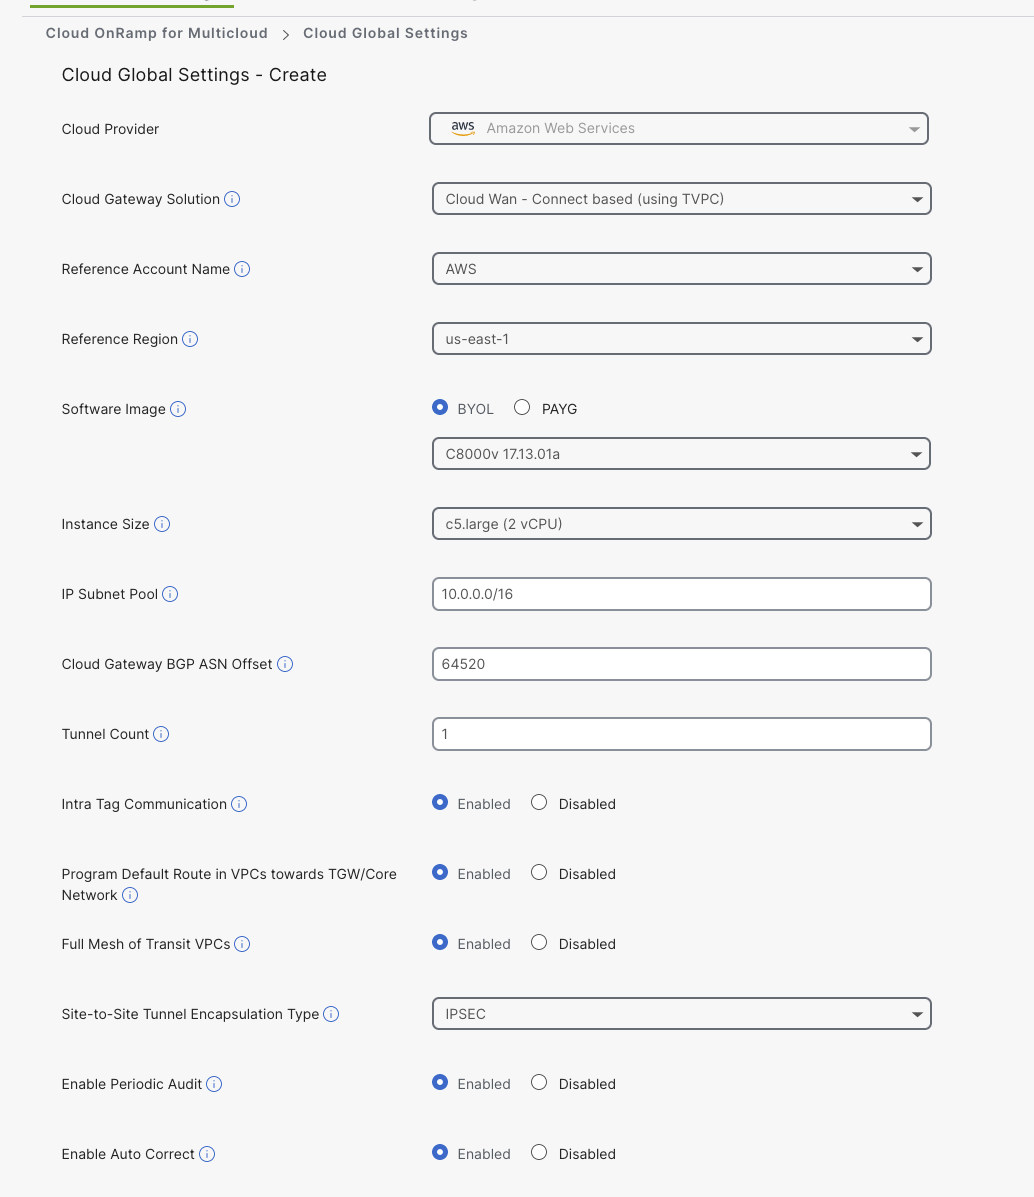
Under Cloud Global Settings, click Add

-
Complete the Cloud Gateway Global Settings
Note: For the IP subnet pool, you can use the smart default suggested or leave it blank and configure during the gateway creation process.
Step 4: Create Cloud Gateway
-
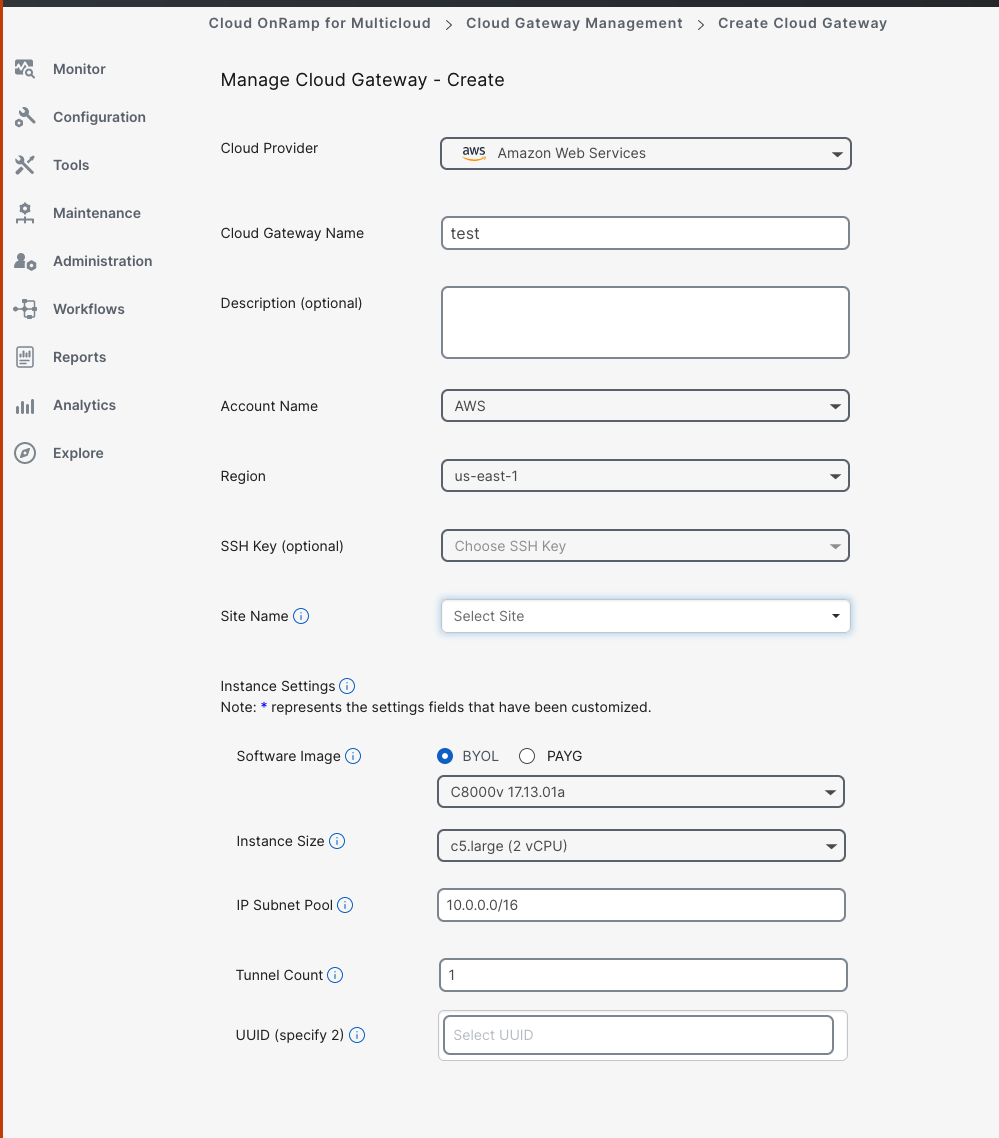
On the Cloud OnRamp dashboard, click Create Cloud Gateway
-
Fill in the required details:
- Use software version 17.13
- Set the IP subnet pool CIDR for your Transit VPC
- Set Tunnel count (typically 1 for 8kv to AWS connections)
- No SSH key is required
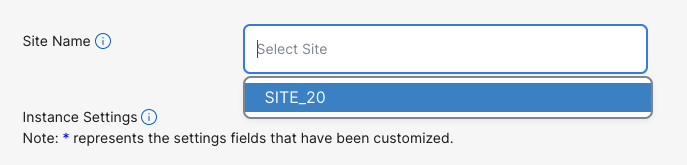
- UUIDs will be added automatically when the site is selected
- The site will be created automatically if it was defined in the template devices
-
Wait for the deployment to complete
- This process takes approximately 30 minutes as it configures all required components in AWS using SDK calls (not Cloud Formation)
Conclusion
You have now successfully set up AWS Cloud WAN integration with Cisco SD-WAN using Cloud onRamp for Multicloud. The deployed configuration establishes secure connectivity between your SD-WAN fabric and AWS network infrastructure.