Manual 8000v Deployment in AWS
This guide will walk you through the process of manually deploying Cisco 8000v routers into AWS without using Cloud onRamp.
Prerequisites
- Access to vManage interface
- AWS account with appropriate permissions
Configuration Steps
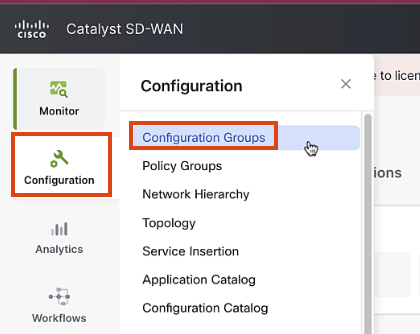
Step 1: Create Configuration Group in vManage
First, you will need to create a configuration group in vManage that includes system and transport profiles.
-
Log in to the vManage console
-
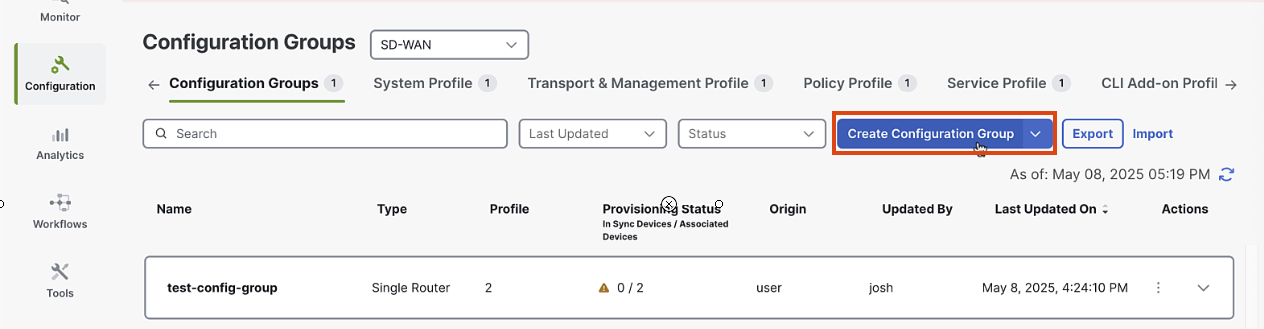
Navigate to Configuration > Configuration Groups
-
Click on "Configuration Groups" and then "Add Configuration Group"
-
Enter
AWS-MANUAL-C8KVas the name and provide a description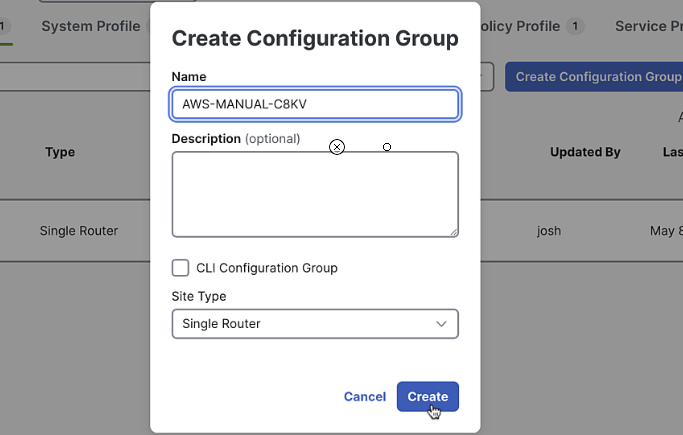
-
Click "Create"
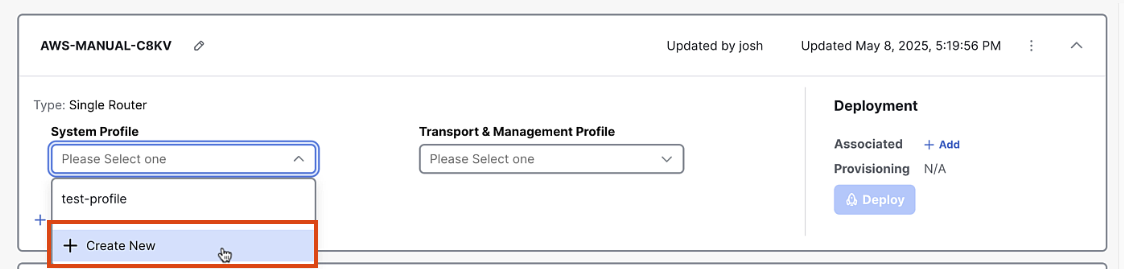
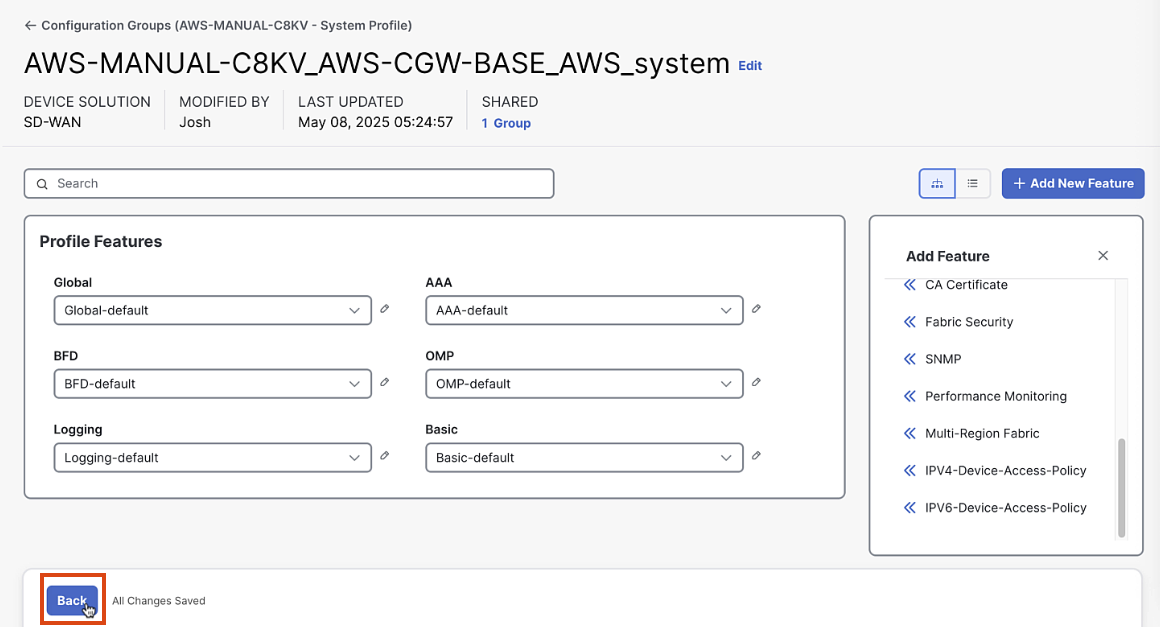
Step 2: Create System Profile
-
In the Configuration Group screen, click "Add System Profile"
-
Enter
AWS-MANUAL-C8KV_AWS-CGW-BASE_AWS_systemas the name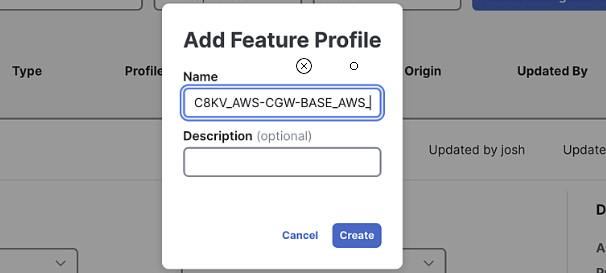
-
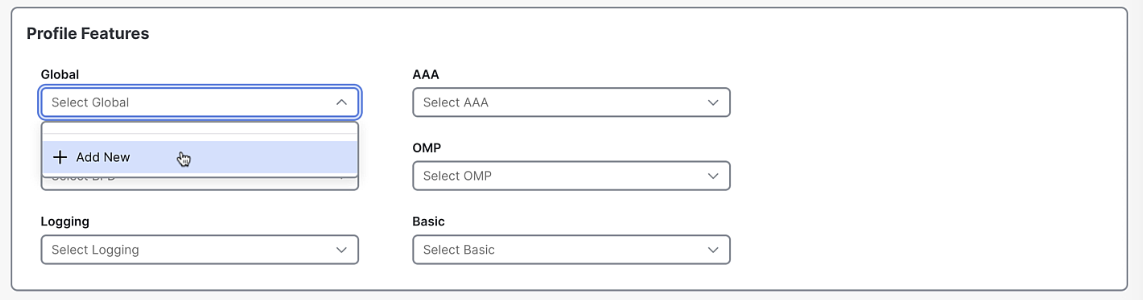
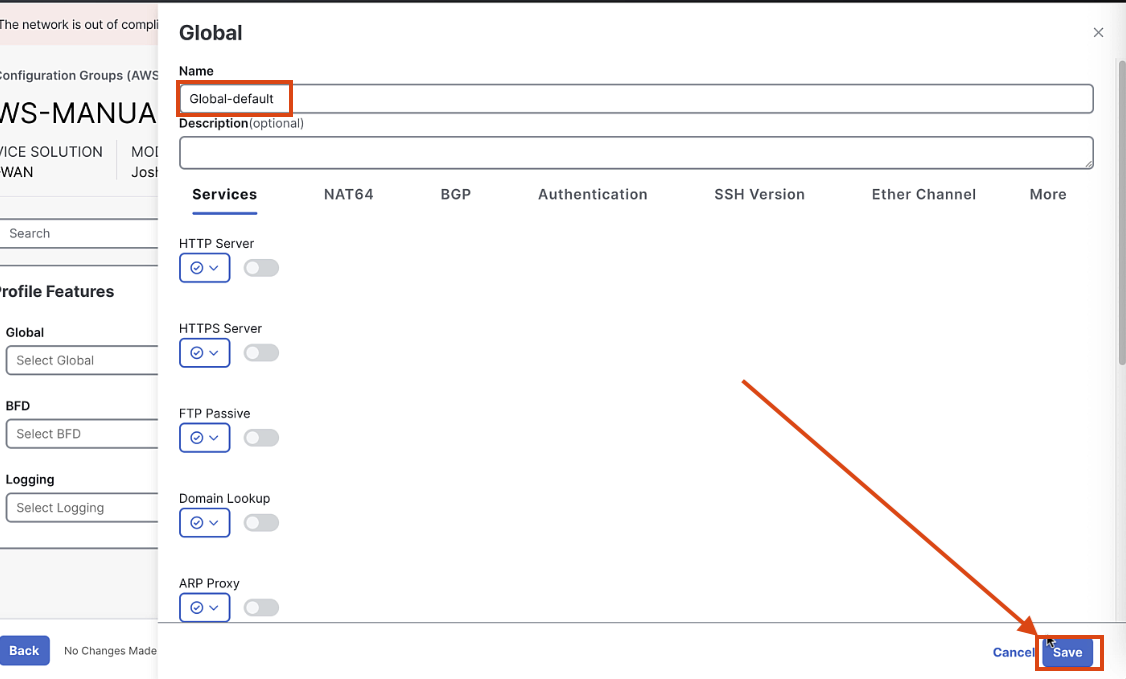
Create a new Global Profile, called Global_default. Keep all settings default, and click save.
-
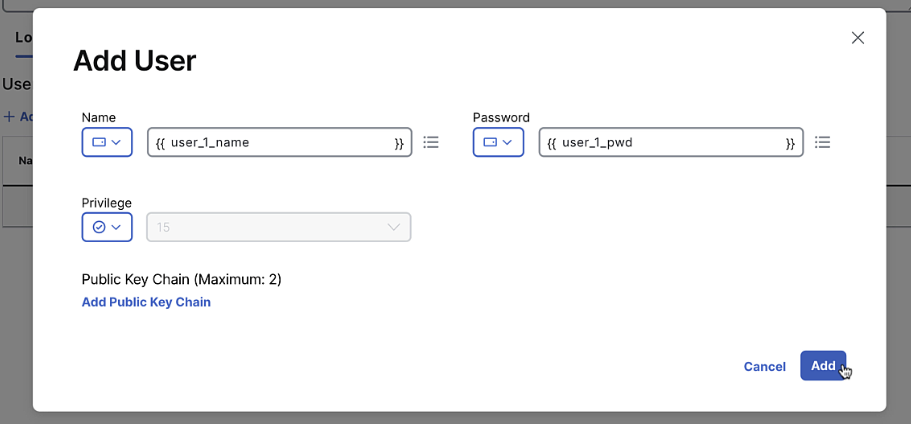
Create a default profile for each of the services:
Global-default,BFD-default,Logging-default,AAA-default,OMP-default,Basic-default. Keep all default settings except for AAA, which should allow user/pass as a variable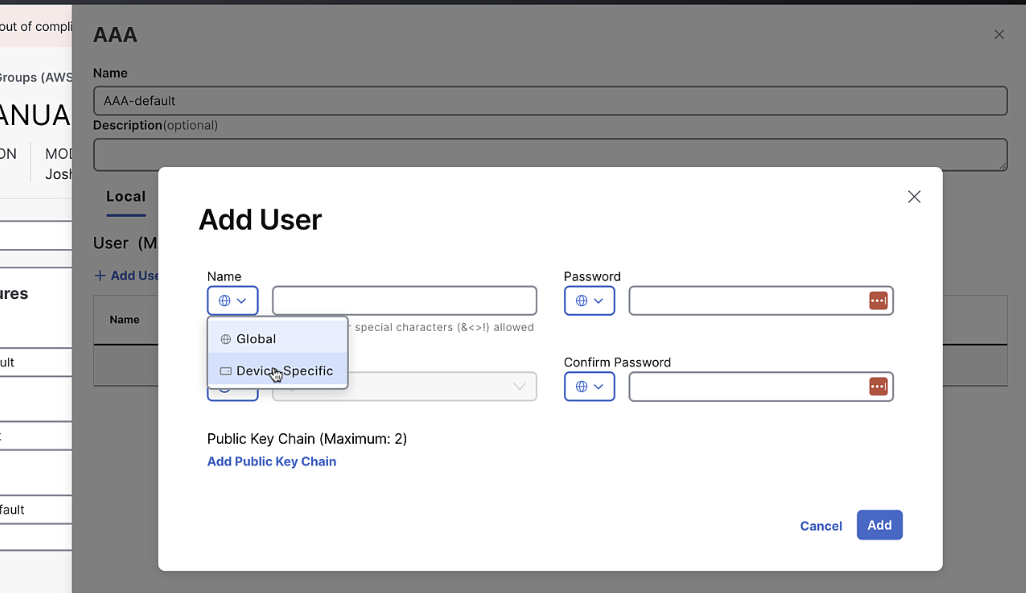
-
Click "Save"
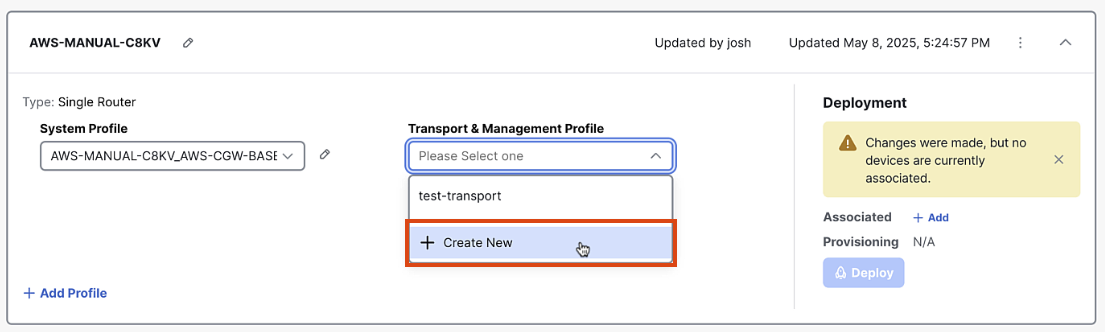
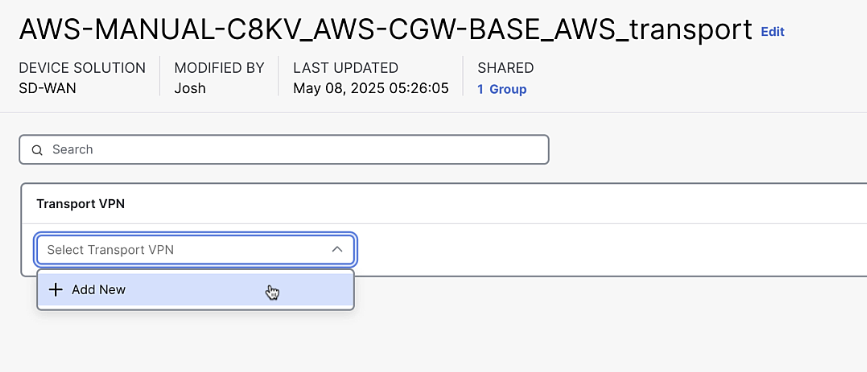
Step 3: Create Transport Profile
-
In the Configuration Group screen, click "Add Transport Profile"
-
Enter a name for the Transport Profile:
AWS-MANUAL-C8KV_AWS-CGW-BASE_AWS_transport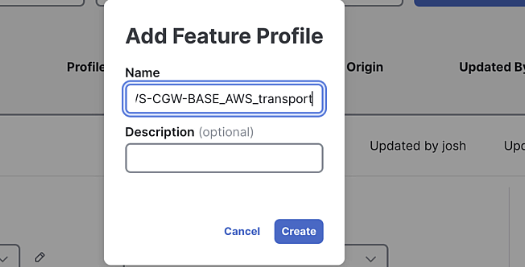
-
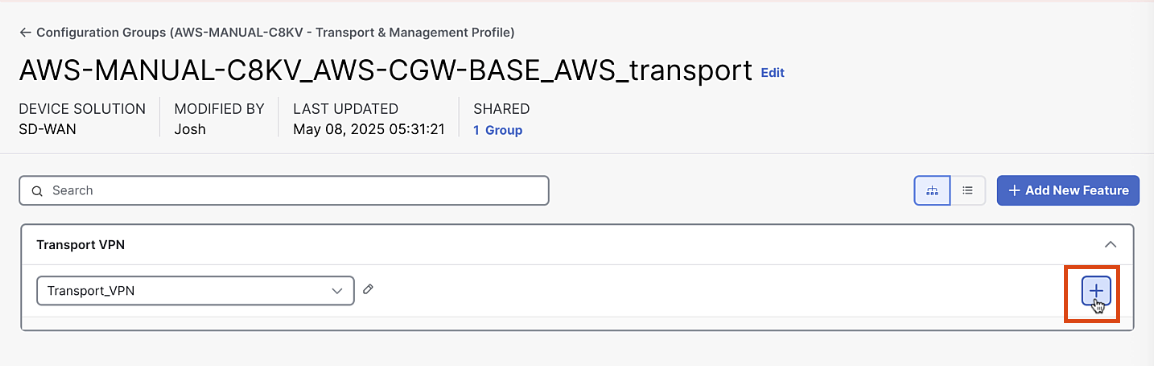
Add a Transport VPN labeled "Transport_VPN" with default settings

-
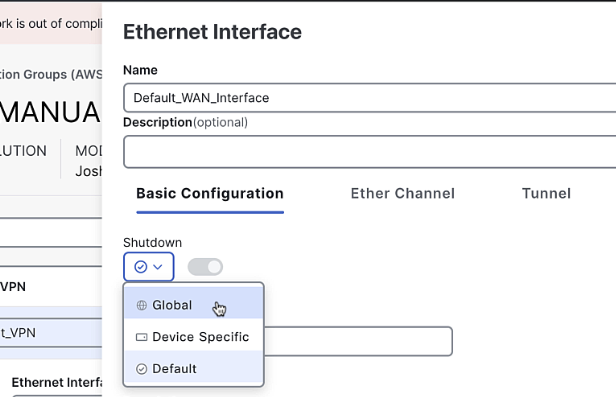
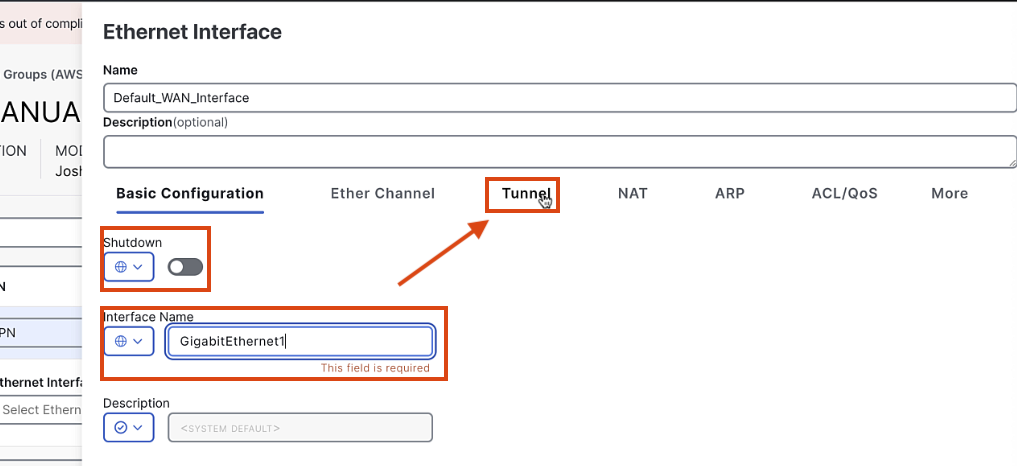
Add an Ethernet Interface:
- Name:
Default_WAN_Interface - Shutdown command: Off
- Interface name:
GigabitEthernet1
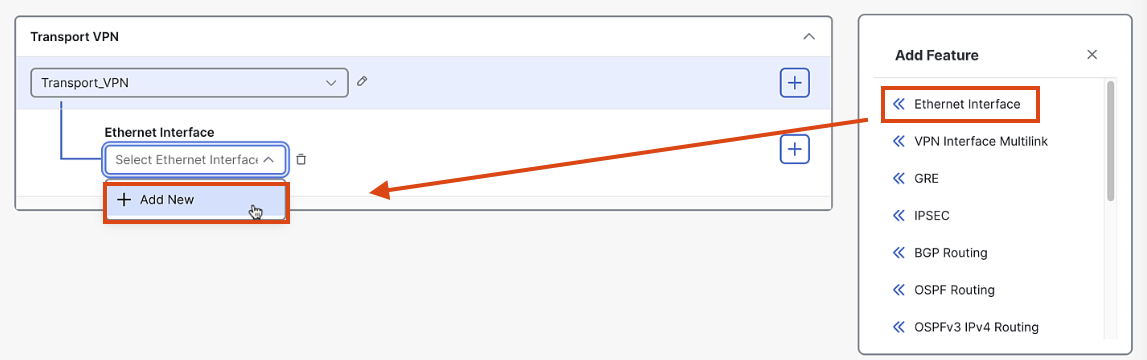
- Name:
-
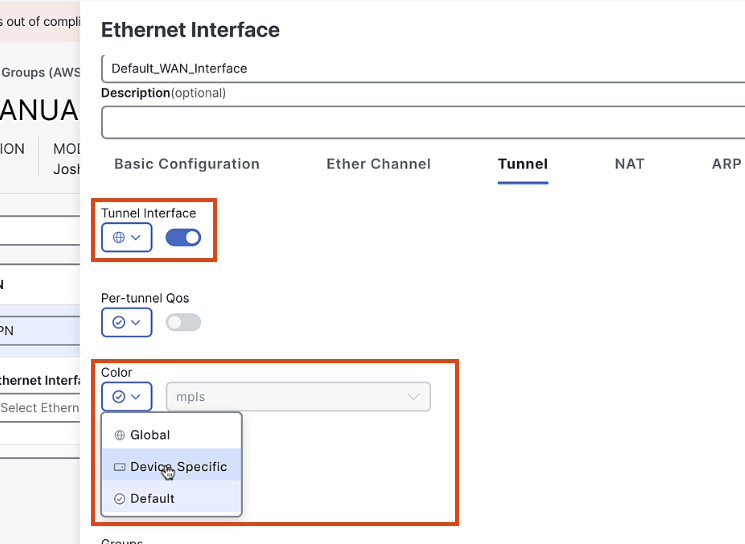
Add a tunnel interface:
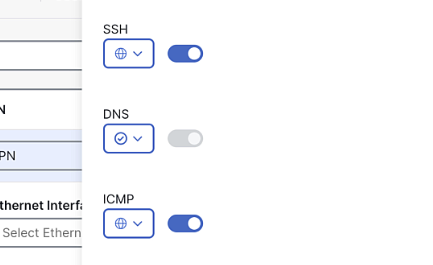
- Set color as a variable
- Enable SSH and ICMP services
-
Add Encapsulation:
- Select IPsec
- Keep all other settings as default

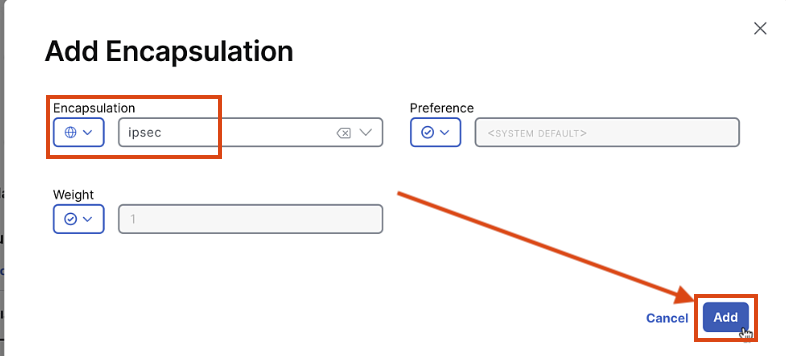
-
Click "Save"
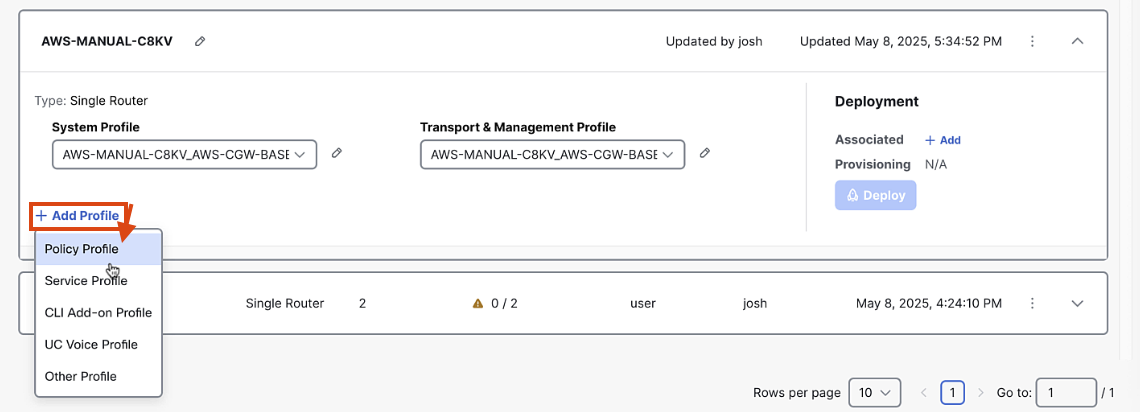
Step 4: Add Policy Profile
-
In the Configuration Group screen, click "Add Policy Profile"
-
Select the default policy
-
Click "Save"
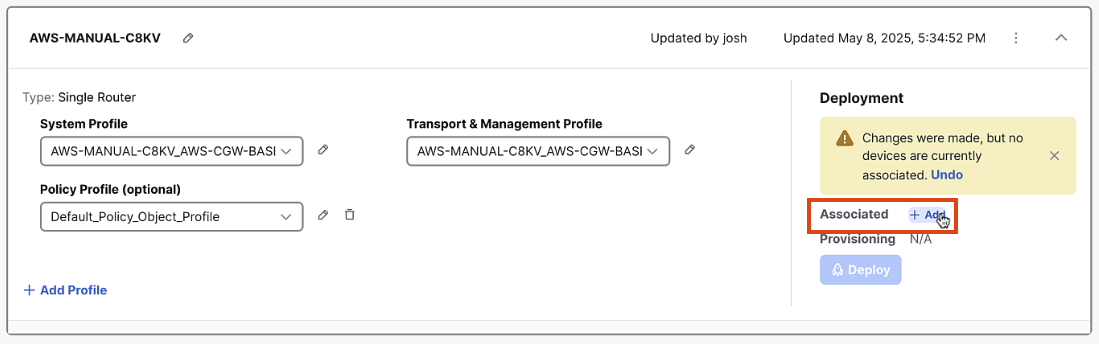
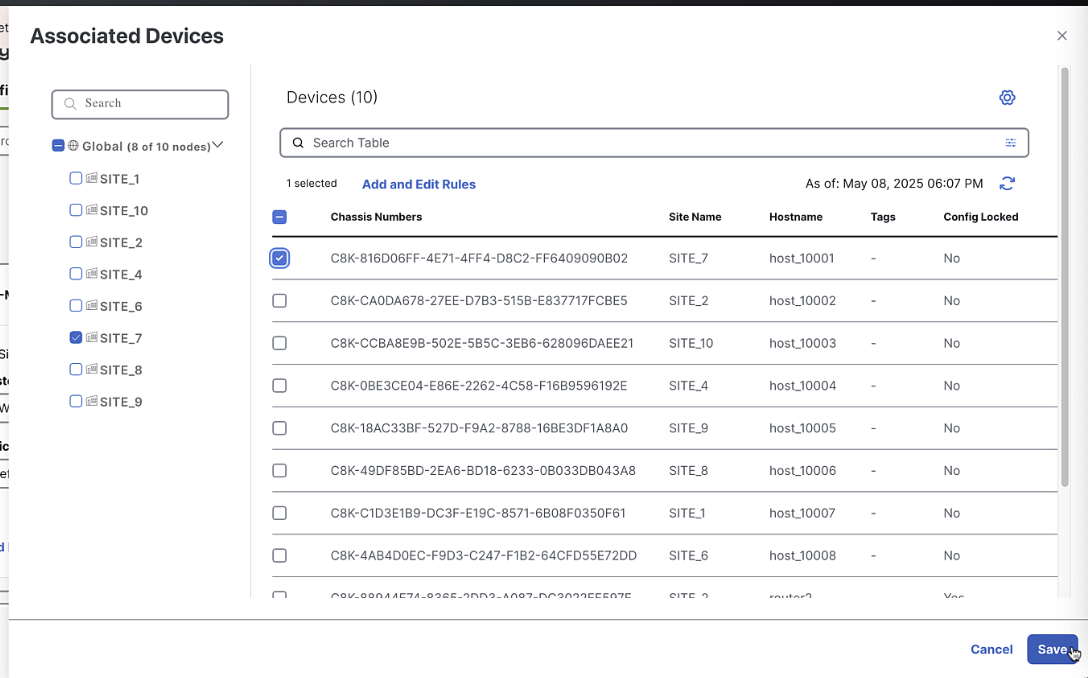
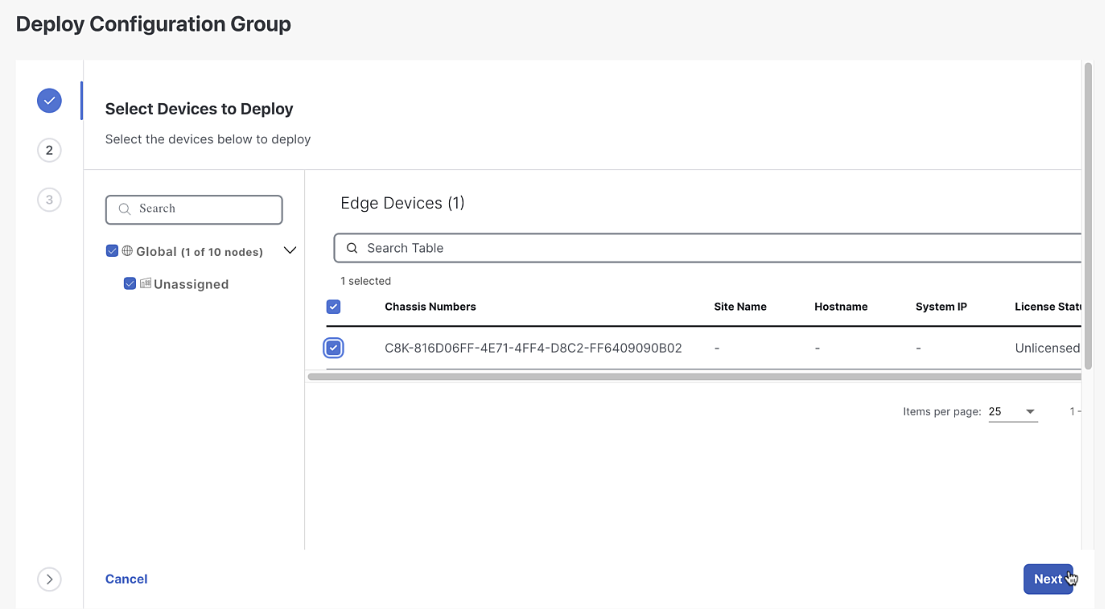
Step 5: Associate Devices
-
In the Configuration Group screen, click "Associate Devices"
-
Select an unused license from the list
-
Click "Associate"
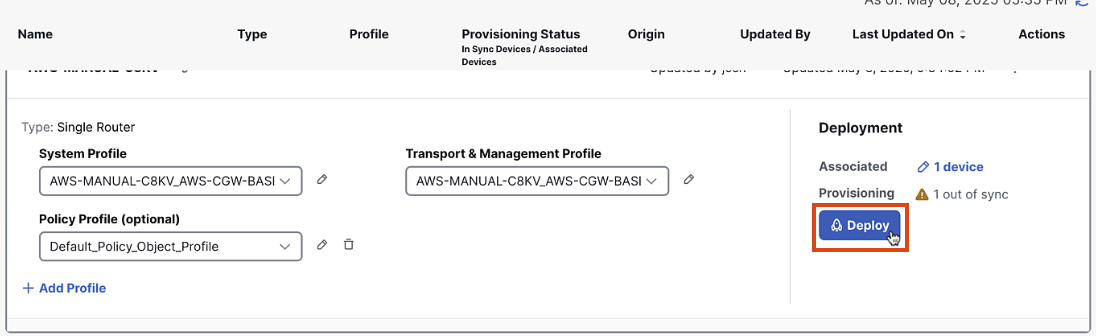
Step 6: Deploy Config to virtual chassis
-
In Configuration Group, click Deploy
-
Click Next until you see the system and transport profile variables
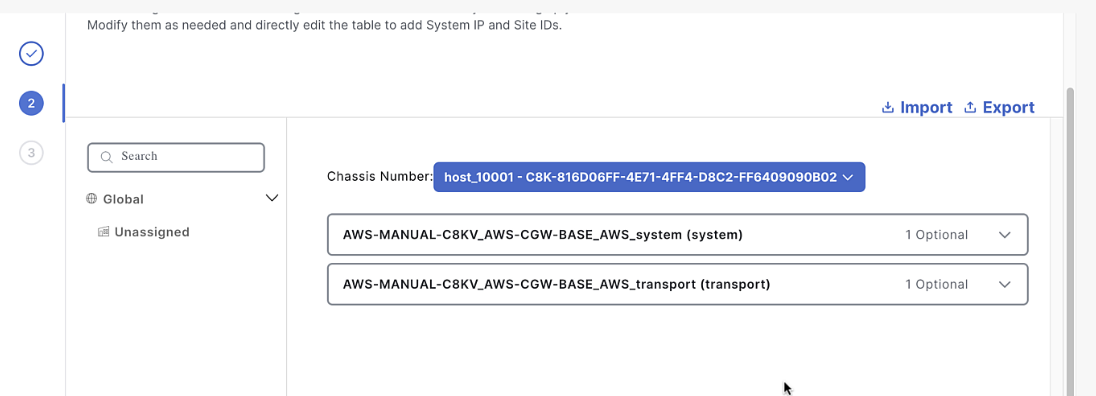
-
Fill in the following details:
- System IP:
10.10.10.10 - Site Id number:
10 - Hostname:
router10 - Login/Password:
admin/C1sco12345 - WAN color:
public-internet
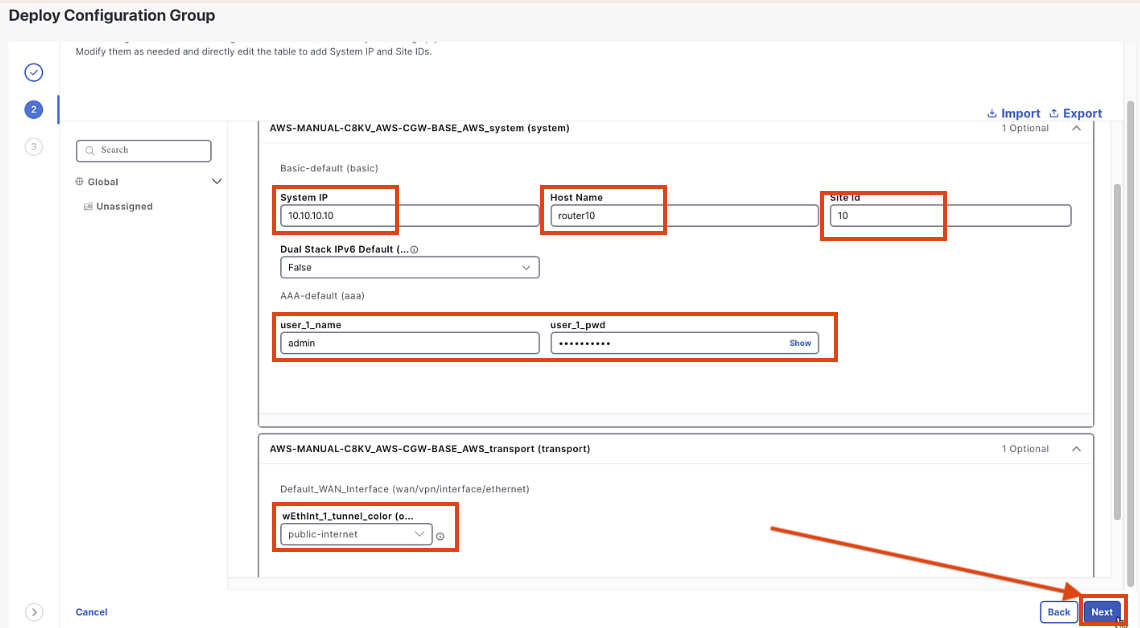
- System IP:
-
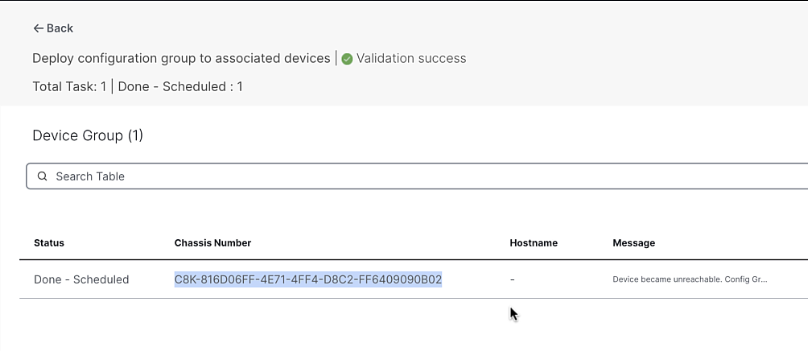
Click "Next" and then "Deploy"

Step 7: Bootstrap the Device
-
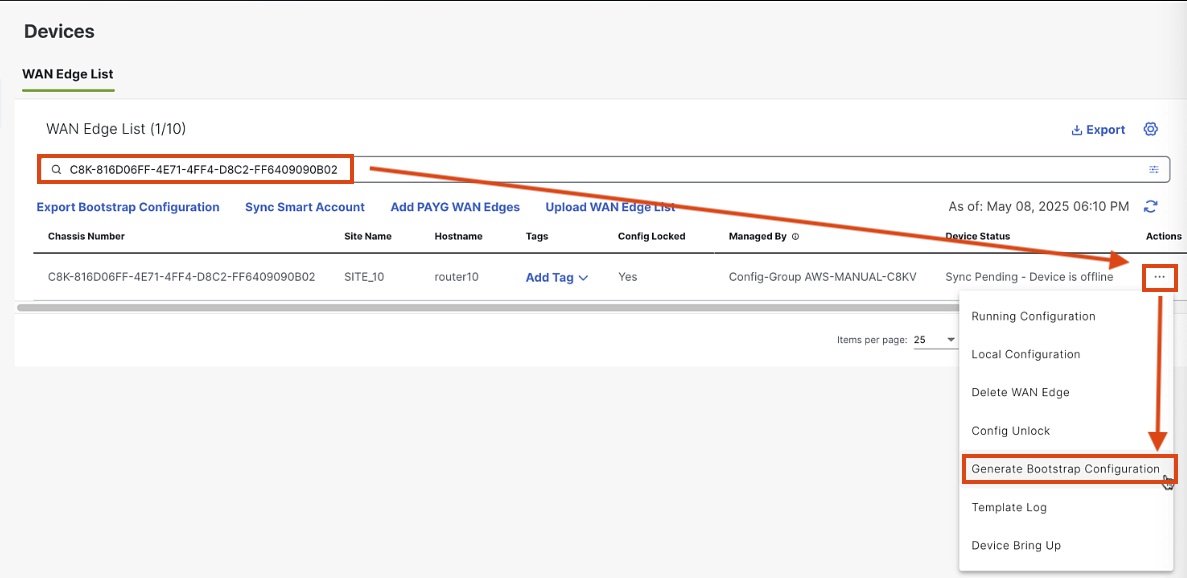
Copy the Chassis number for the next step
 \
\ -
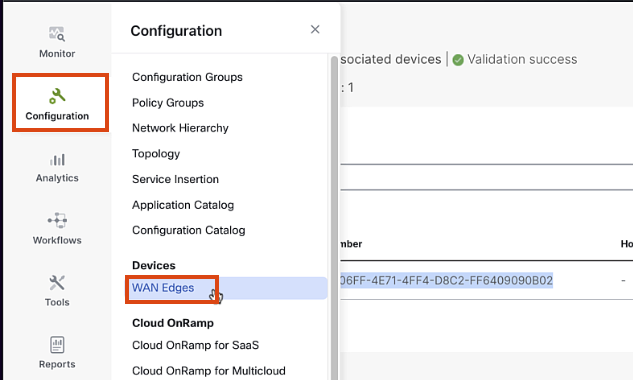
Navigate to Configuration > Devices > WAN Edges
-
Paste the Chassis number into the search, Click Actions > Geneerate Bootstrap Configuration
-
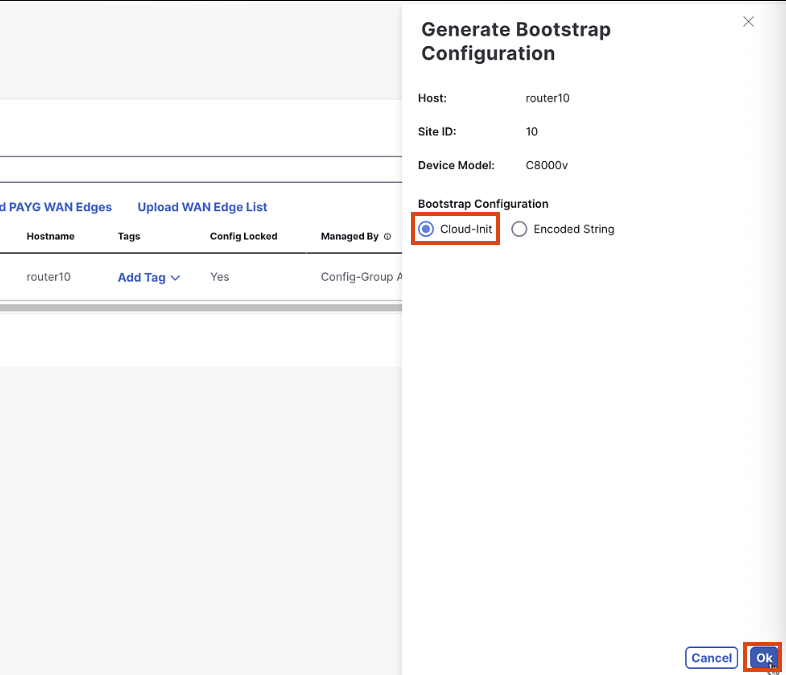
Select Cloud-Init > OK
-
Once the configuration is ready, click "Download Configuration"
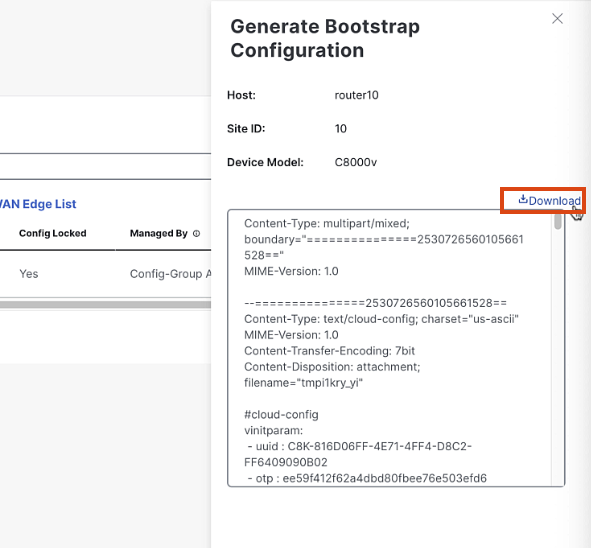
-
Save the configuration file to your computer. We will use this when we launch the C8000v Instance in AWS EC2
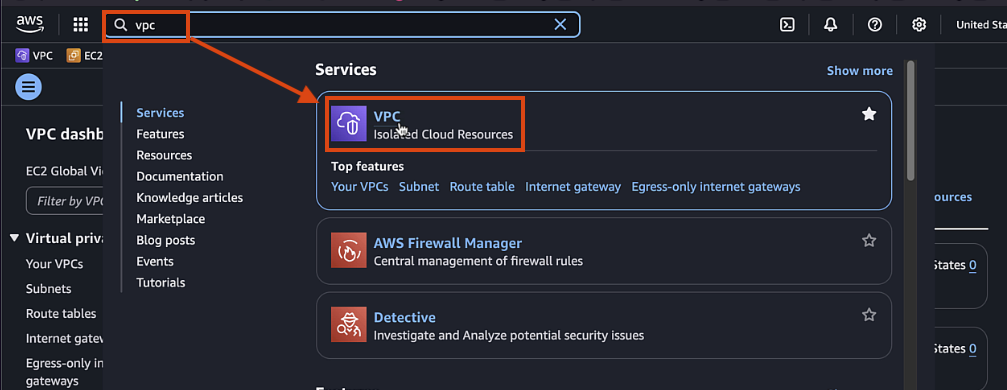
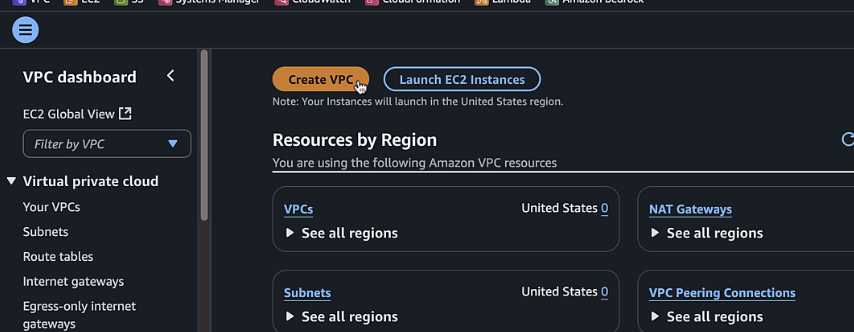
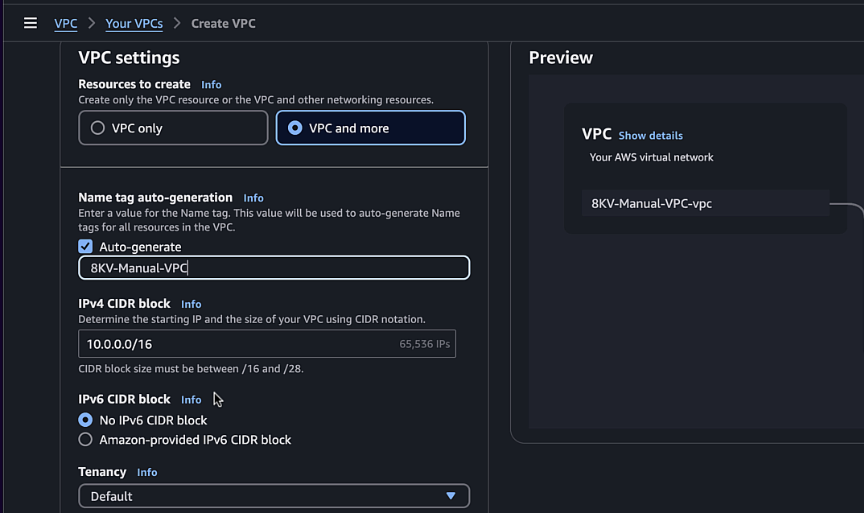
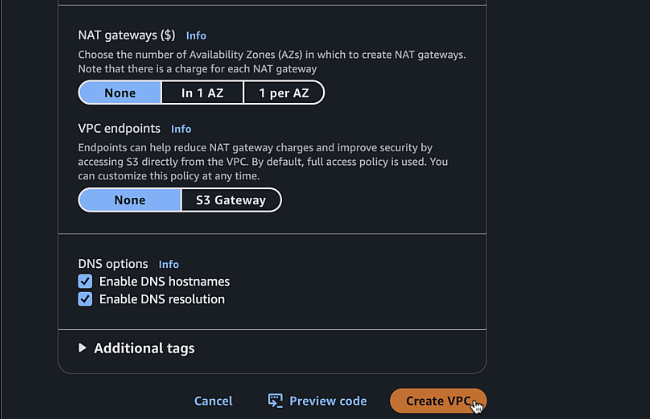
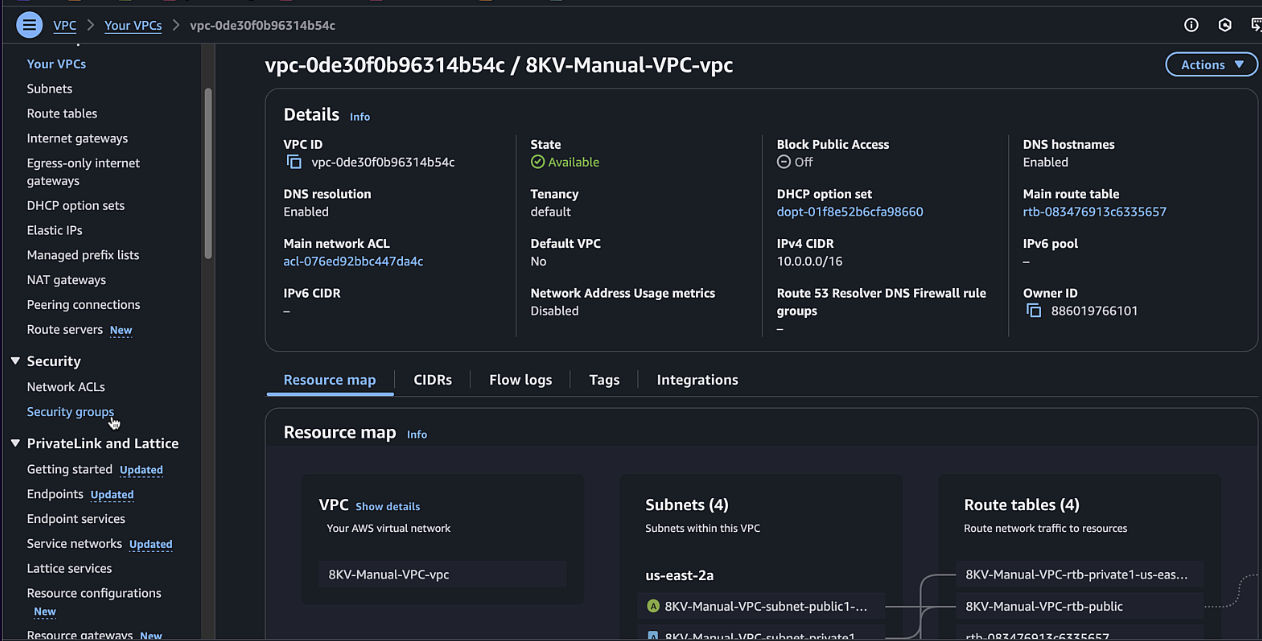
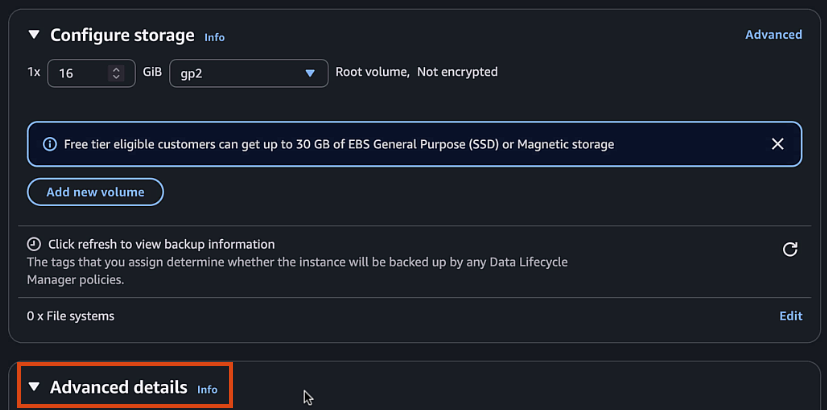
Step 8: Create VPC and Subnets in AWS
-
Log in to the AWS console and navigate to the VPC dashboard
-
Click "Create VPC" and select "VPC and more"
-
Configure the following settings:
- Name tag:
C8KV-Manual-VPC - IPv4 CIDR block:
10.0.0.0/16 - Number of Availability Zones:
2 - Number of public subnets:
2 - Number of private subnets:
2 - NAT gateways:
None - VPC endpoints:
None

- Name tag:
-
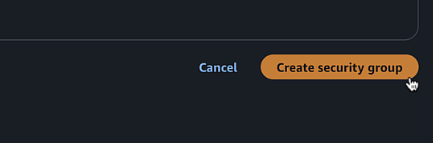
Click "Create VPC"

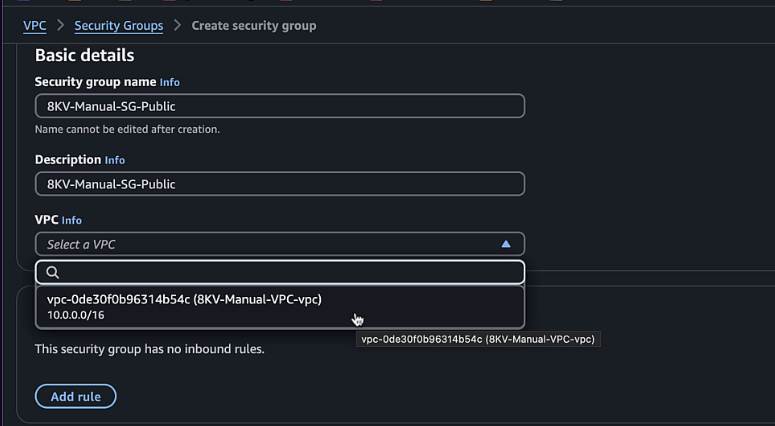
Step 9: Create Security Groups
-
In the VPC dashboard, navigate to "Security Groups"
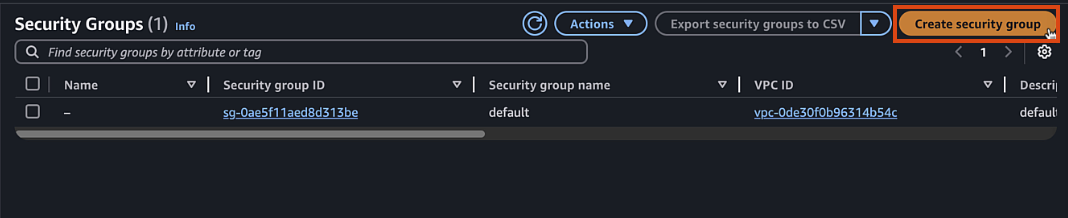
-
Create a public security group:
- Name:
C8KV-Manual-SG-Public - Description:
Security group for public interfaces - VPC: Select the VPC you created
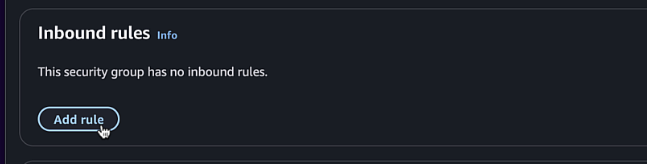
- Add inbound rules for SSH (port 22) and ICMP

- Name:
-
Create a private security group:
- Name:
C8KV-Manual-SG-Private - Description:
Security group for private interfaces - VPC: Select the VPC you created
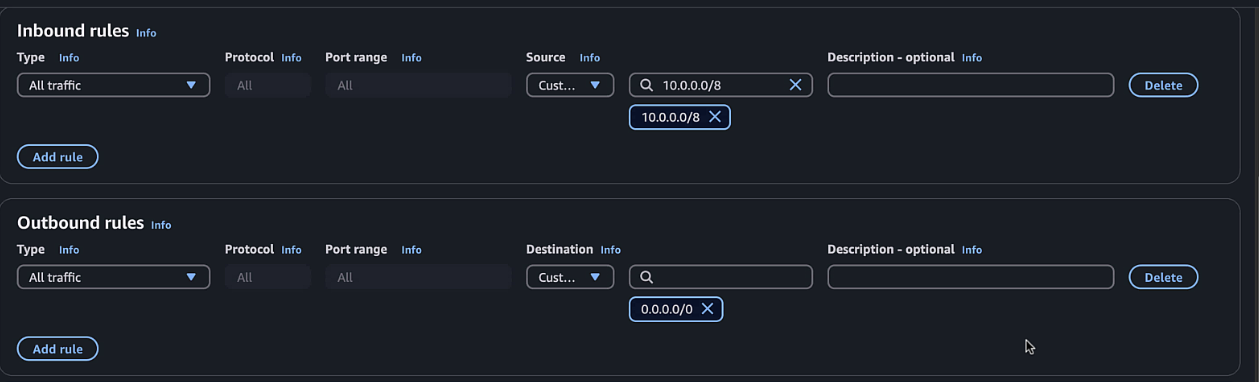
- Add inbound rules for all traffic from the VPC CIDR

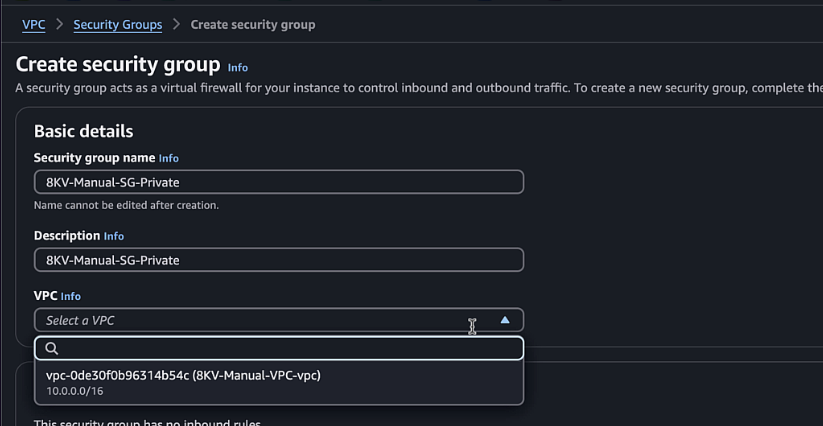
- Name:
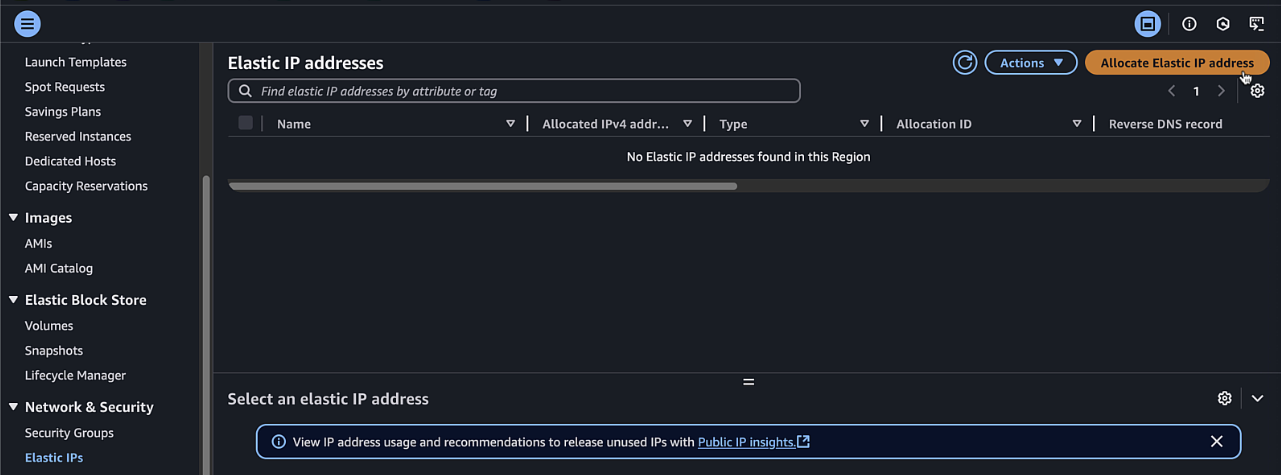
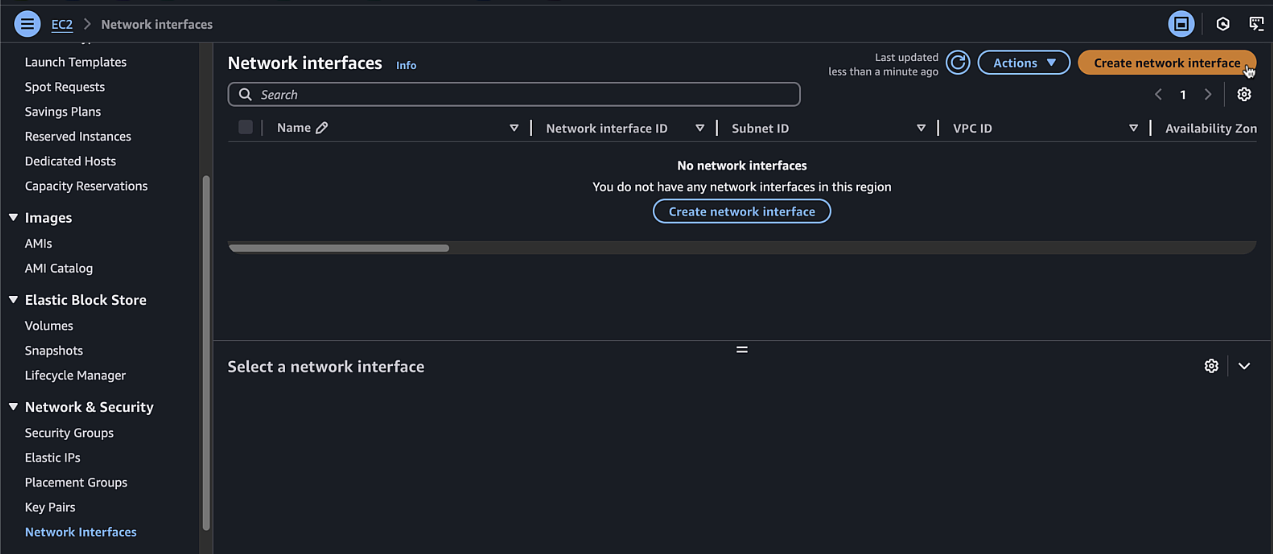
Step 10: Create Network Interfaces
-
Navigate to EC2 > Network & Security > Elastic IPs
-
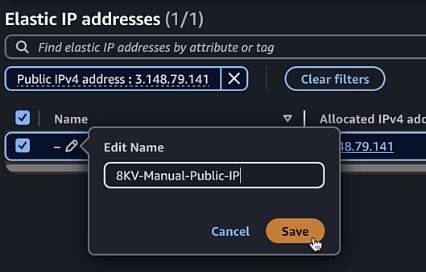
Click Allocate and give it a Name Tag of
8KV-Manual-Public-IP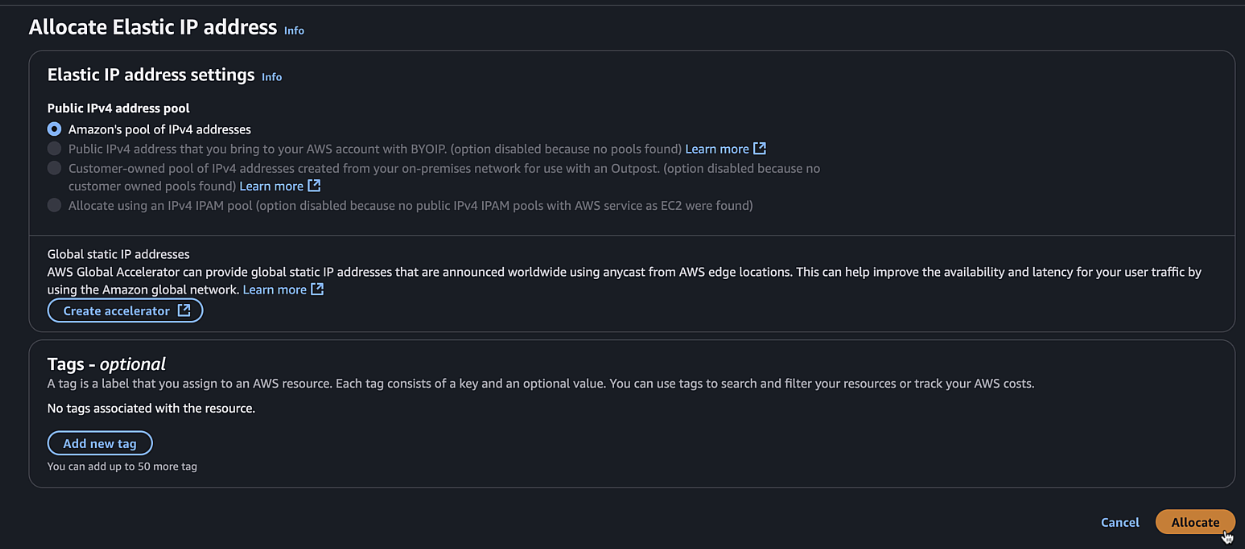
-
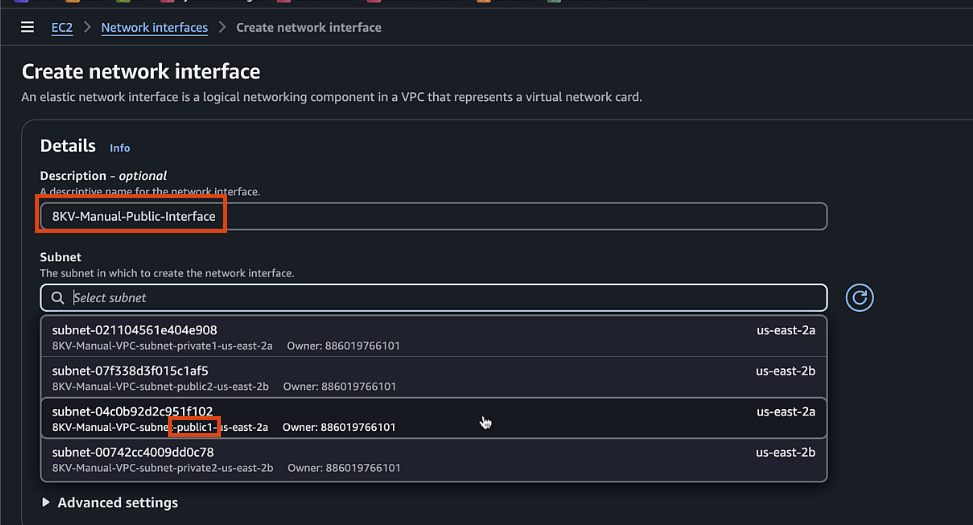
Navigate to EC2 > Network & Security > Network Interfaces
- Description:
C8KV-Manual-Public-Interface - Subnet: Select
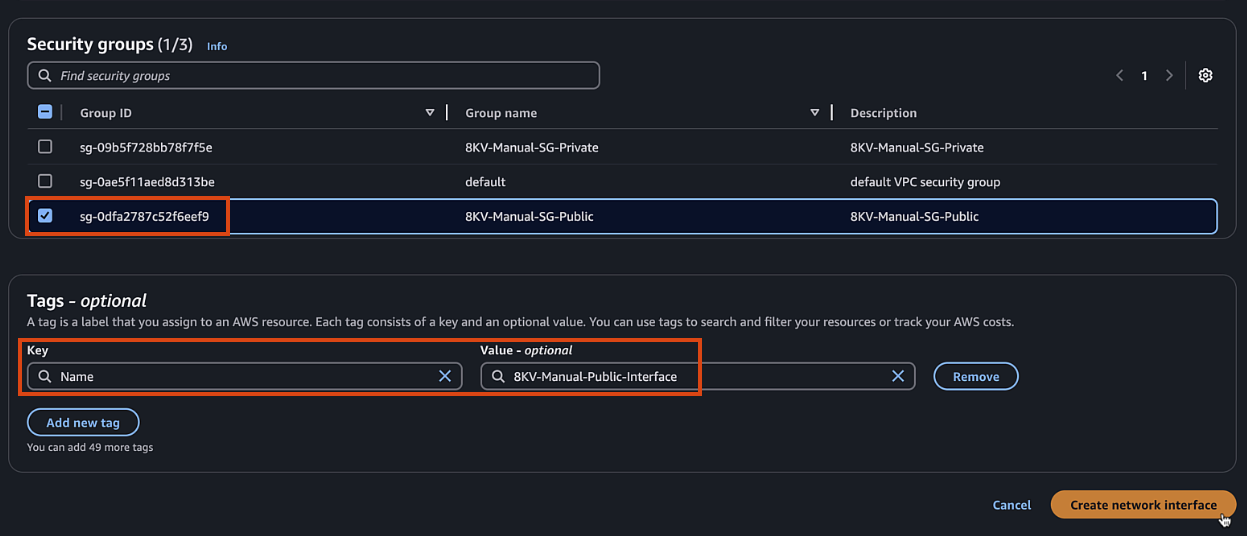
public1subnet - Security group: Select the public security group
- Name Tag, also
C8KV-Manual-Public-Interface
- Description:
-
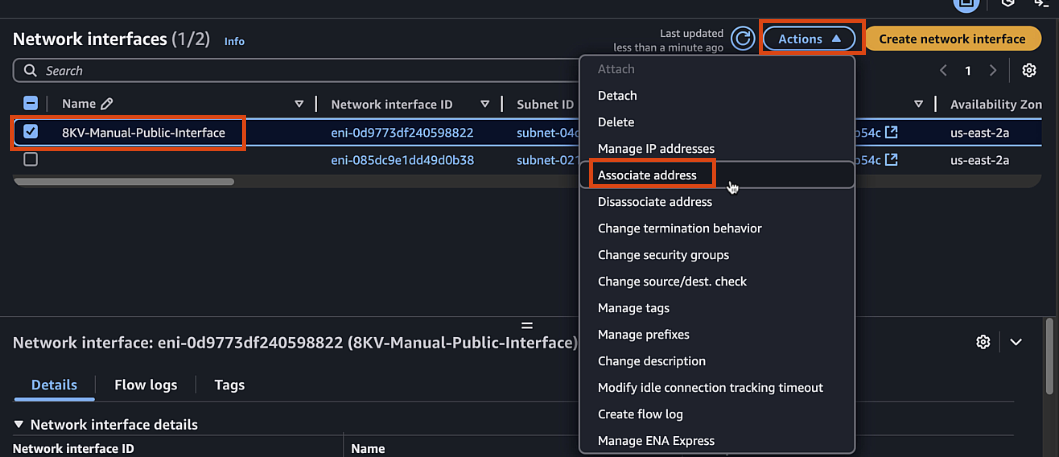
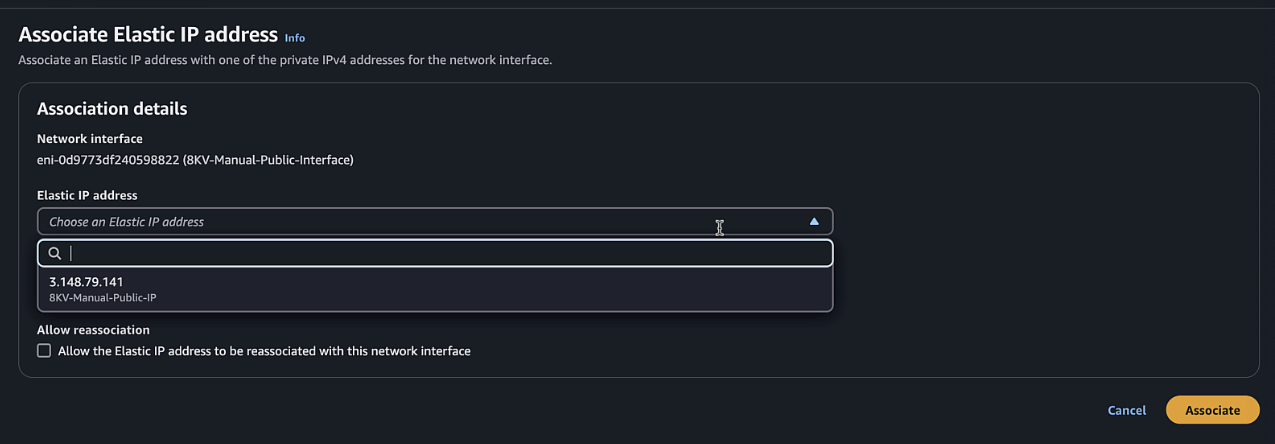
Select the newly created interface, click Actions > Associate address. Select the Elastic IP created earlier and associate with everything else default.
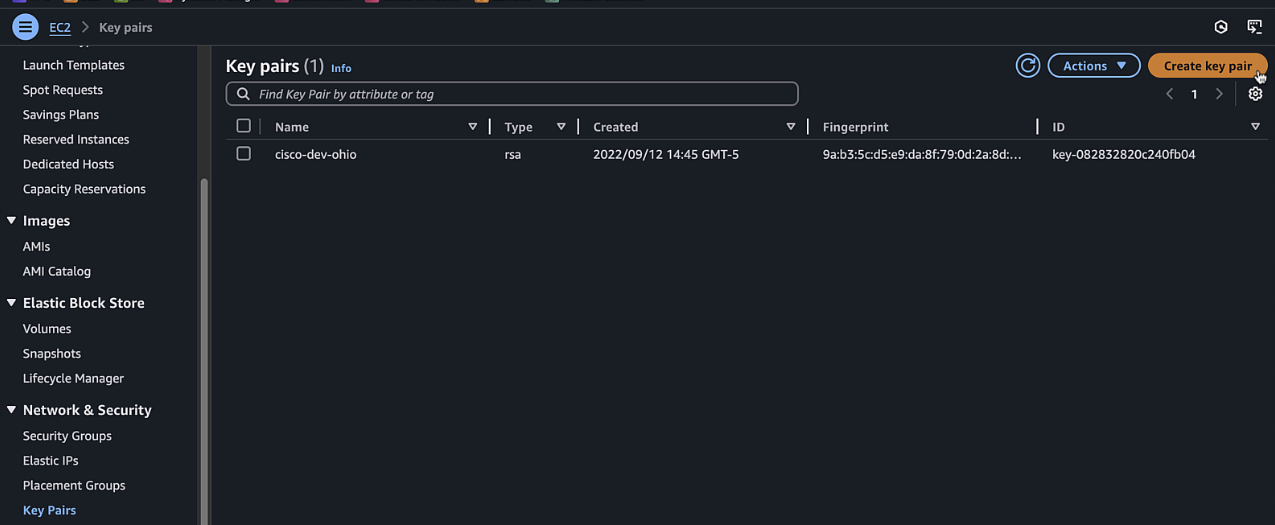
Step 11: Create Key Pair
-
Navigate to EC2 > Network & Security > Key Pairs
-
Click "Create key pair"
-
Enter a name and select the appropriate format
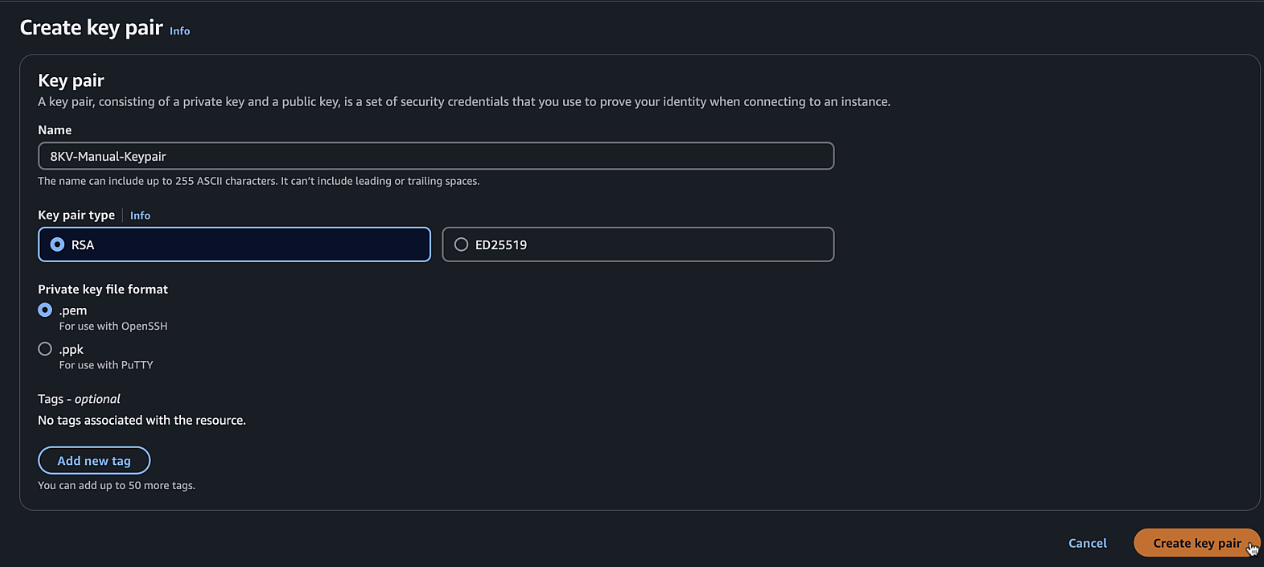
-
Click "Create key pair" and save the file
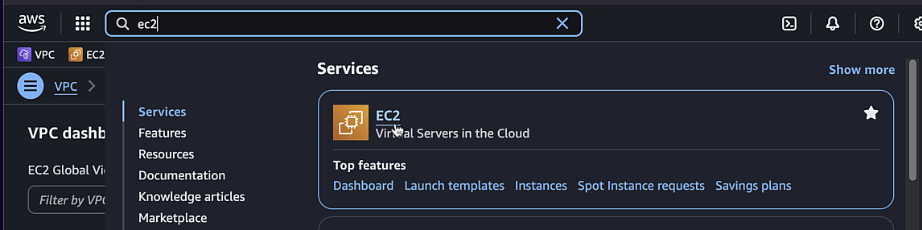
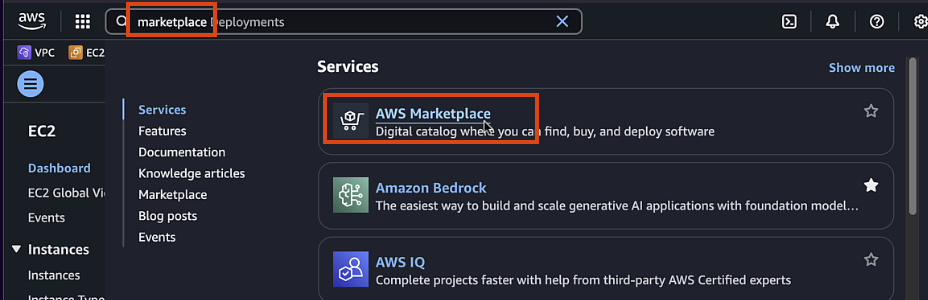
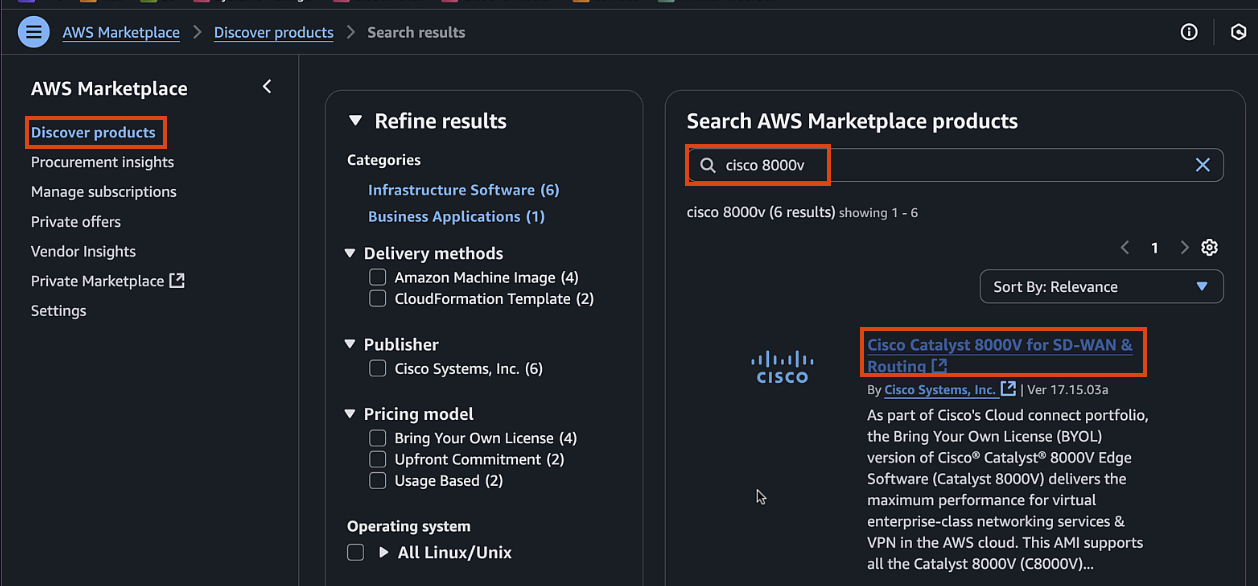
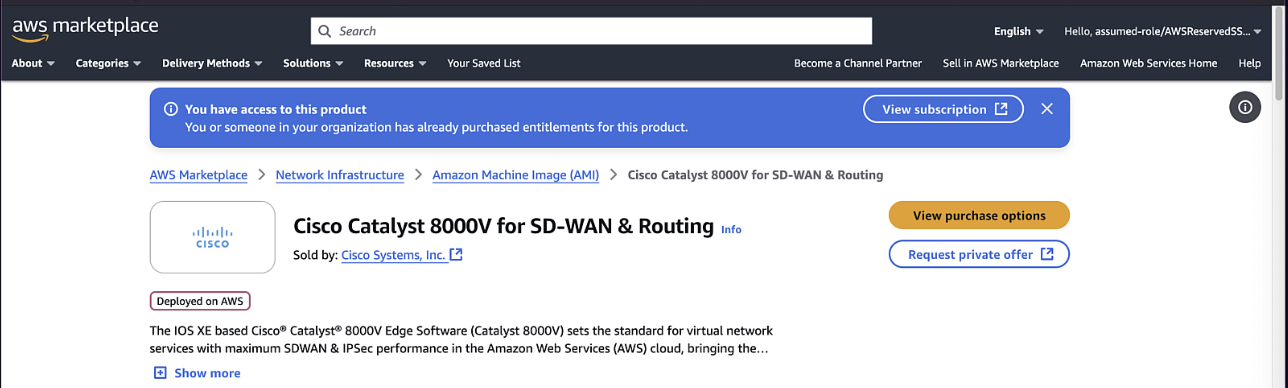
Step 12: Subscribe to 8000v Marketplace Listing
-
Navigate to AWS Marketplace
-
Search for "Cisco Catalyst 8000V" and select the BYOL option
-
Click "Continue to Subscribe" if you are not already subscribed and accept the terms and conditions
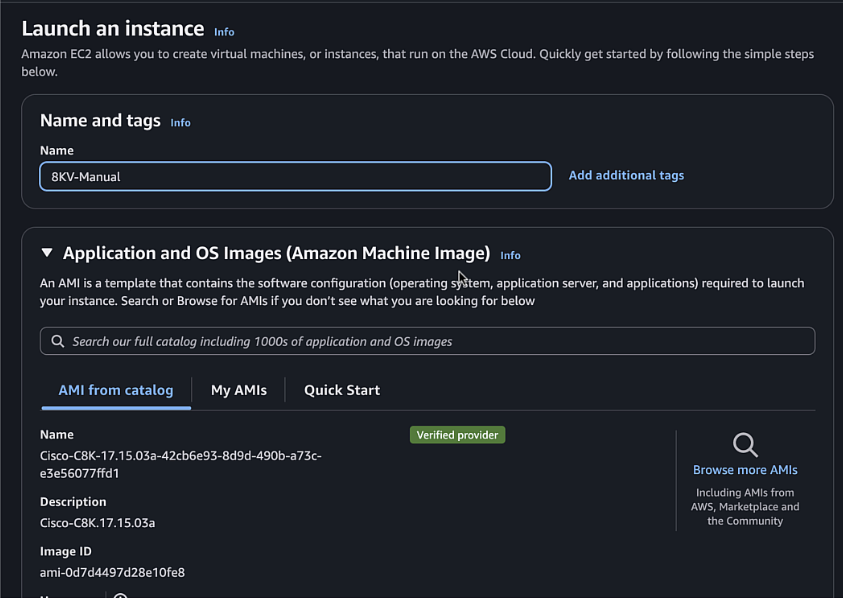
Step 13: Launch EC2 Instance
-
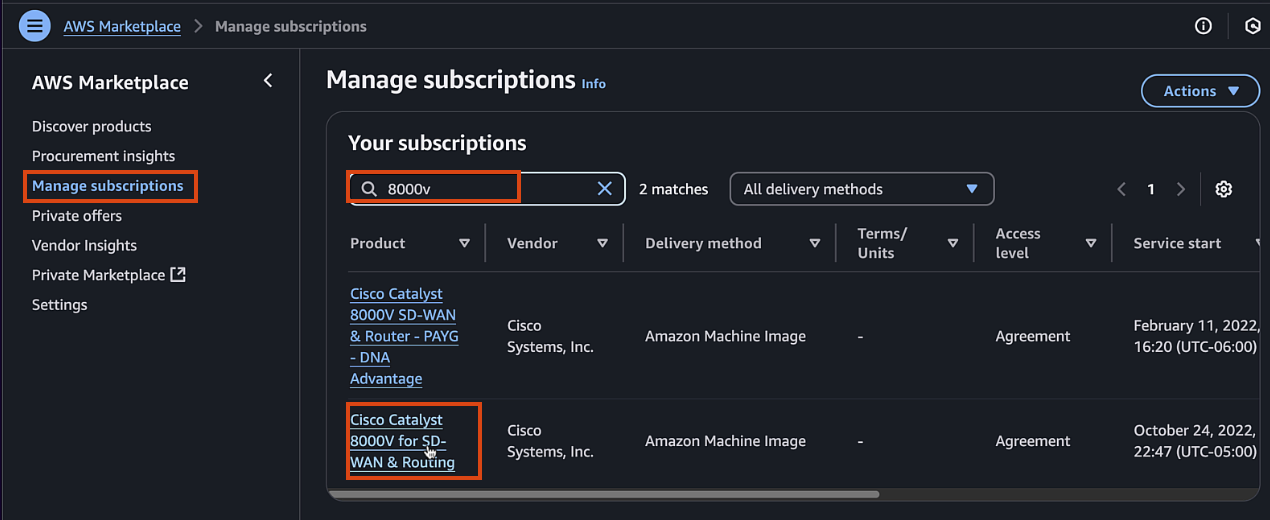
Navigate back to your Marketplace subscription page > Manage subscriptions
-
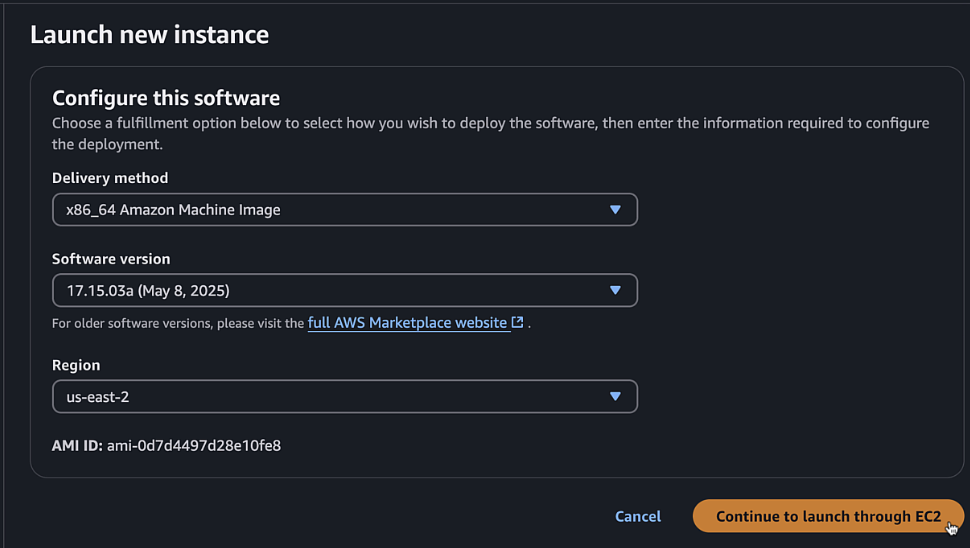
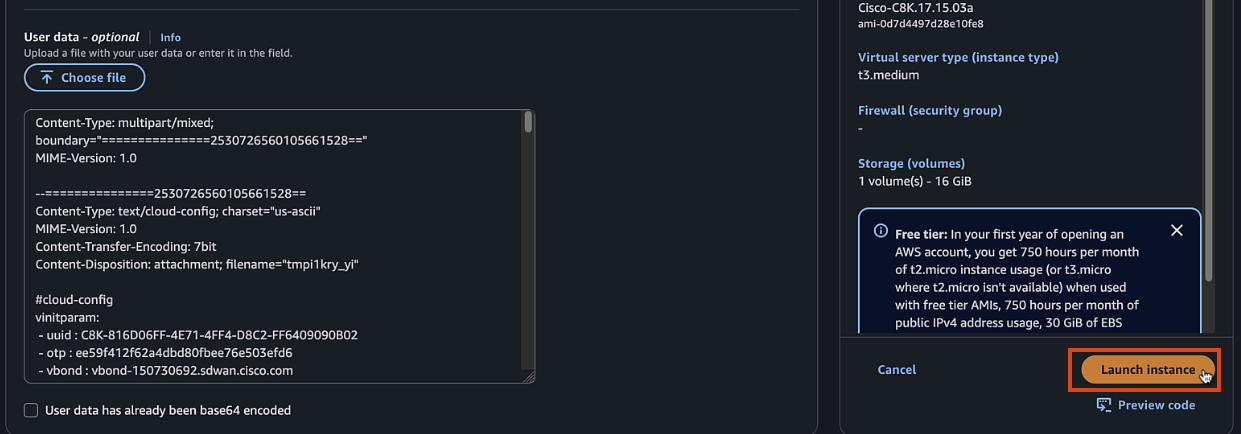
Click "Launch new instances" using 17.15 as the image and the region we created the VPC

-
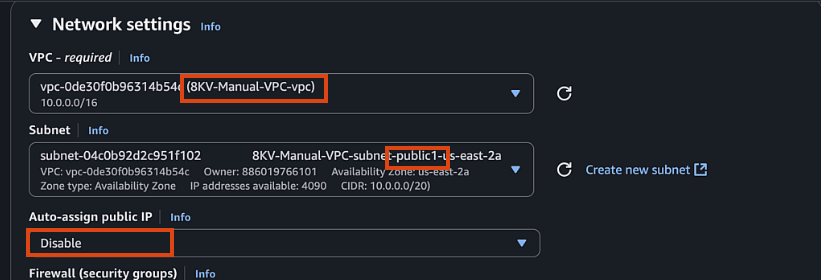
Configure the following settings:
- Name:
C8KV-Manual - AMI: Verify the Cisco 8000v AMI (version 17.15)
- Instance type:
t3.medium - Key pair: Select the key pair you created

- Network settings:
- VPC: Select your VPC
- Subnet: Select public1 subnet
- Auto-assign public IP: Disable
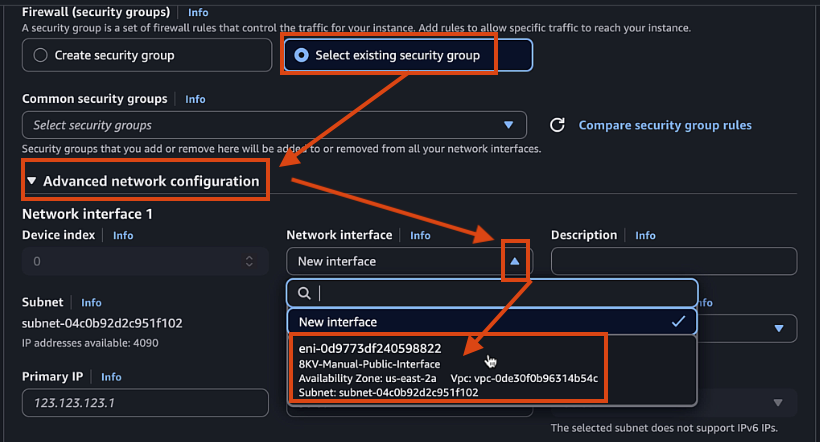
- 1st Interface (Public, Gigabitethernet1):
- Since we are using multiple interfaces, click select existing security group but leave it blank (each interface will have it's own SG)
- Under Advanced network configuration > Network interface , select the public interface created earlier
- It already has the public1 subnet and SG assigned, leave everything else default
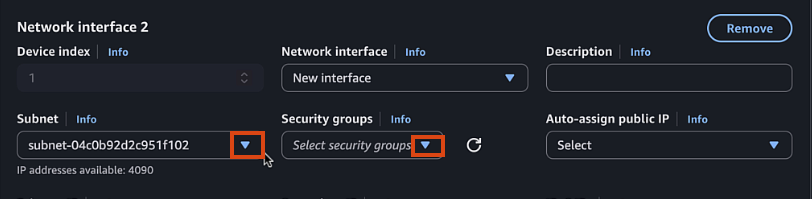
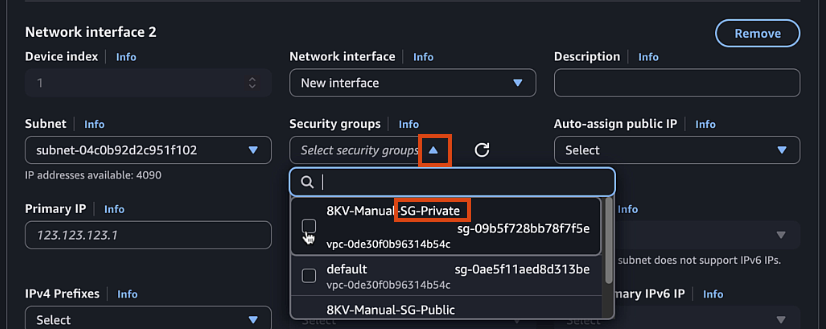
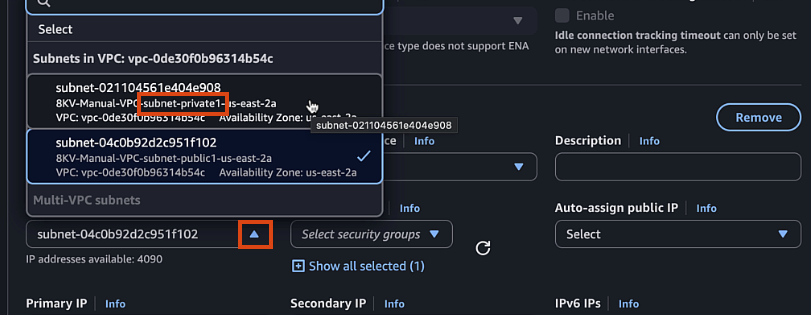
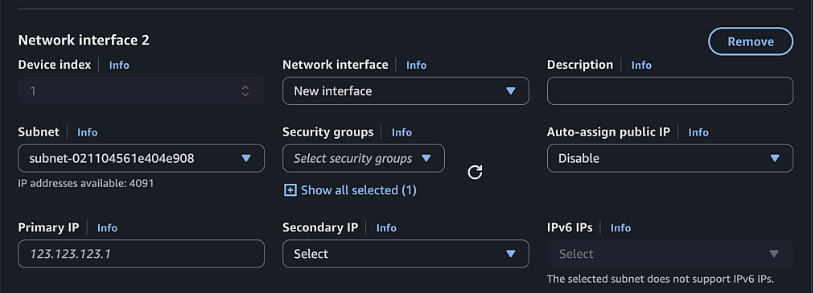
- 2nd Interface (Private, Gigabitethernet2):
- Click Add network interface
- New Interface
- Select Private1 subnet
- Select Private Security Group
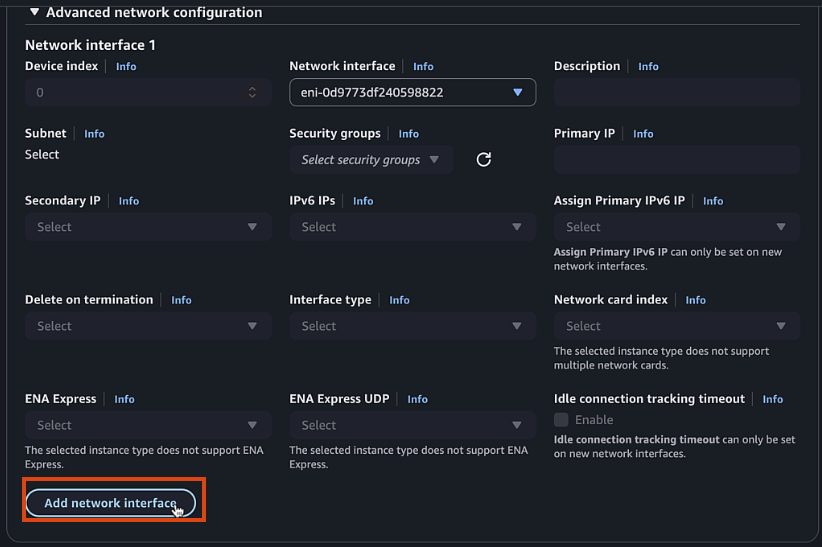
- Name:
-
Click "Advanced details" and expand the "User data" section
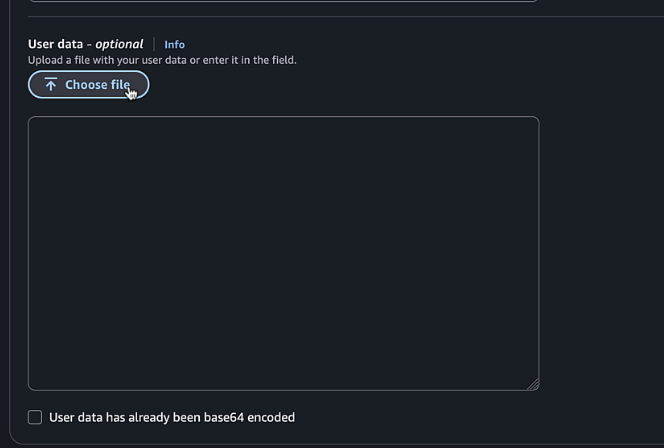
-
Upload the configuration file content from vManage

-
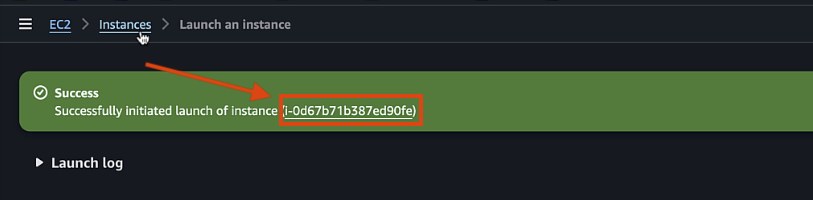
Click "Launch instance"
Step 14: Monitor Boot Process
-
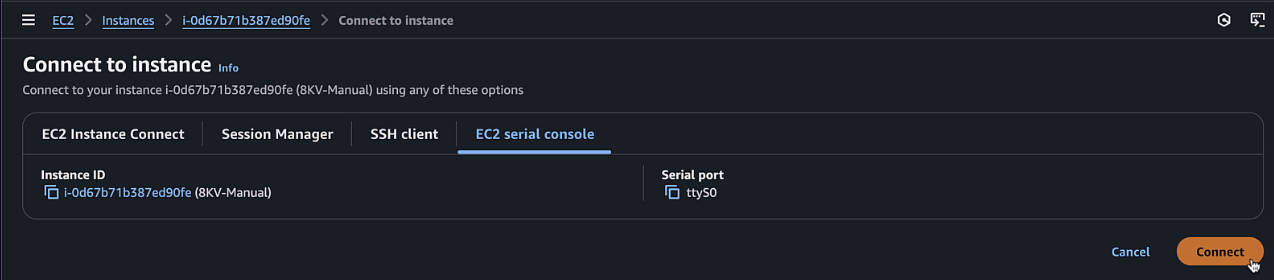
Once the instance is running, select it and click "Connect"

-
Choose "EC2 Serial Console" and click "Connect"

-
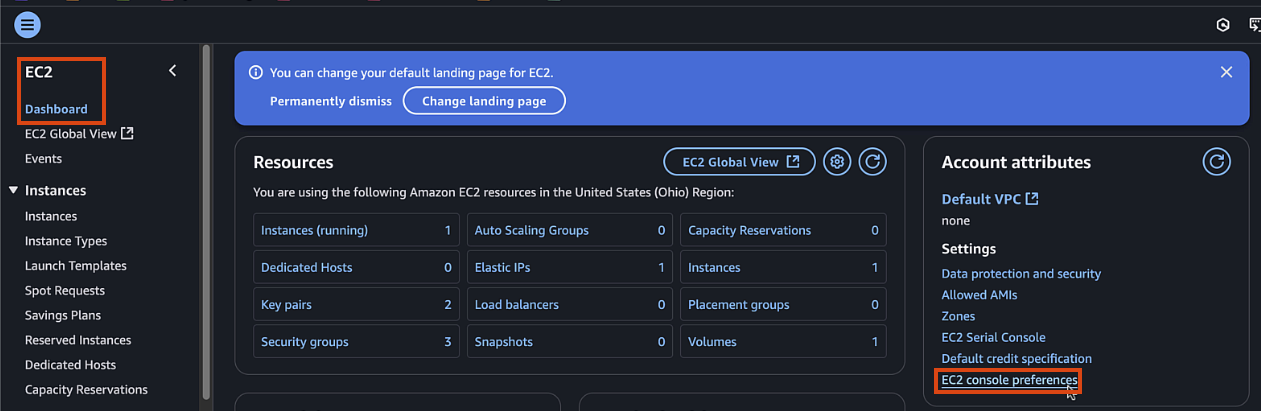
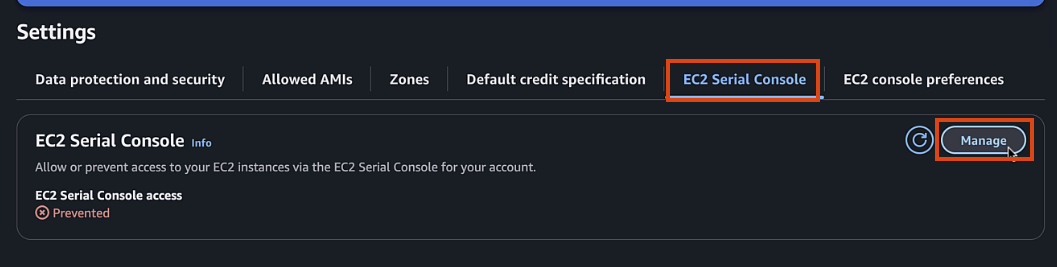
If EC2 serial is not accessible, you can enable it in your account by:
- Clicking Manage Access (or in EC2 page go to Account attributes > EC2 console preferences)
- EC2 Serial Console > Manage
- Allow > Update

-
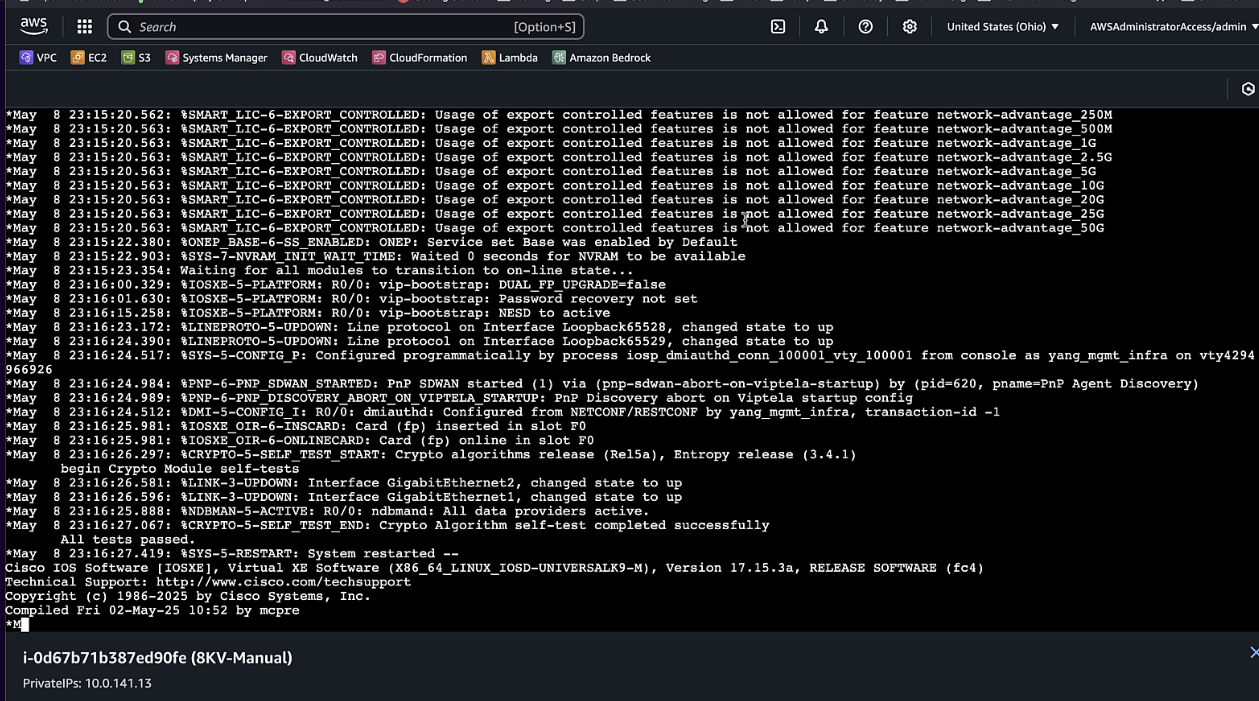
Monitor the boot process and wait for the router to initialize
Step 15: Verify Connection
-
Once the router has booted, verify the connection with:
enable
show sdwan control connections

-
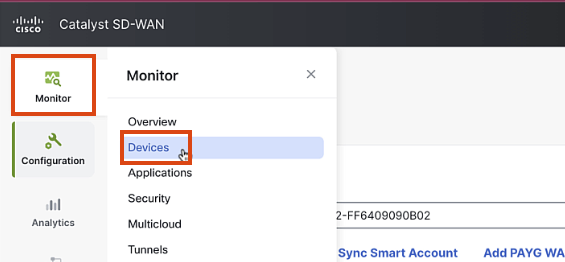
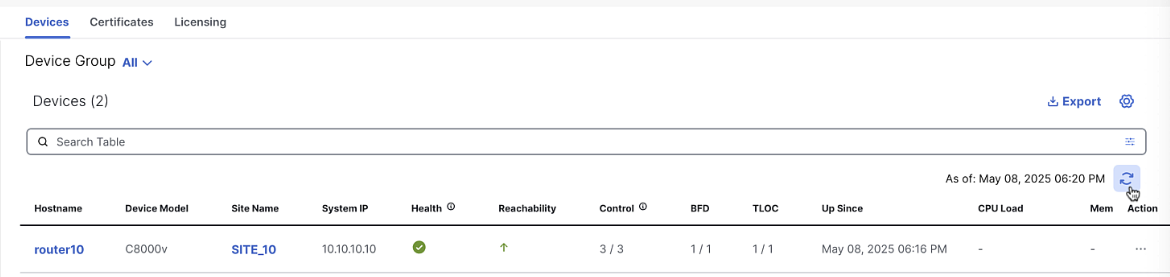
In vManage, navigate to Monitor > Devices to verify the router is connected and operational
Notes
Troubleshooting
If the router fails to connect to vManage, check the following:
- Check the transport profile that the tunnel is configured properly, assoicated with Gigabitethernet1, etc
- Verify the configuration file was properly uploaded as user data and includes the vBond info and initial config
- Check that the Elastic IP is properly associated with the public interface
- Verify network connectivity using ping and traceroute commands
High Availability
For production environments, consider deploying multiple 8000v routers across different availability zones for high availability.